Integration
4.1 ServiceNow
CloudCADI offers a seamless integration with ServiceNow, enabling direct notification of recommendations to your engineering team through a single action button.
4.1.1 ServiceNow Setup
-
If you don’t have an existing app, create a new one in ServiceNow.
-
Create a table with the following columns.
-
If you already have an app and table, ensure these columns are added to your existing table.
Columns:
- type
- short_description
- state
- description
- user_id
- cloud_project_id
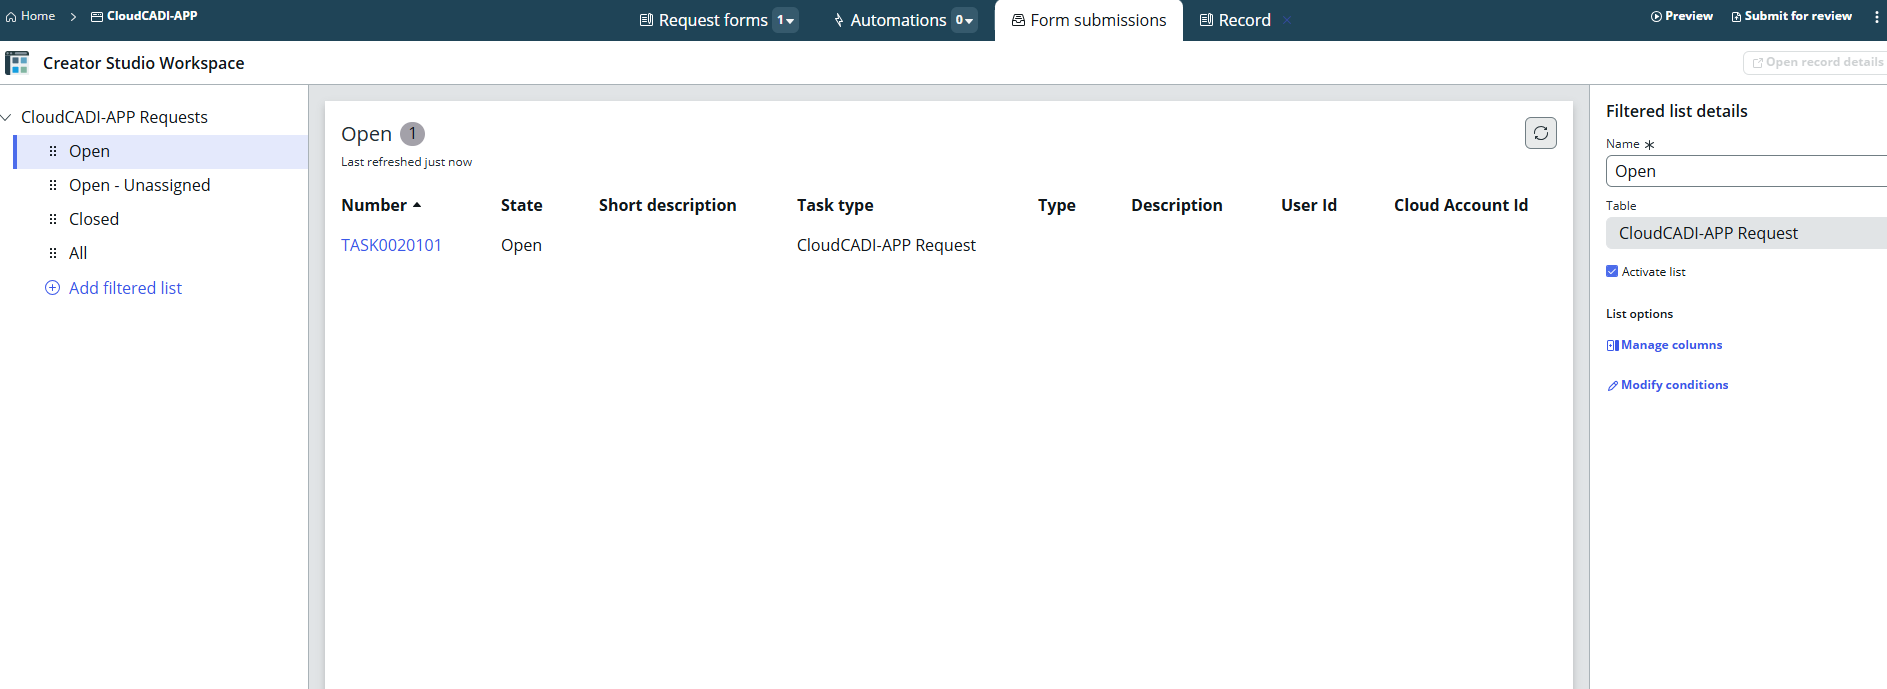
Using REST API Explorer to Insert or Retrieve Data
- Open the REST API Explorer in ServiceNow.
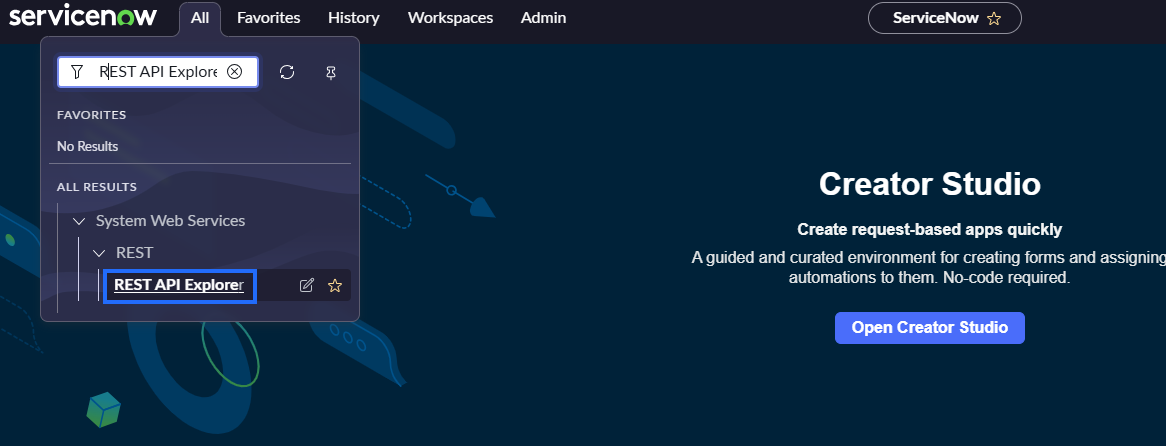
- Click on Create a record(POST).
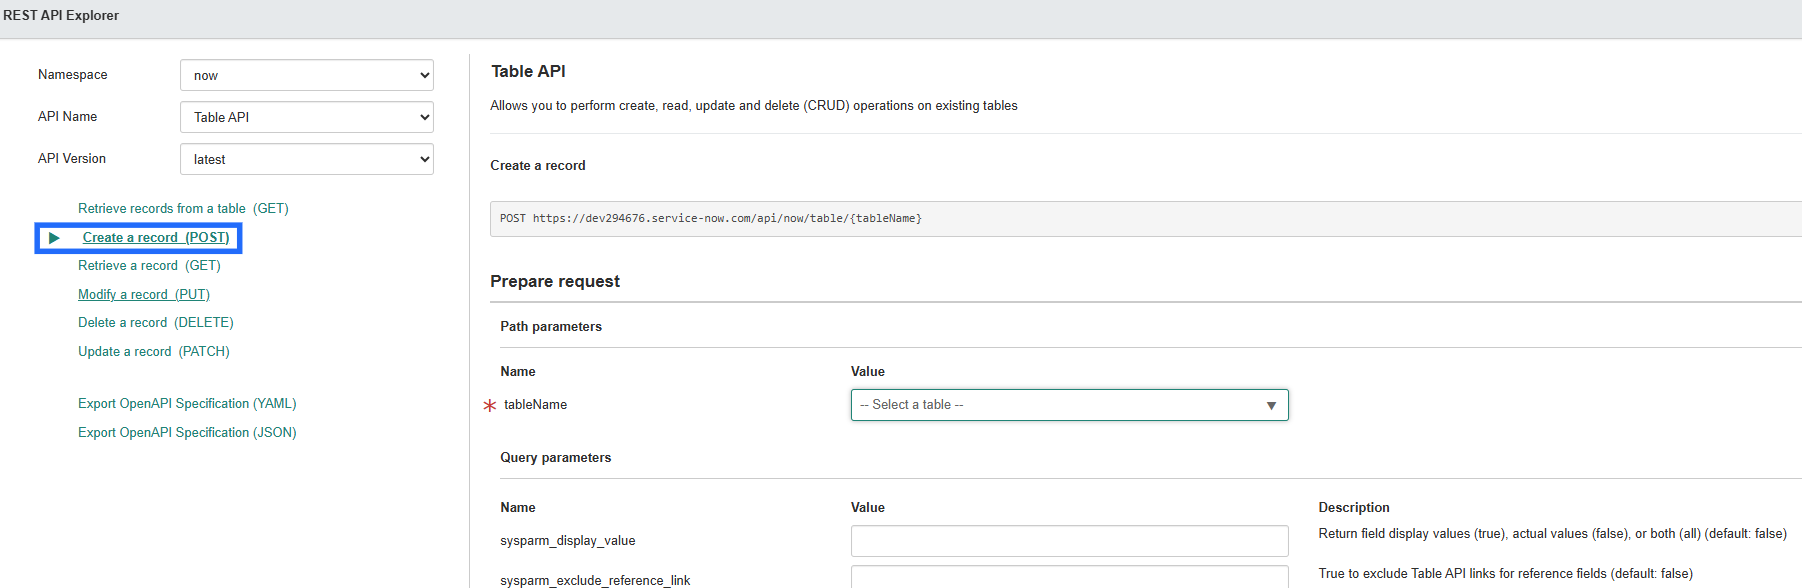
- Select the table you created or select existing table.
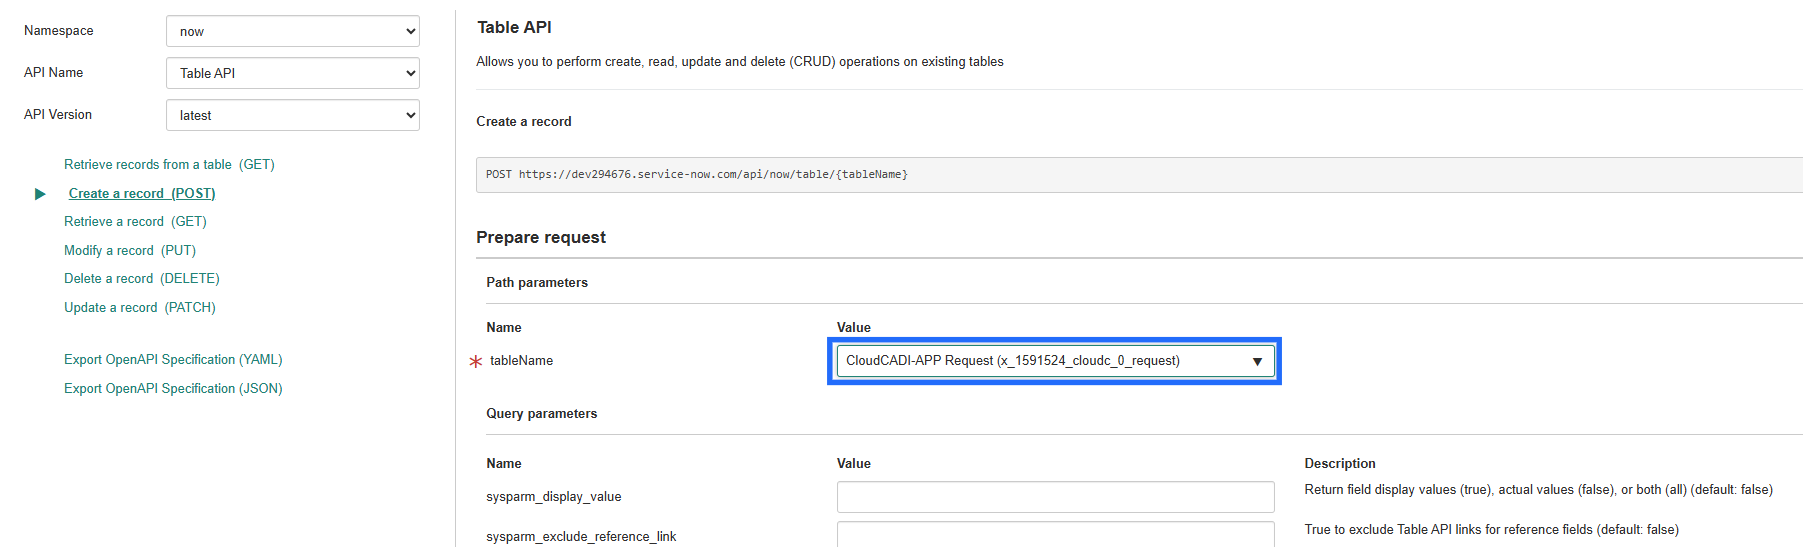
- Click Send to submit the request.
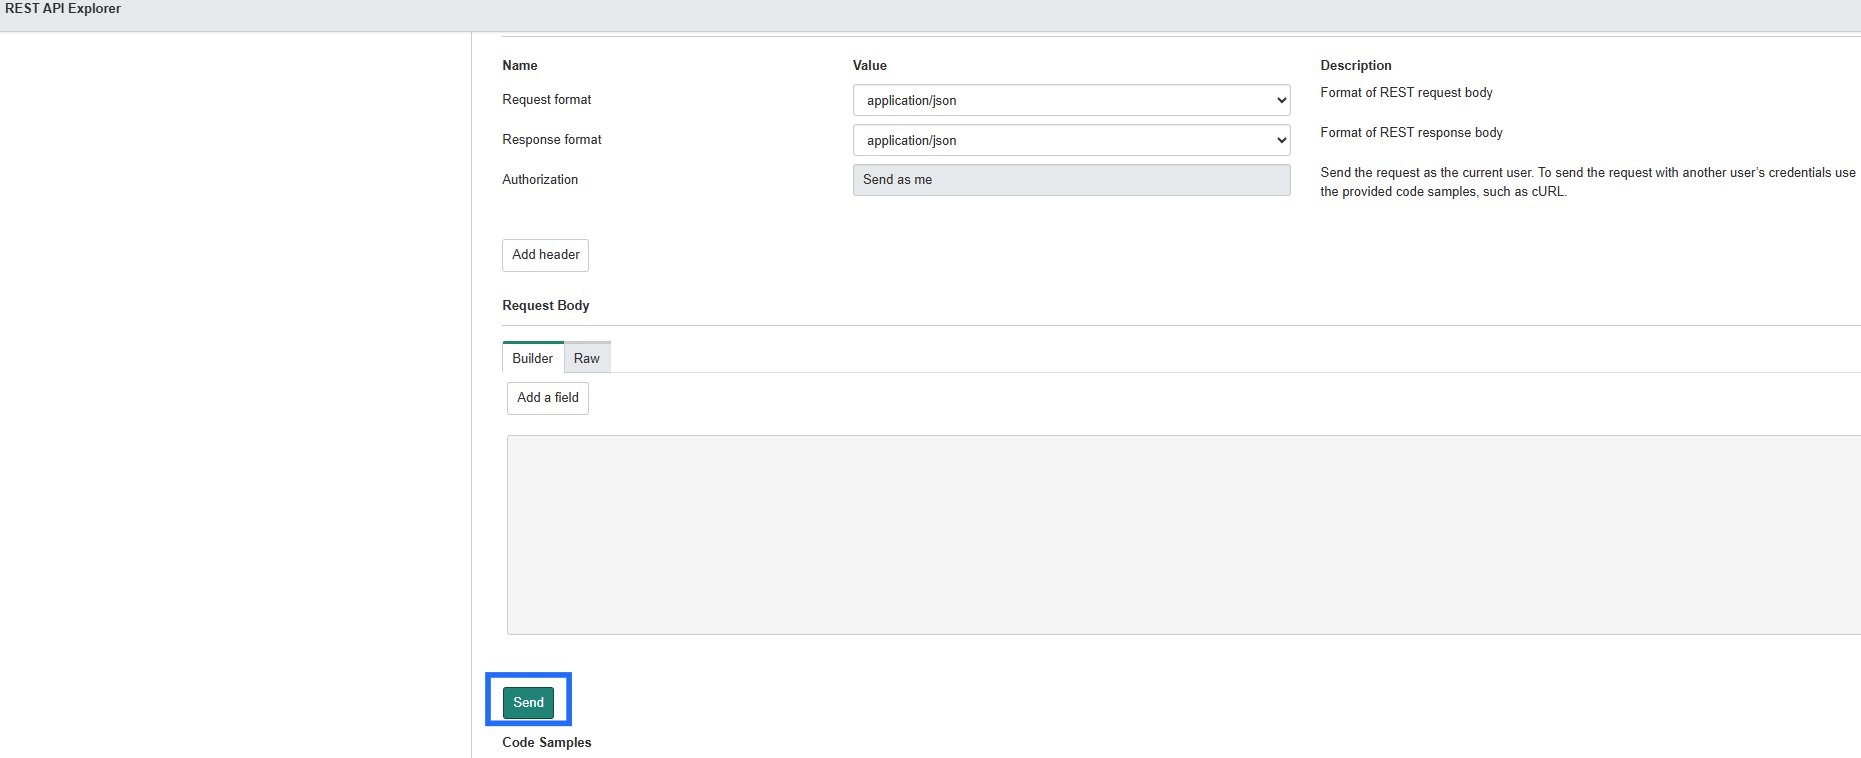
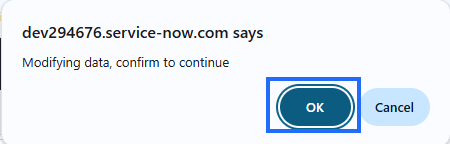
- A popup will appear, click OK to continue.
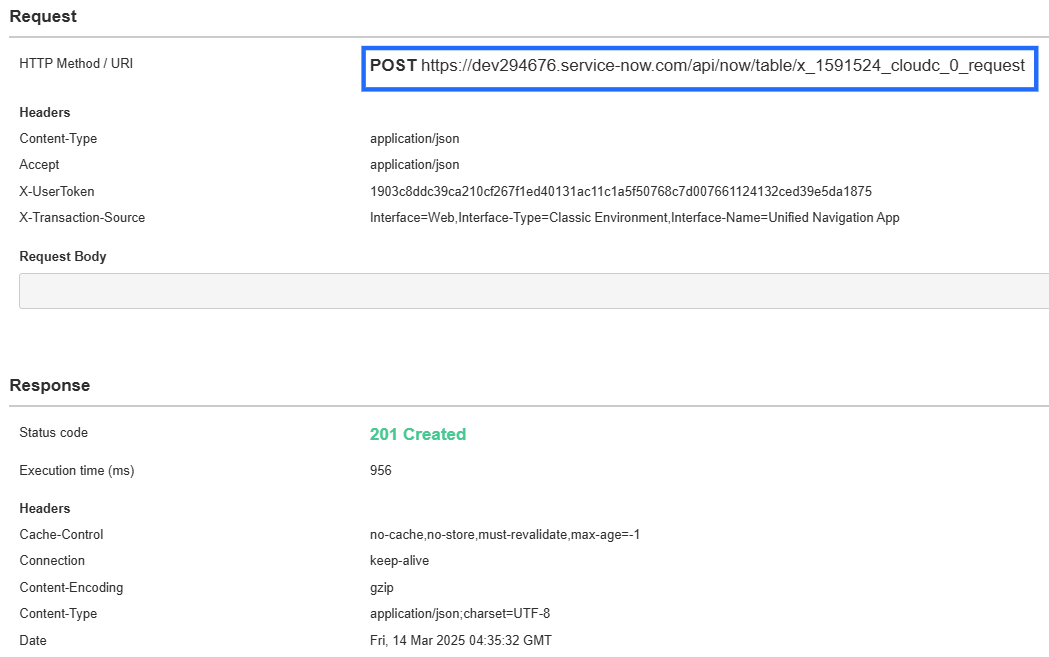
-
You will receive a response with the URL.
-
Copy the generated POST URL for further use.
4.1.2 CloudCADI Setup
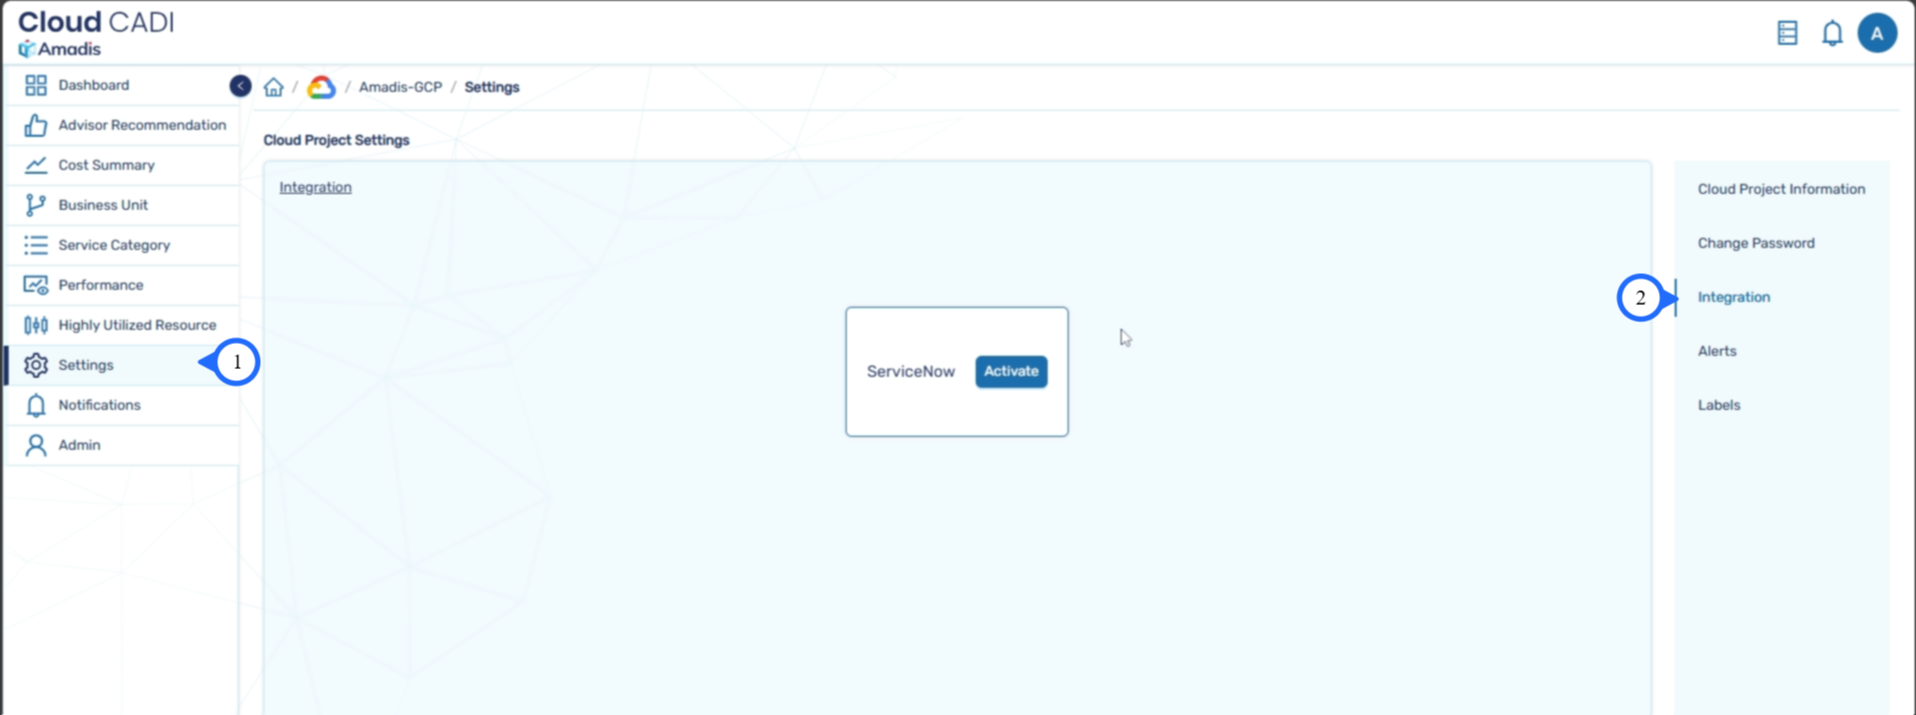
- To integrate ServiceNow, navigate to the Admin dashboard, click Integrations from the left sidebar, and click Activate next to ServiceNow.
- In the ServiceNow Integration, select one or more Cloud Projects from the left panel to apply the integration.
-
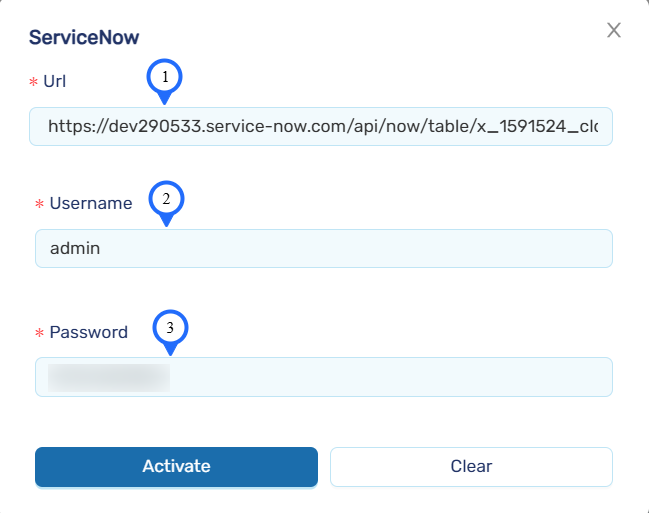
Enter the URL you have got in POST method request.
-
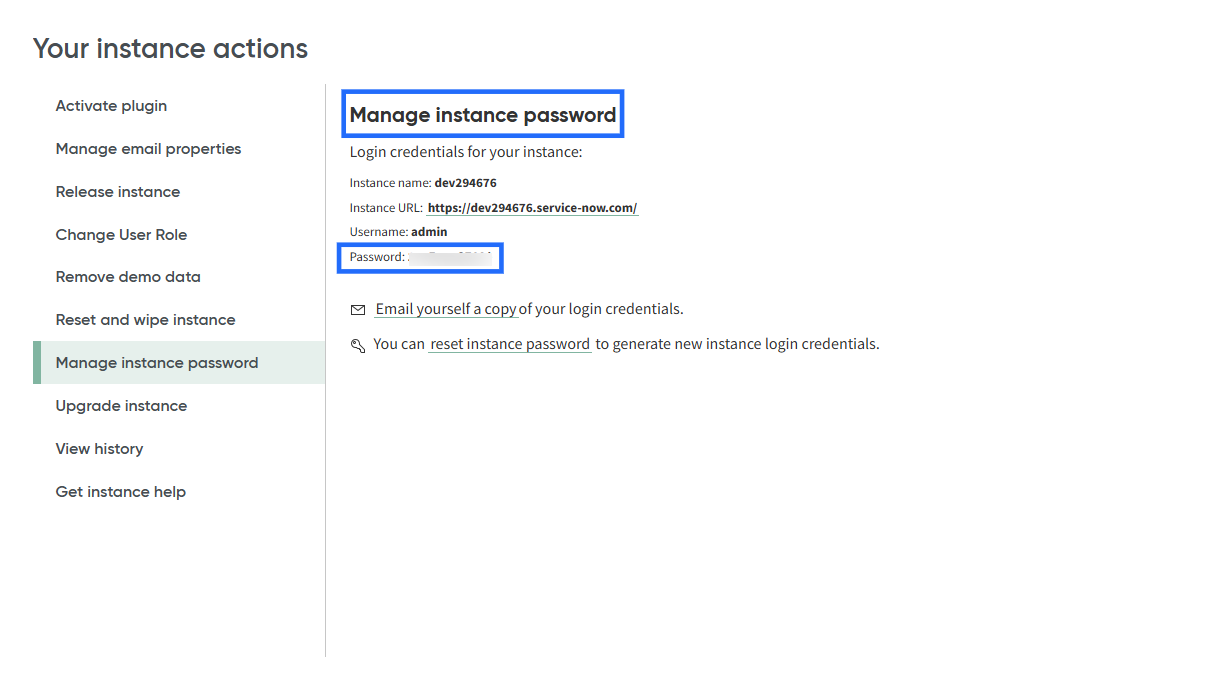
Provide the Username and Password received from ServiceNow. If you have forgotten your credentials, visit the ServiceNow Developer Website, click on your profile icon, and select Manage Instance Password to retrieve your credentials.
-
Click Apply to save and activate the ServiceNow integration.
-
To verify the ServiceNow Integration, Go to the CloudCADI Recommendation page and click the Action button.
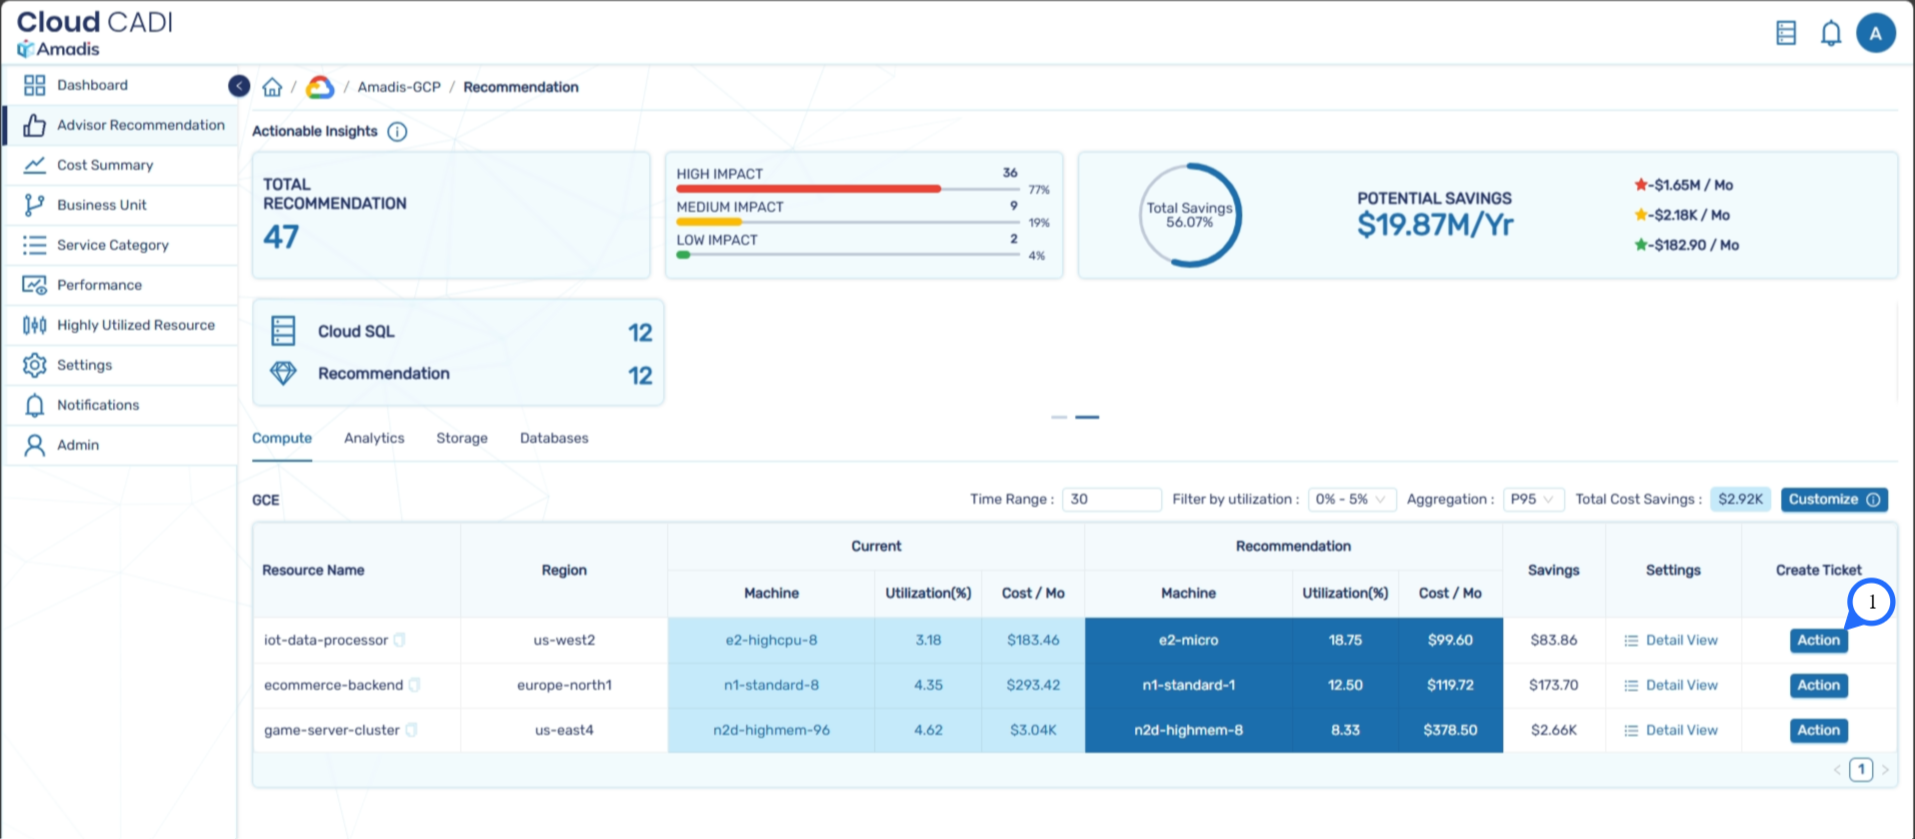
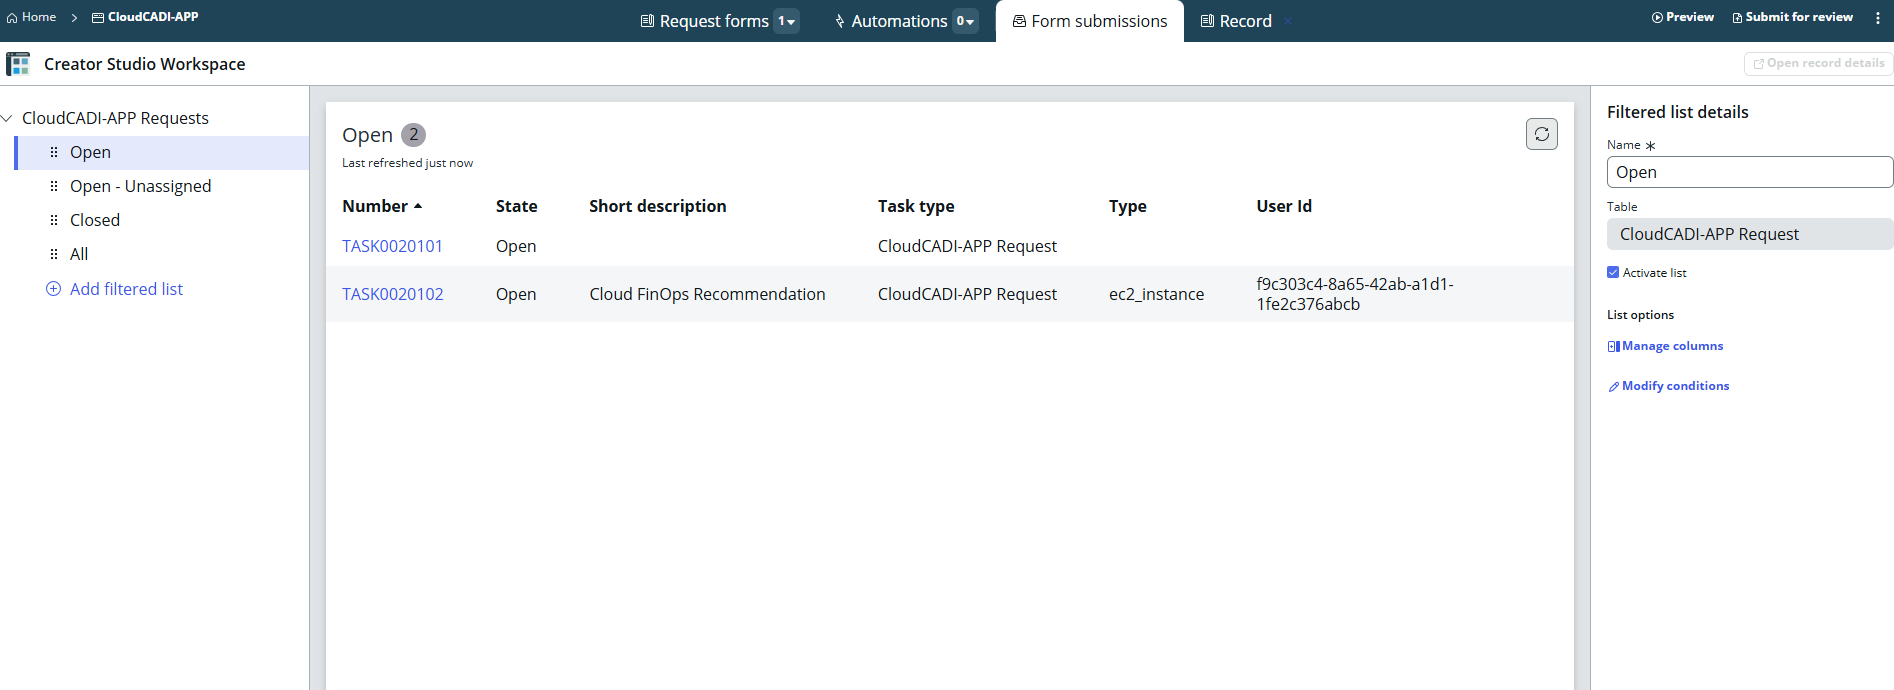
- A small pop-up will appear confirming that a ticket has been created.

- The data is now successfully sent to the corresponding table in ServiceNow.
4.2 AWS-EKS Integration
4.2.1 Configuration Steps
-
Navigate to the Settings page in CloudCADI.
-
Click on the Integrations tab.
-
Click Connect next to EKS Multi-Cluster.
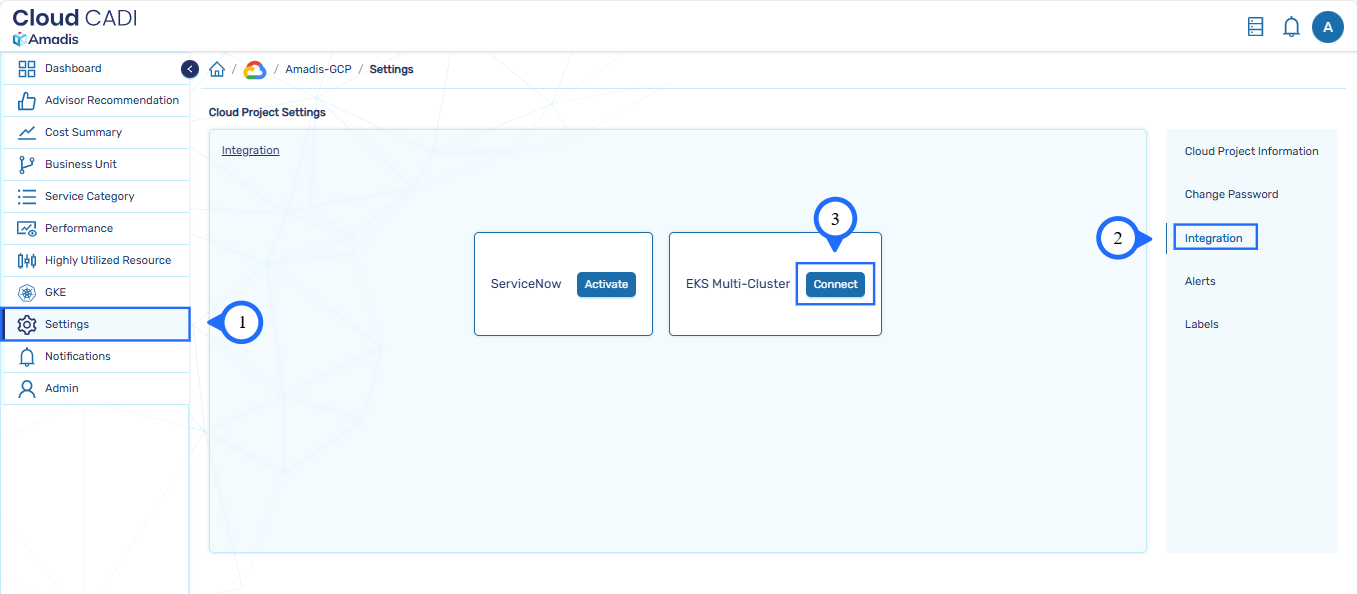
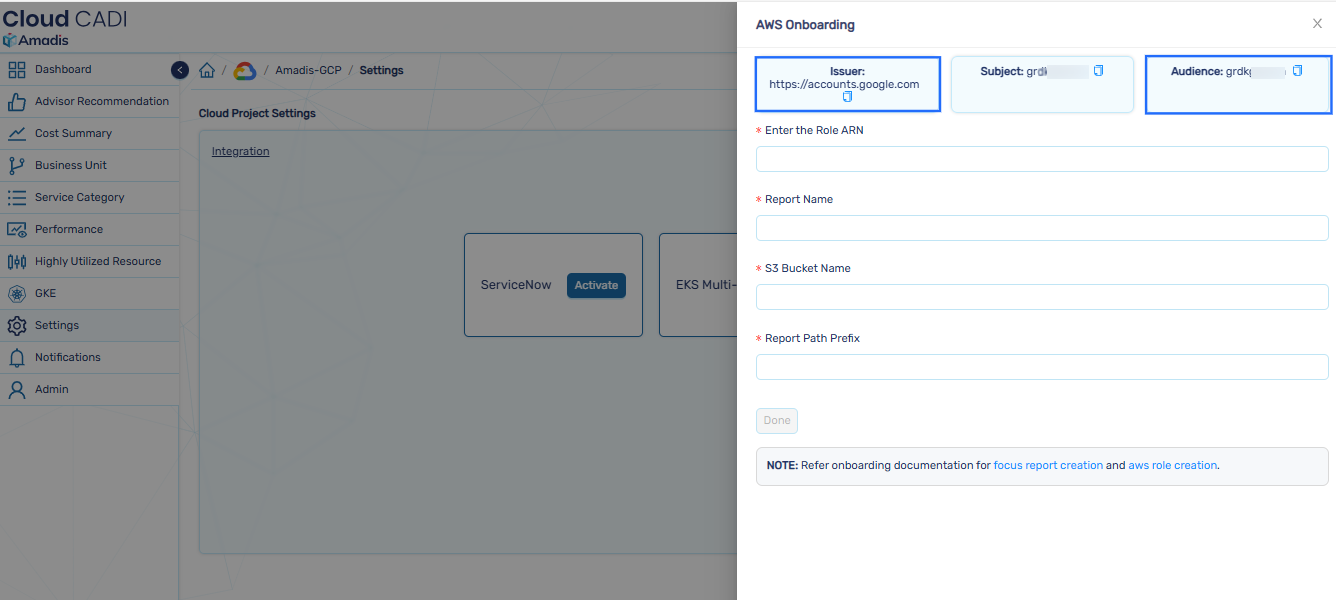
- Copy the Issuer and Audience values.
In the AWS Console:
-
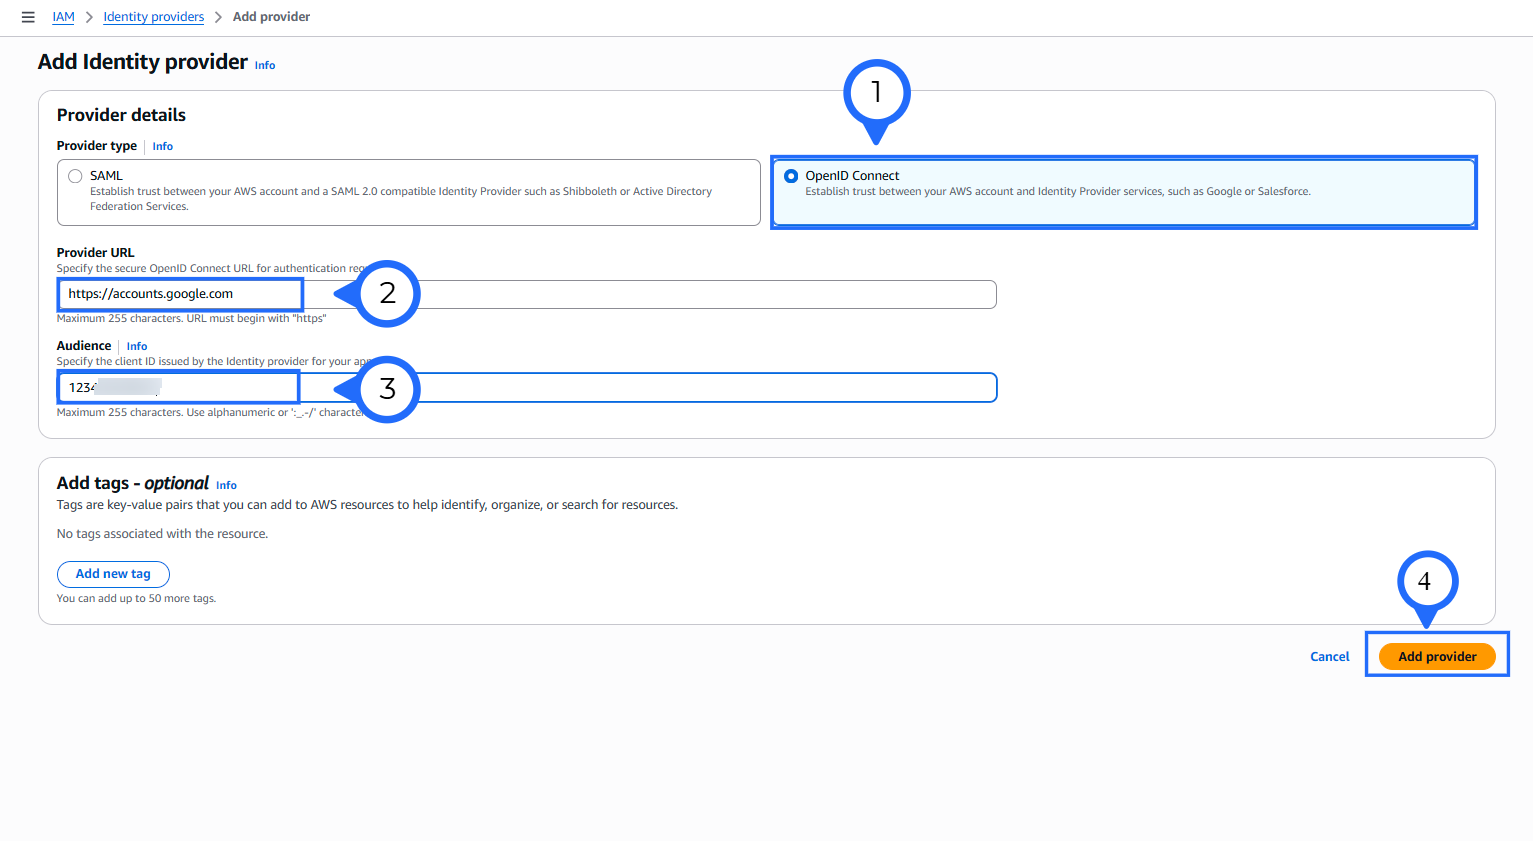
Go to IAM , Click on Identity Providers and click Add provider.
-
Choose OpenID Connect (OIDC) as the provider type.
-
In the Provider URL, enter the issuer (
https://accounts.google.com) copied from CloudCADI. -
In Audience, enter the Audience value
({UNIQUE_ID})copied from CloudCADI.
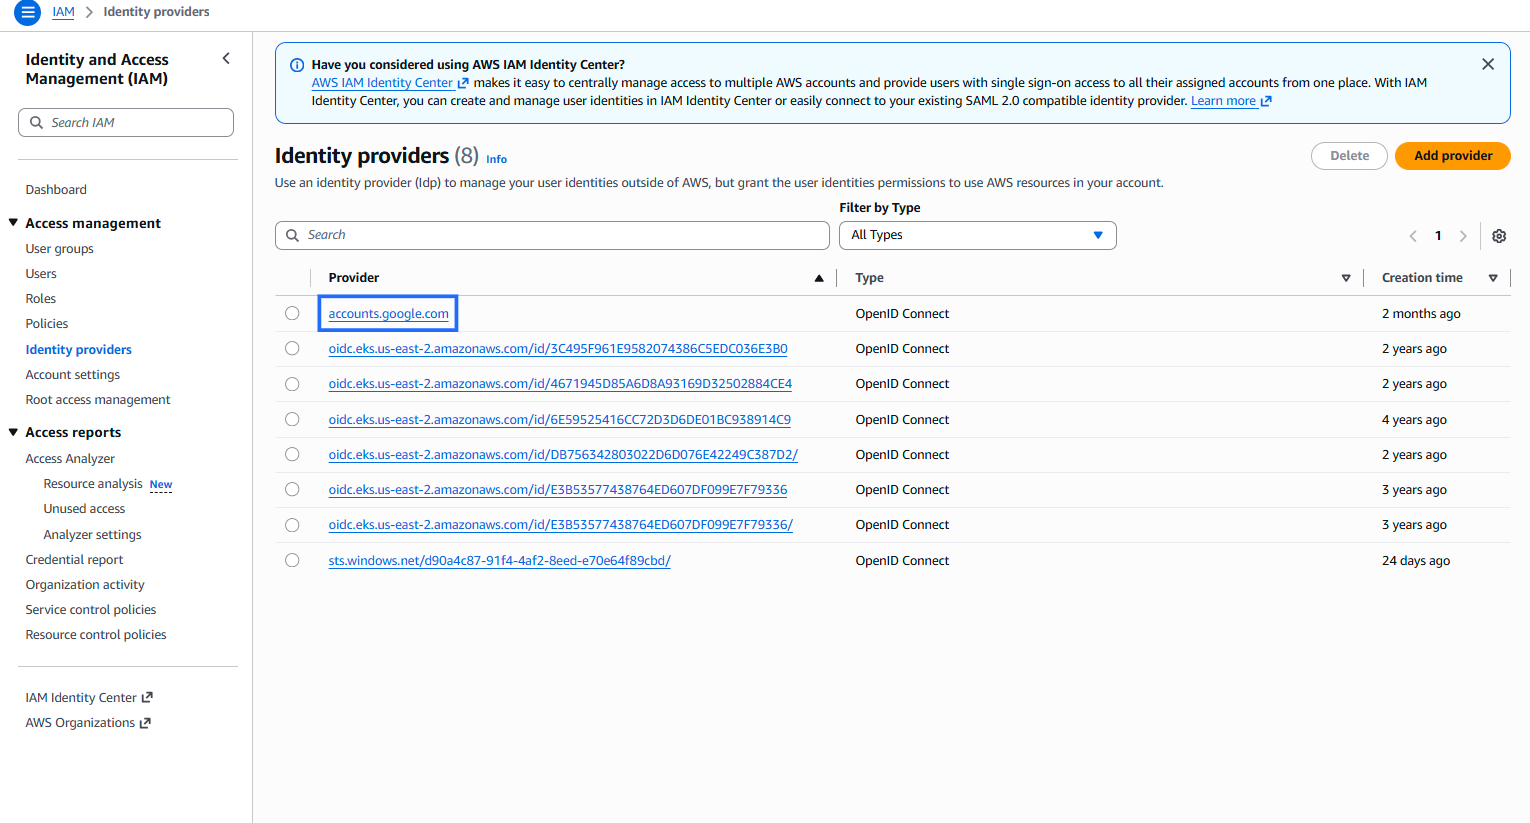
- The created identity provider will appear in the list.
Create IAM Policy
-
Go to IAM, Click on Policy.
-
Click on the JSON tab
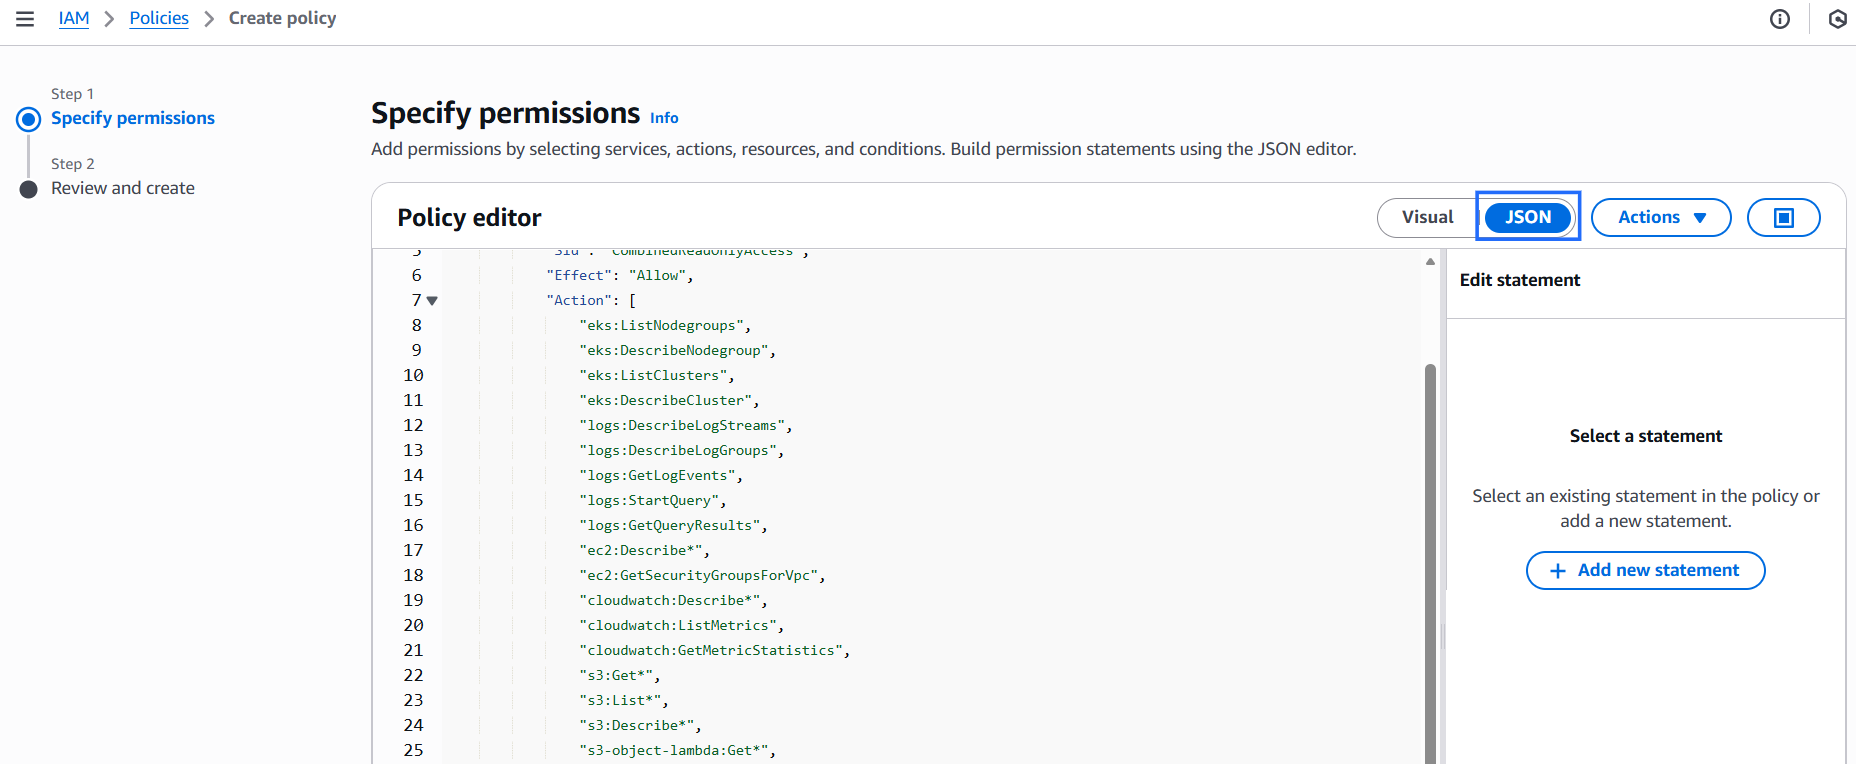
- Copy and paste the following policy in the JSON editor while creating the IAM policy:
{
"Version": "2012-10-17",
"Statement": [
{
"Sid": "CombinedReadOnlyAccess",
"Effect": "Allow",
"Action": [
"eks:ListNodegroups",
"eks:DescribeNodegroup",
"eks:ListClusters",
"eks:DescribeCluster",
"logs:DescribeLogStreams",
"logs:DescribeLogGroups",
"logs:GetLogEvents",
"logs:StartQuery",
"logs:GetQueryResults",
"ec2:Describe*",
"ec2:GetSecurityGroupsForVpc",
"cloudwatch:Describe*",
"cloudwatch:ListMetrics",
"cloudwatch:GetMetricStatistics",
"s3:Get*",
"s3:List*",
"s3:Describe*",
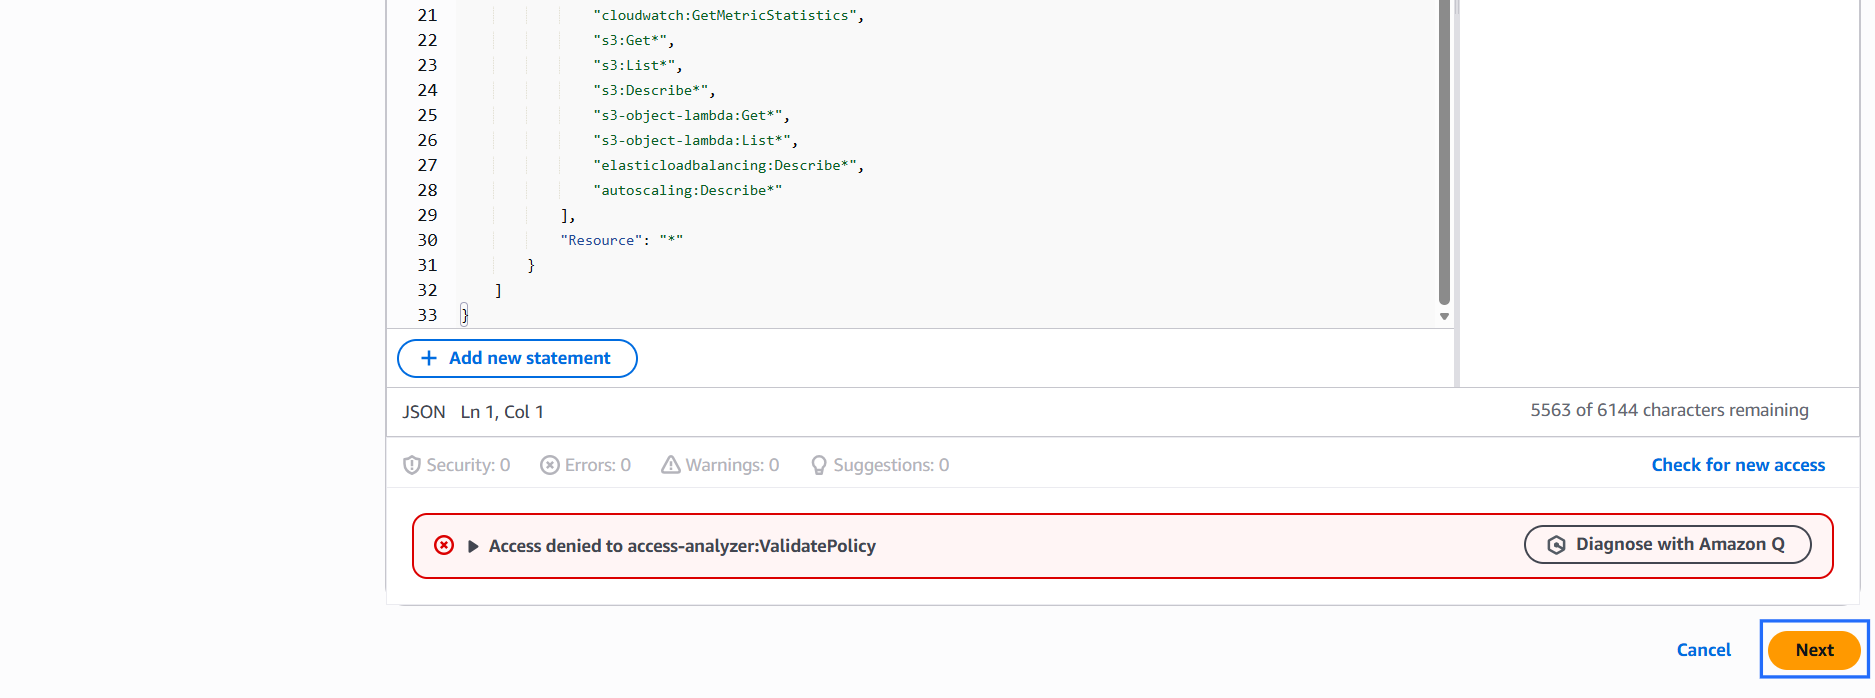
"s3-object-lambda:Get*",
"s3-object-lambda:List*",
"elasticloadbalancing:Describe*",
"autoscaling:Describe*"
],
"Resource": "*"
}
]
}
-
Click Next.
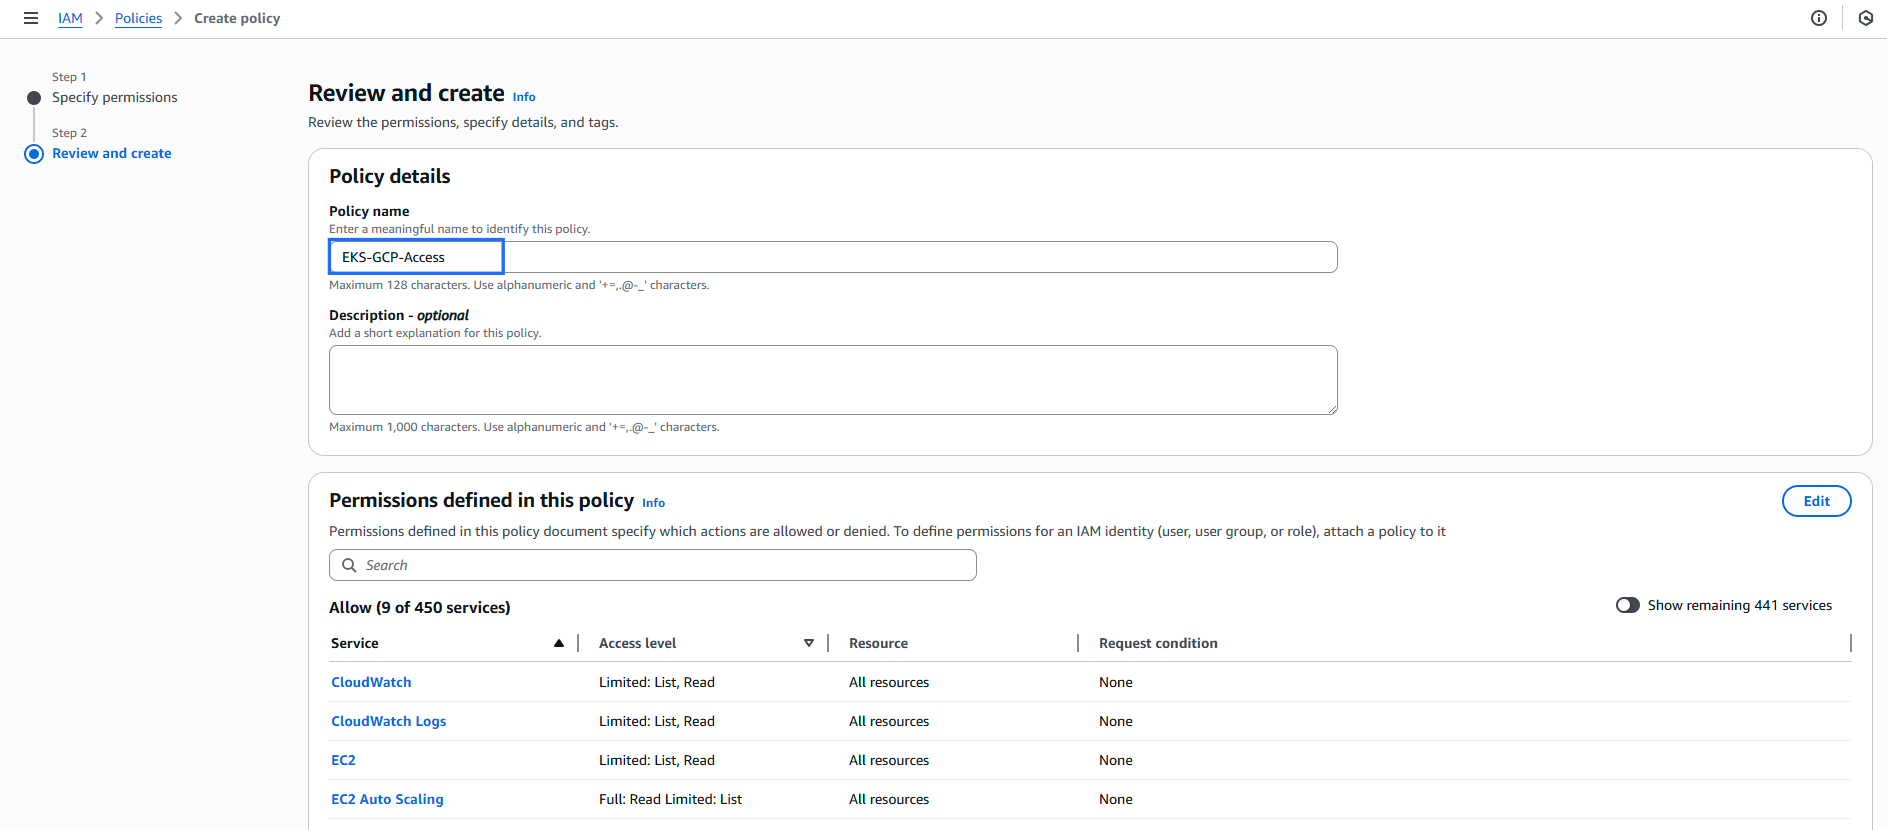
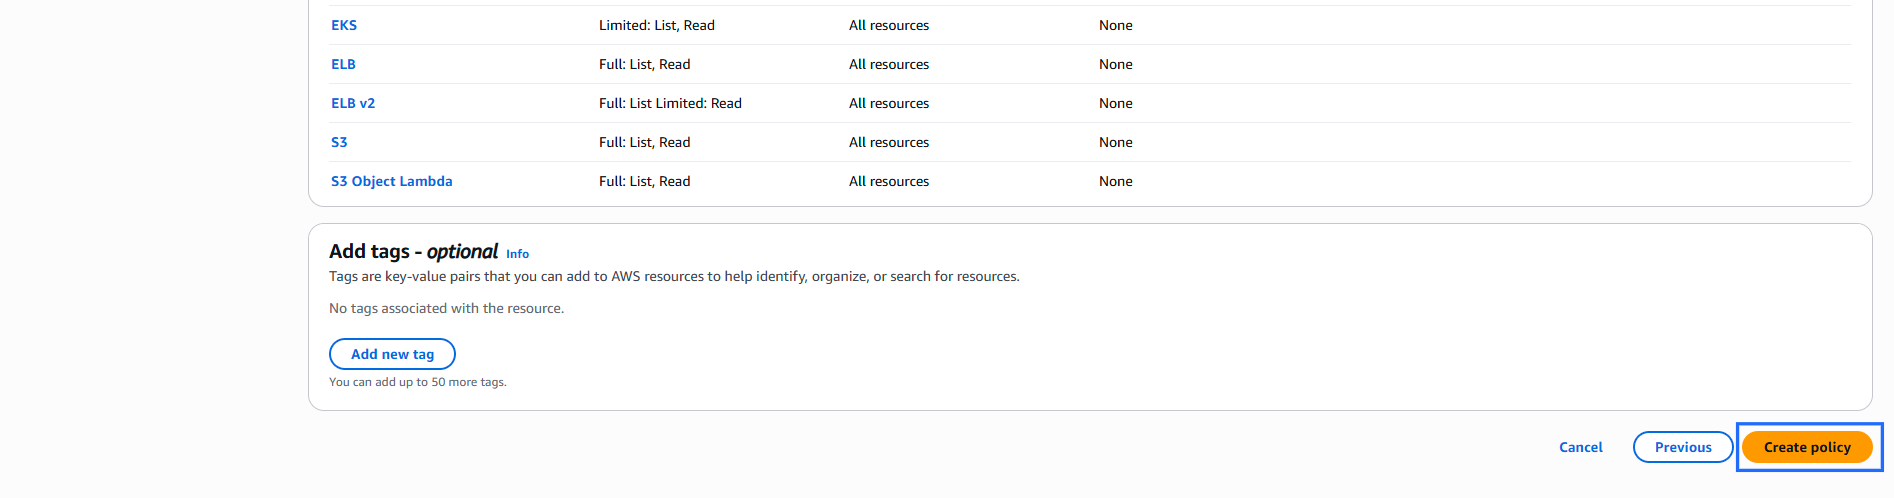
-
Enter a Policy Name and click Create policy.
Create IAM Role
- In IAM select roles and click on Create roles

- Choose Web Identity as the trusted entity type.
- Select Google as the Identity Provider from the dropdown.
- In Audience, enter the Unique ID copied from the CloudCADI EKS integration page.
- Click Next
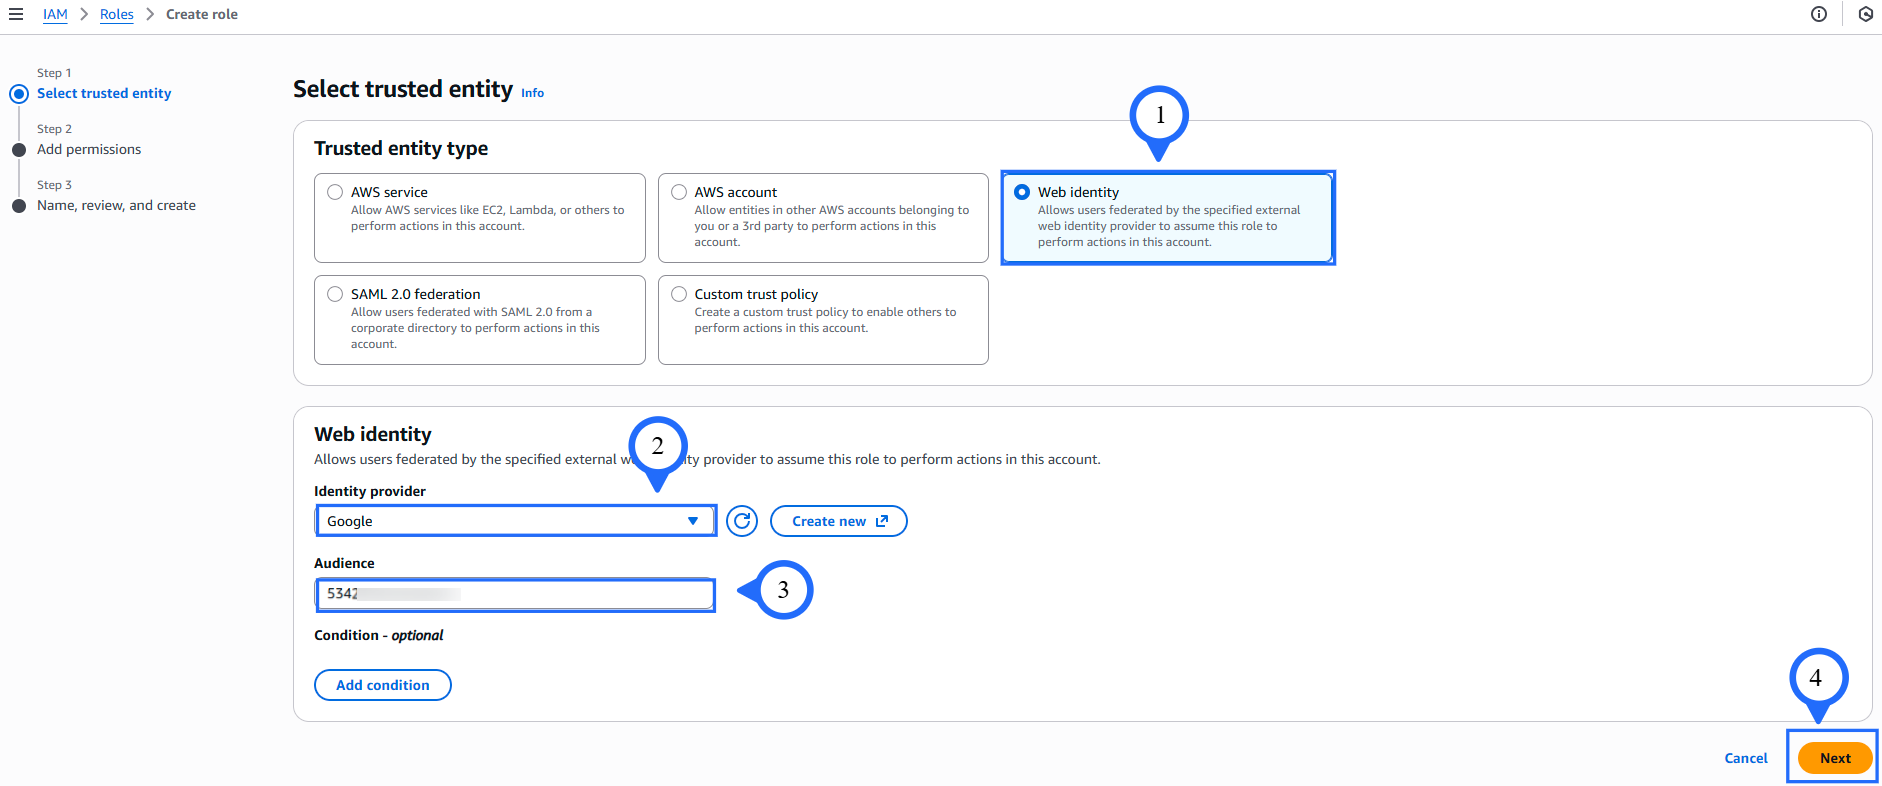
- Enter a Role Name, then click Create role.
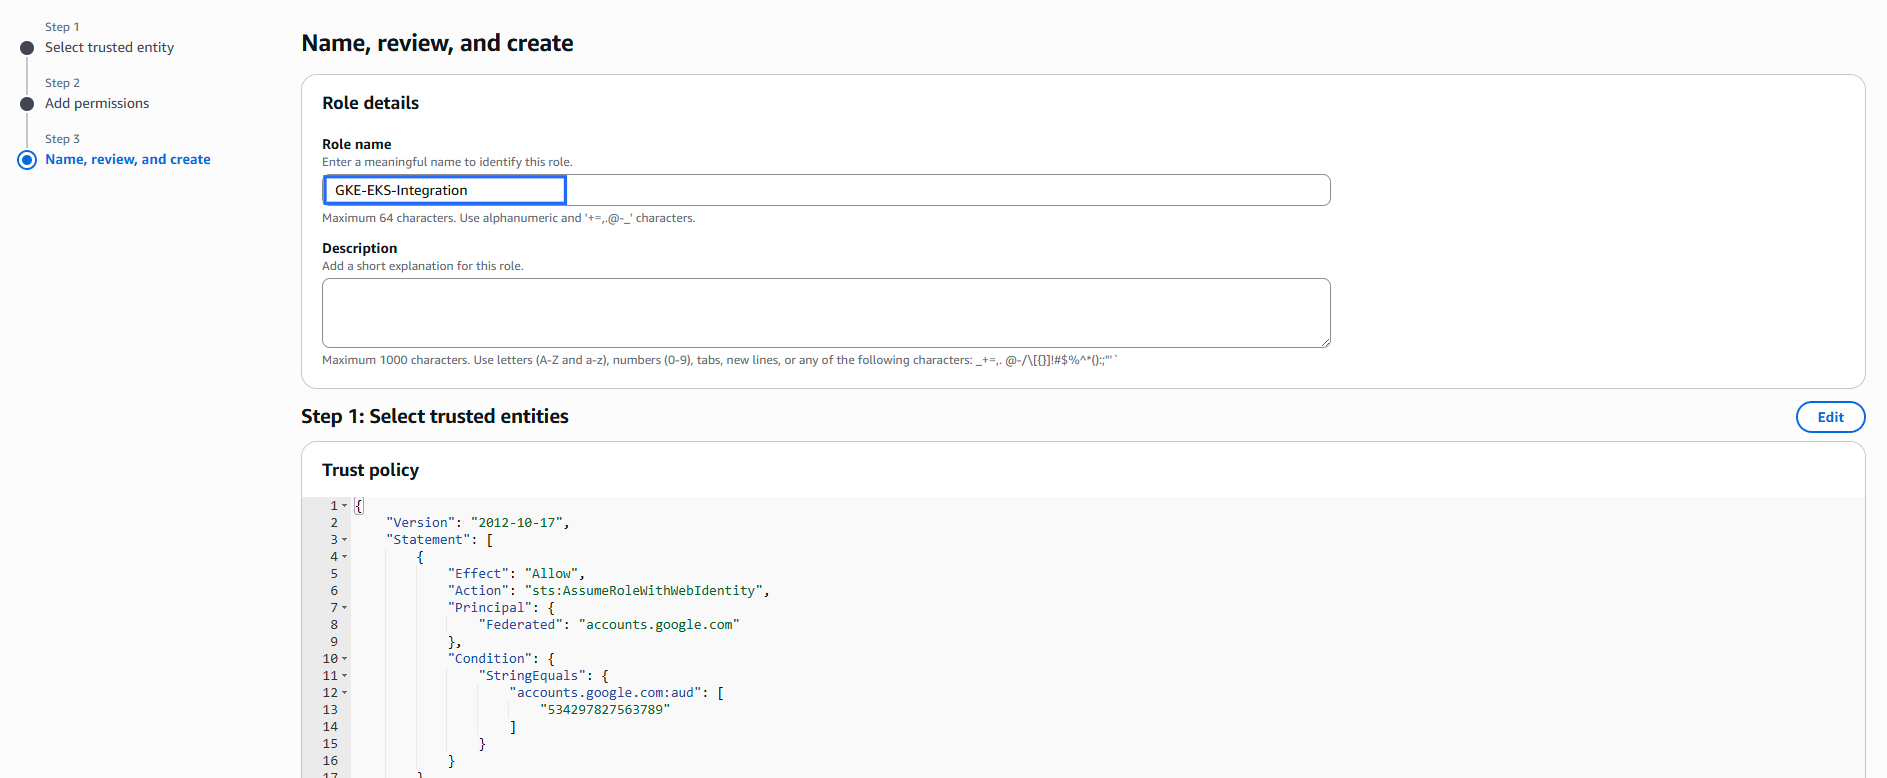
Edit Trust Relationship
- Search for the created role and click on it.
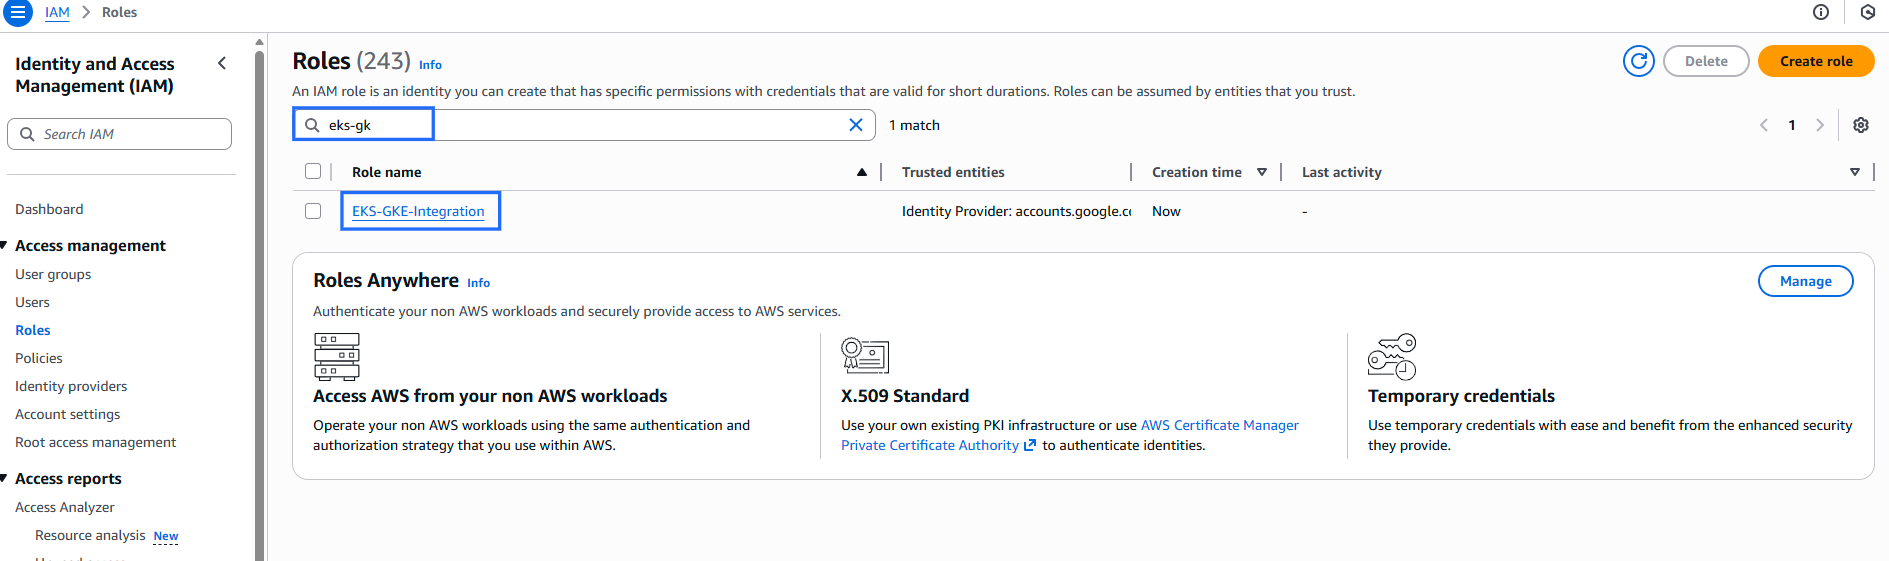
- Go to the Trust Relationships tab.
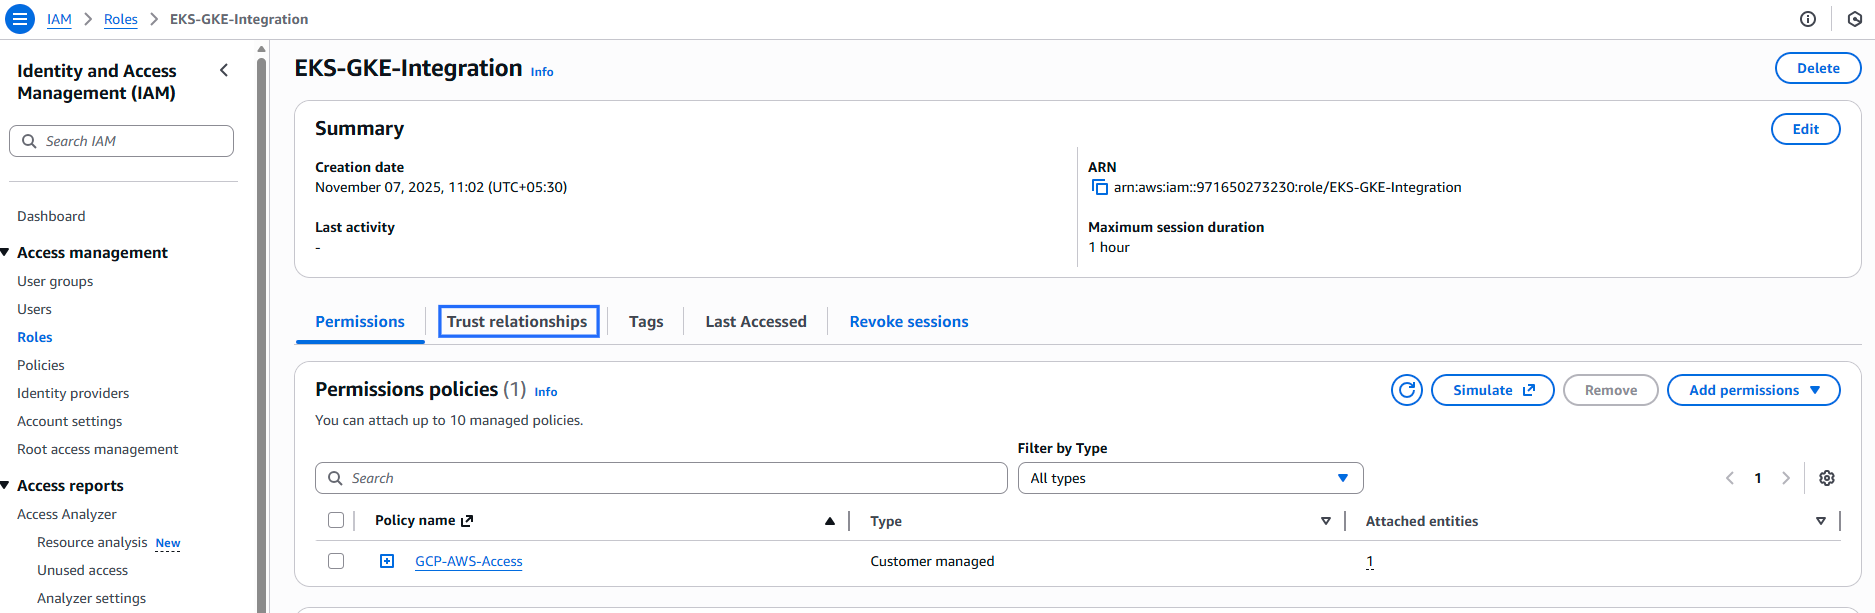
- Click Edit trust policy.
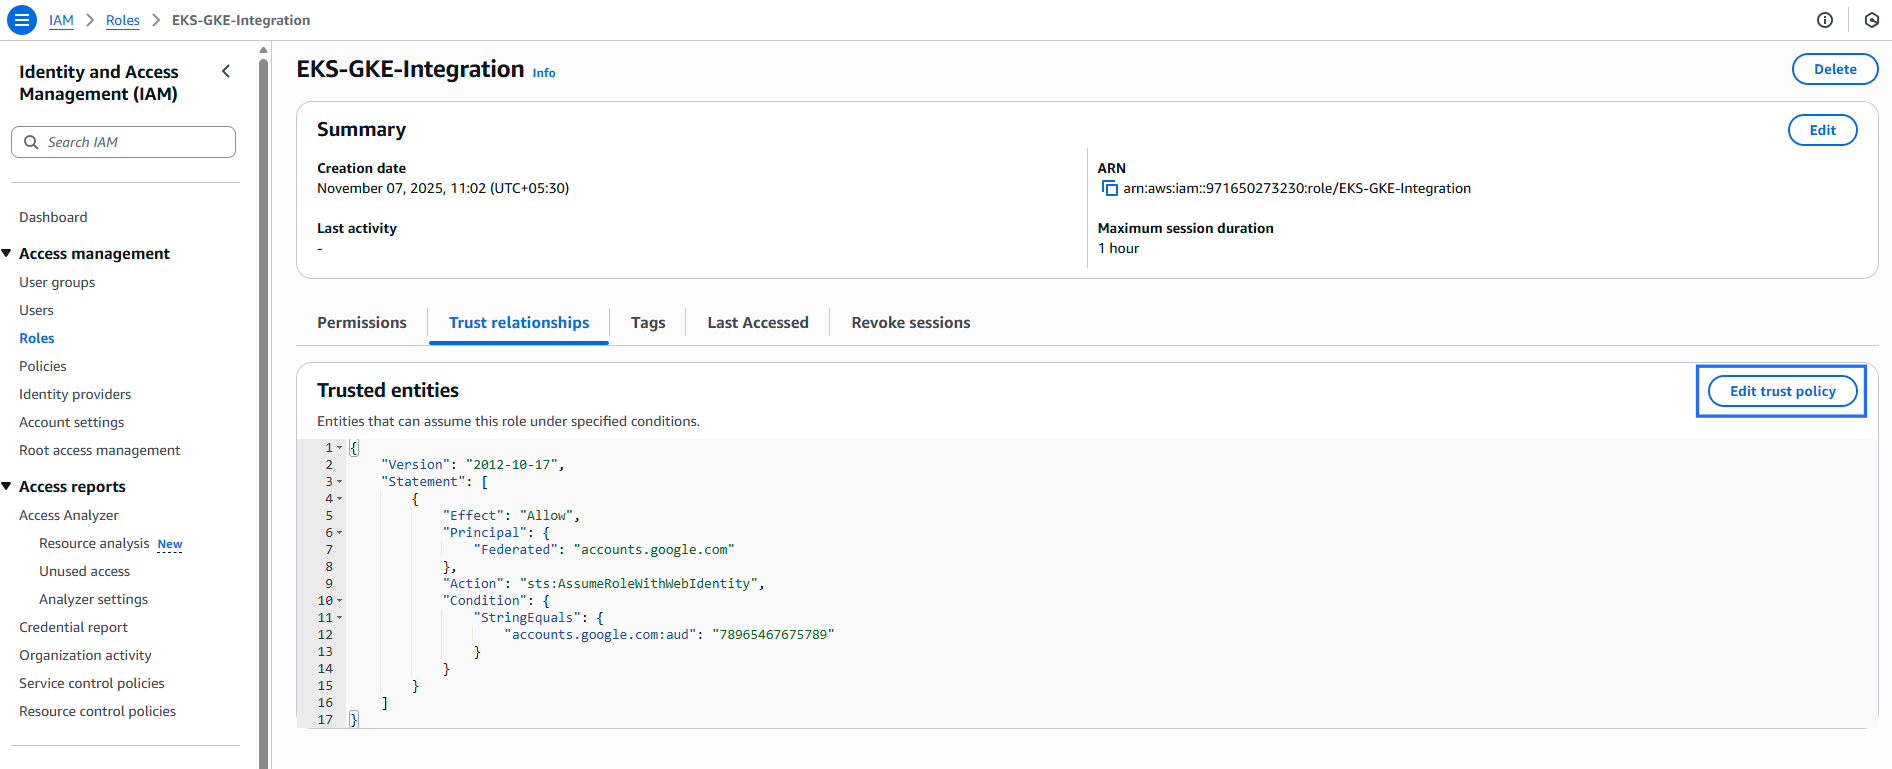
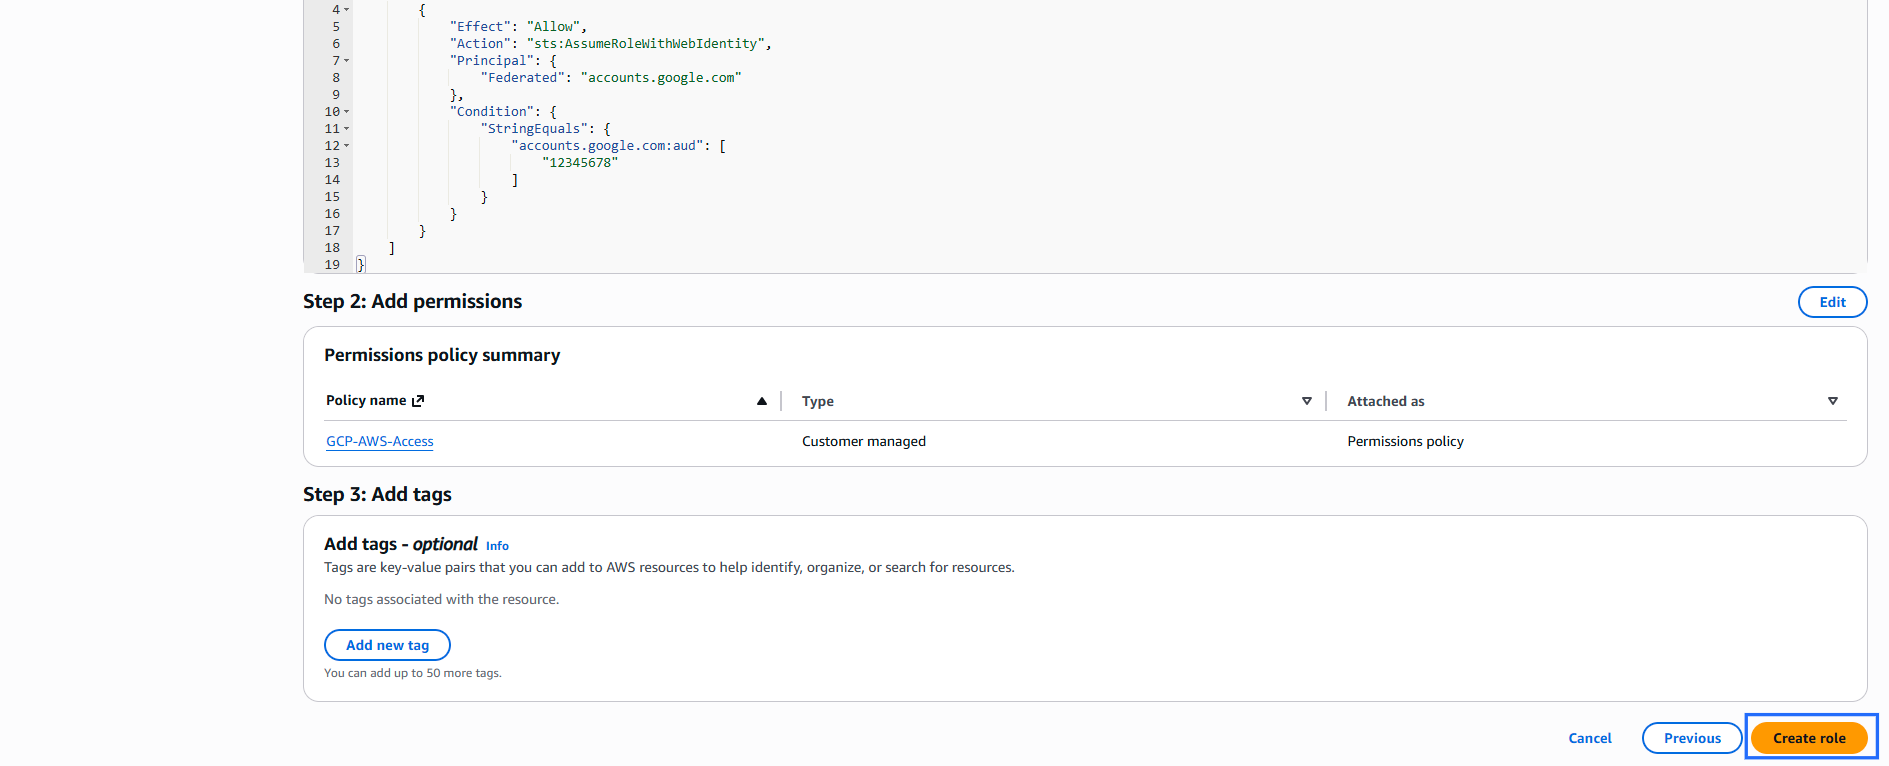
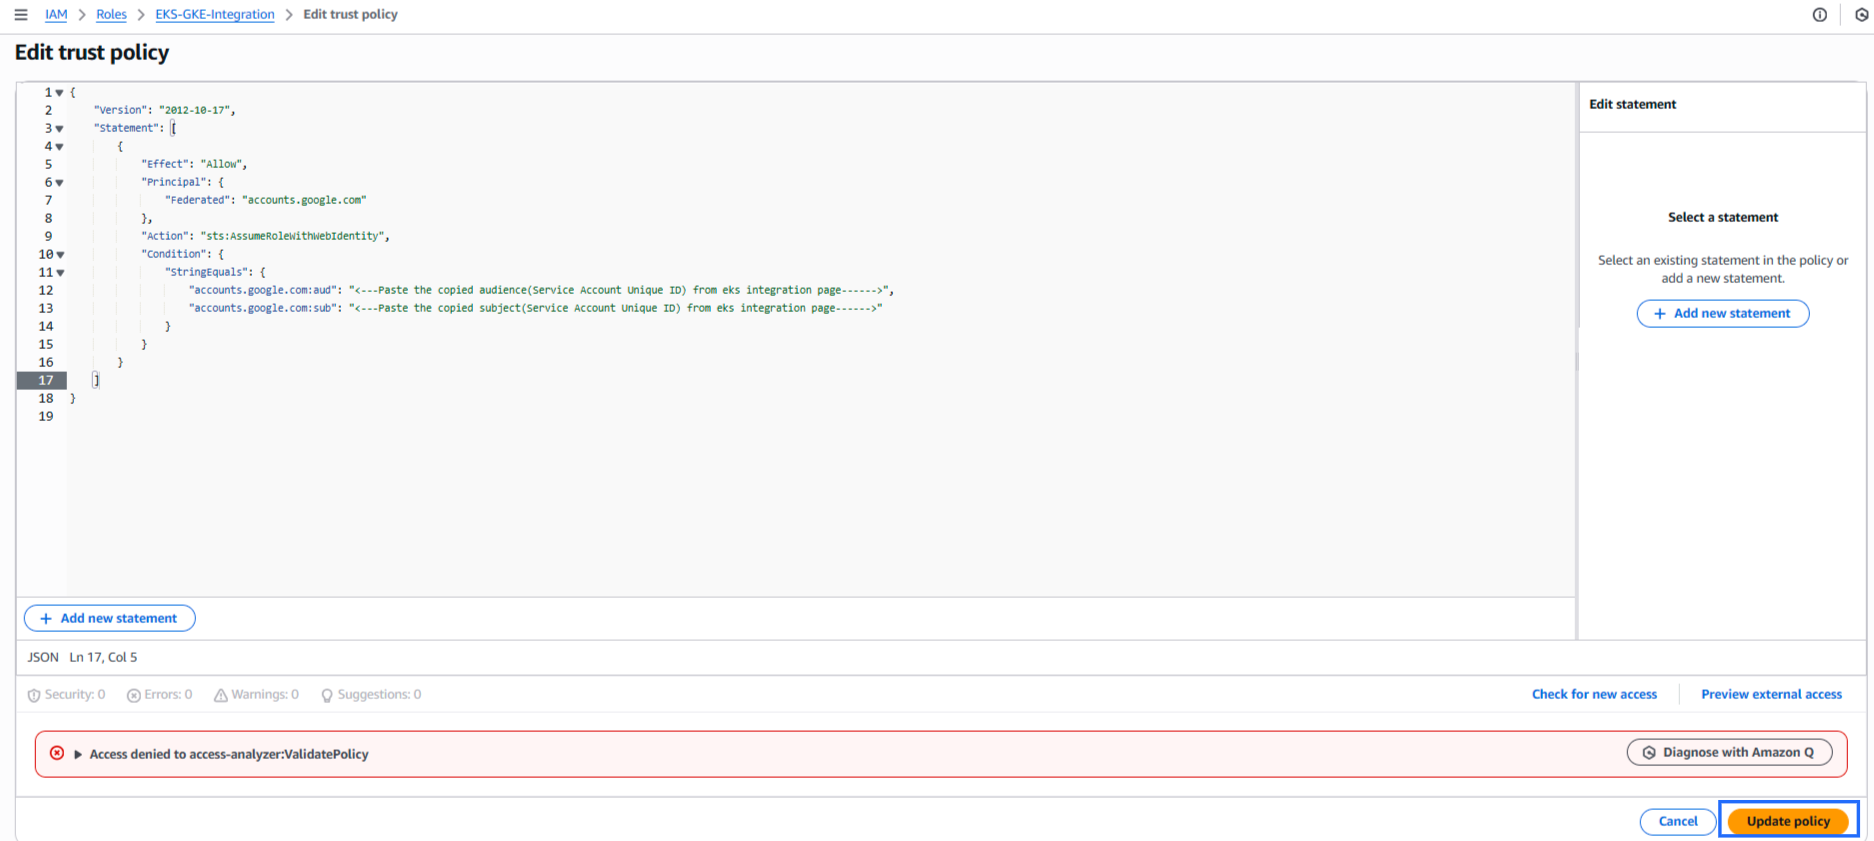
- Replace the existing JSON with the following:
{
  "Version": "2012-10-17",
  "Statement": [
    {
      "Effect": "Allow",
      "Principal": {
        "Federated": "accounts.google.com"
      },
      "Action": "sts:AssumeRoleWithWebIdentity",
      "Condition": {
        "StringEquals": {
          "accounts.google.com:aud": "<---Paste the copied audience(Service Account Unique ID) from eks integration page------>",
          "accounts.google.com:sub": "<---Paste the copied subject(Service Account Unique ID) from eks integration page------>"
        }
      }
    }
  ]
}
- Click Update policy to save changes.
4.2.1 Configure FOCUS Report
Note
- For security reasons, please do not use the AWS root user account.
The AWS FOCUS (FinOps Open Cost and Usage Specification) report provides a standardized and normalized view of your AWS cost and usage data. You can configure FOCUS reports to publish your billing data to an Amazon Simple Storage Service (Amazon S3) bucket that you own. The report delivers consistent cost and usage information across services, accounts, and resources, making it easier to analyze, allocate, and optimize your cloud spend.
-
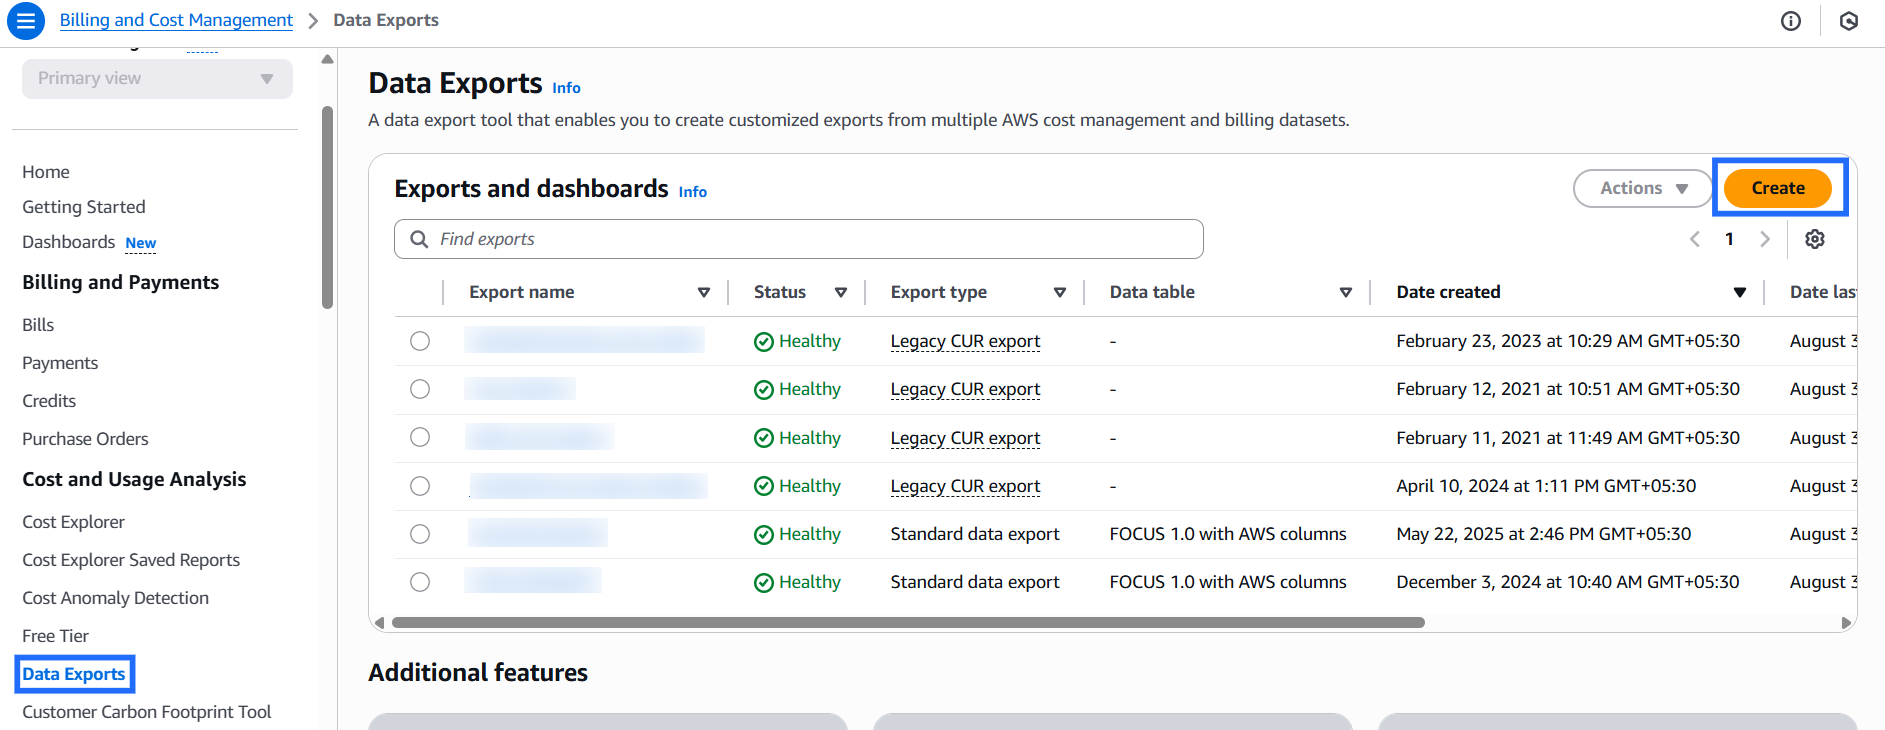
Sign into the AWS Management Console and open the Billing and Cost Management console with required permissions.
-
Click Data Exports from the left menu under Cost and Usage Analysis and click Create report.
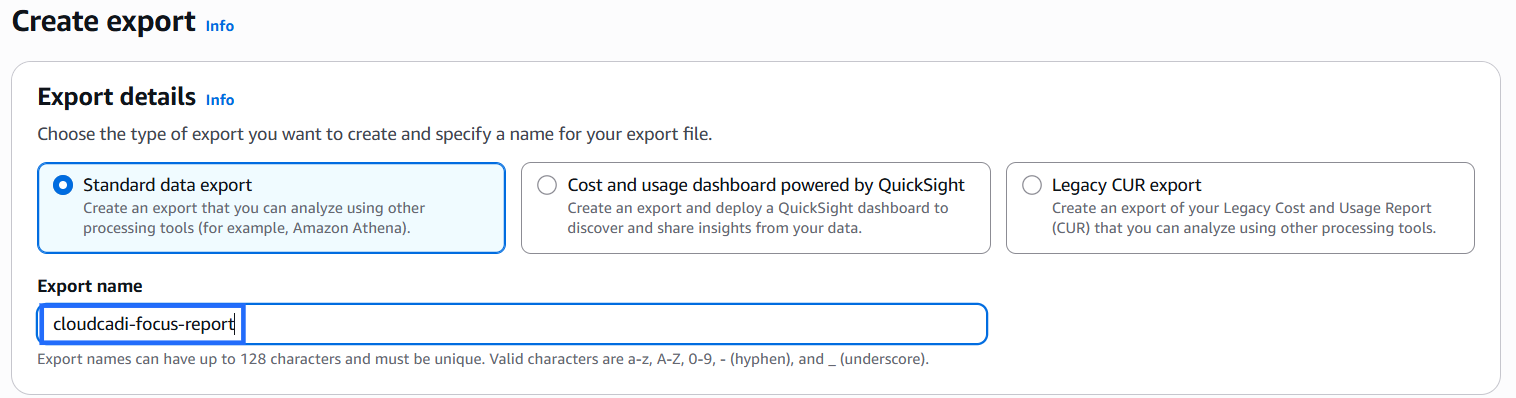
Export details
- Choose the type of export: Standard data export
- Enter a Export name: cloudcadi-focus-report
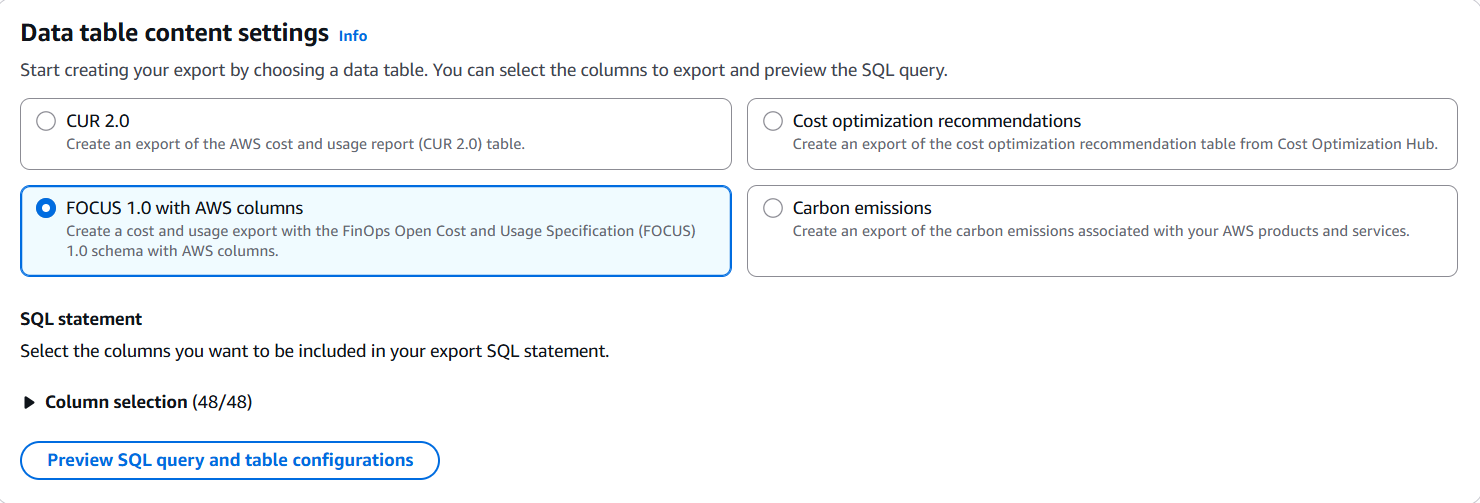
Data table content settings
-
Select FOCUS 1.0 with AWS columns to create a cost and usage export with the FinOps Open Cost and Usage Specification (FOCUS) schema.
-
Keep the default Column selection (all columns enabled), or adjust based on your needs.
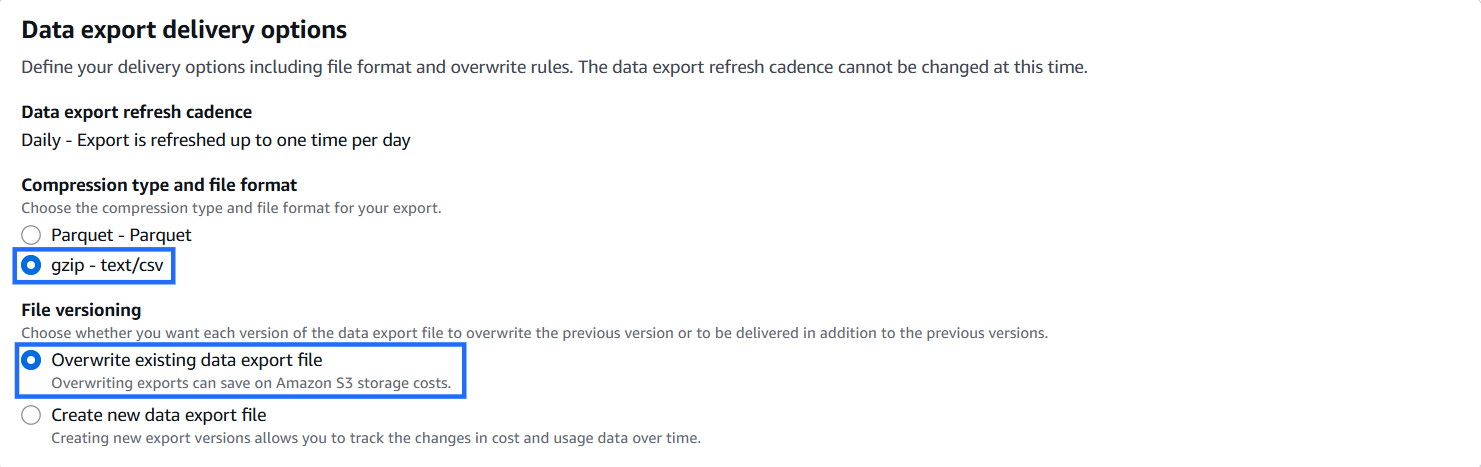
Data export delivery options
-
Compression type and file format: gzip – text/csv
-
File versioning: Overwrite existing data export file
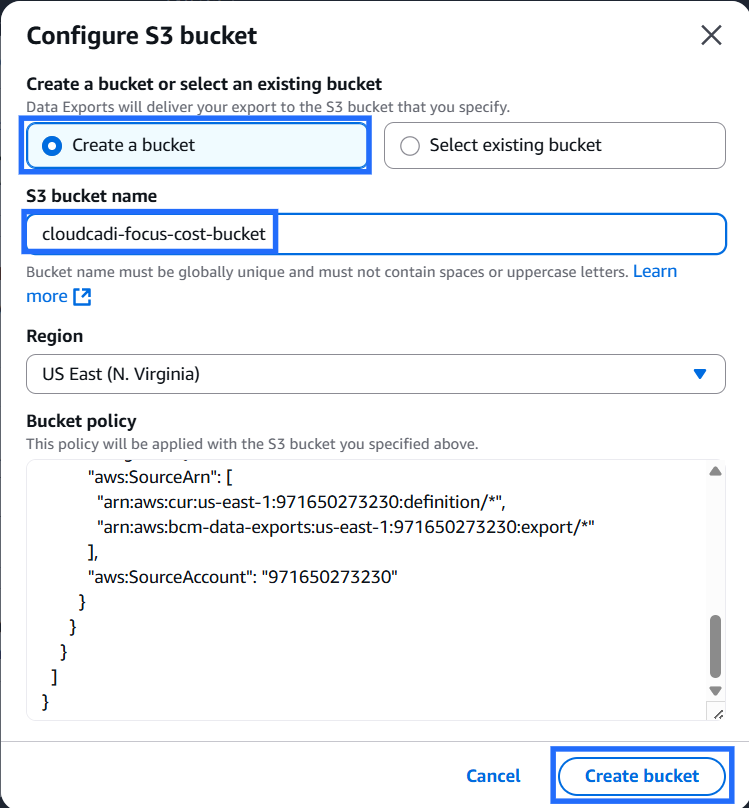
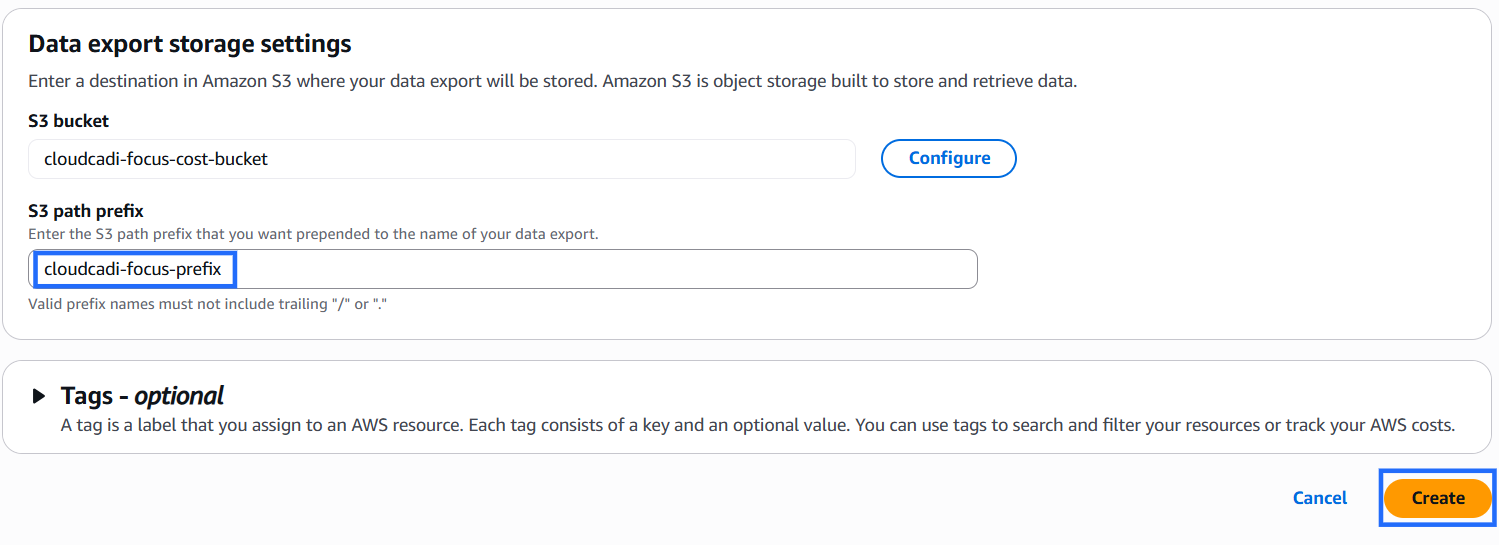
Data export storage settings
- Select Create a bucket.
- S3 bucket name: cloudcadi-focus-cost-bucket.
- Select the region.
- Read and verify the policy, this policy will allow AWS to import billing reports to the S3 bucket. Click Create bucket.
- Enter a S3 path prefix: cloudcadi-focus-prefix.
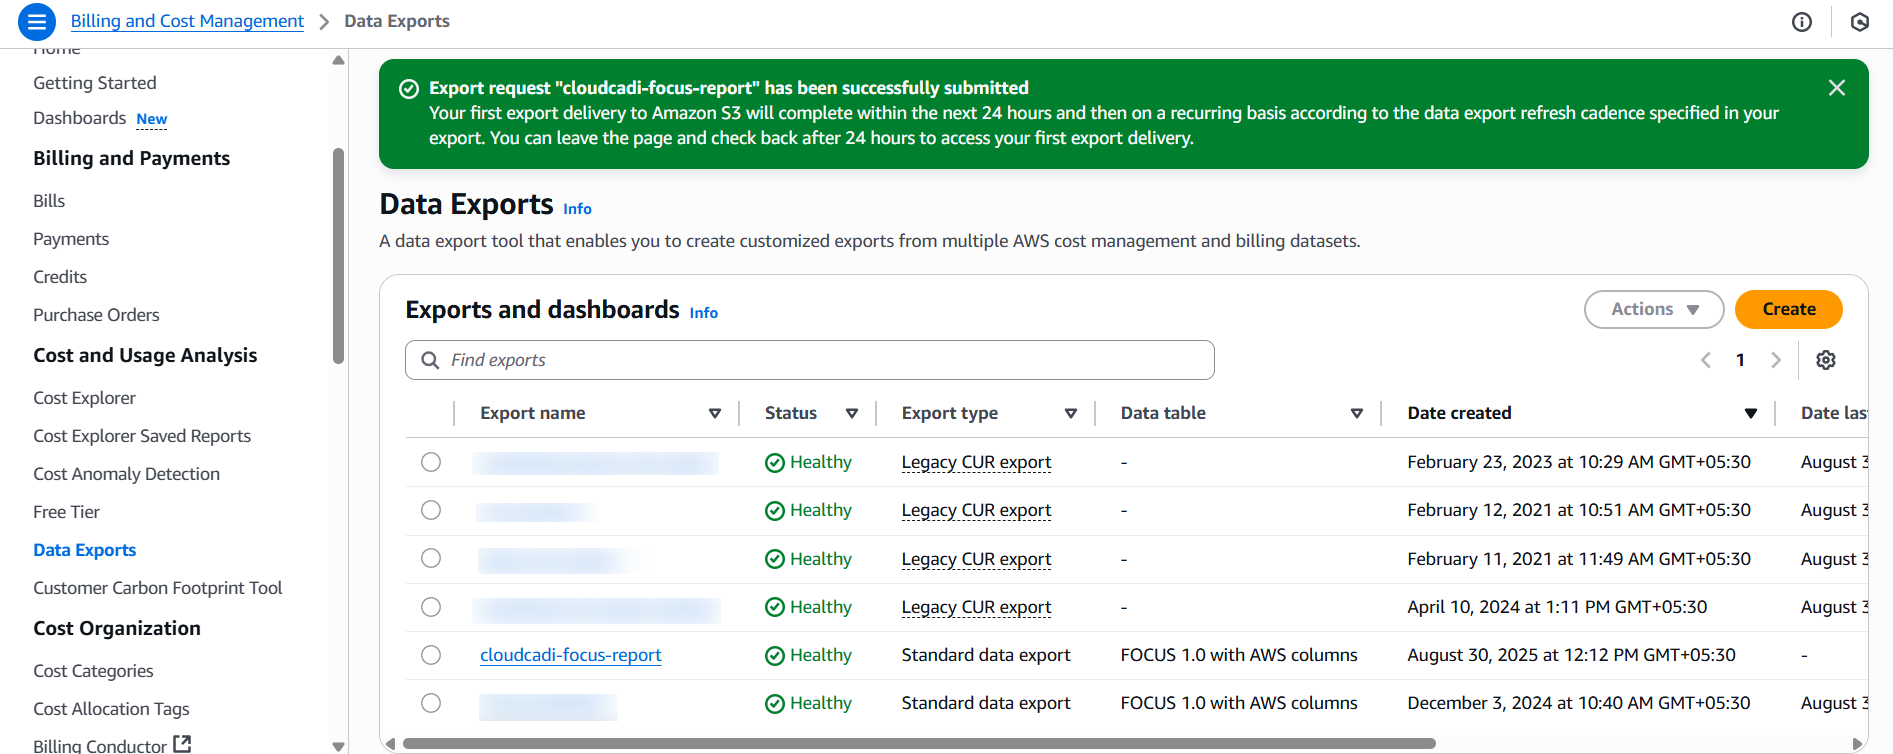
- Click on Create.
- Focus report is successfully created. The reports are expected to be generated in next 24 hours in S3 bucket.
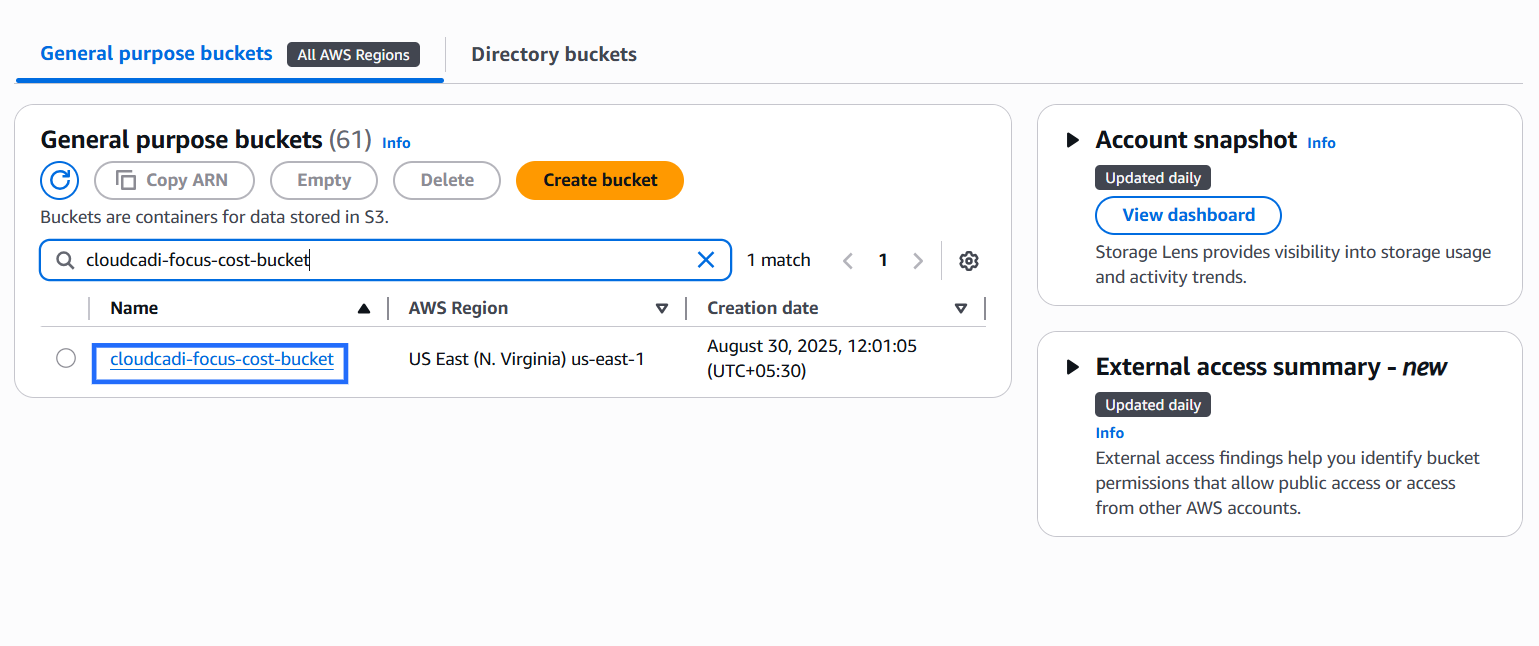
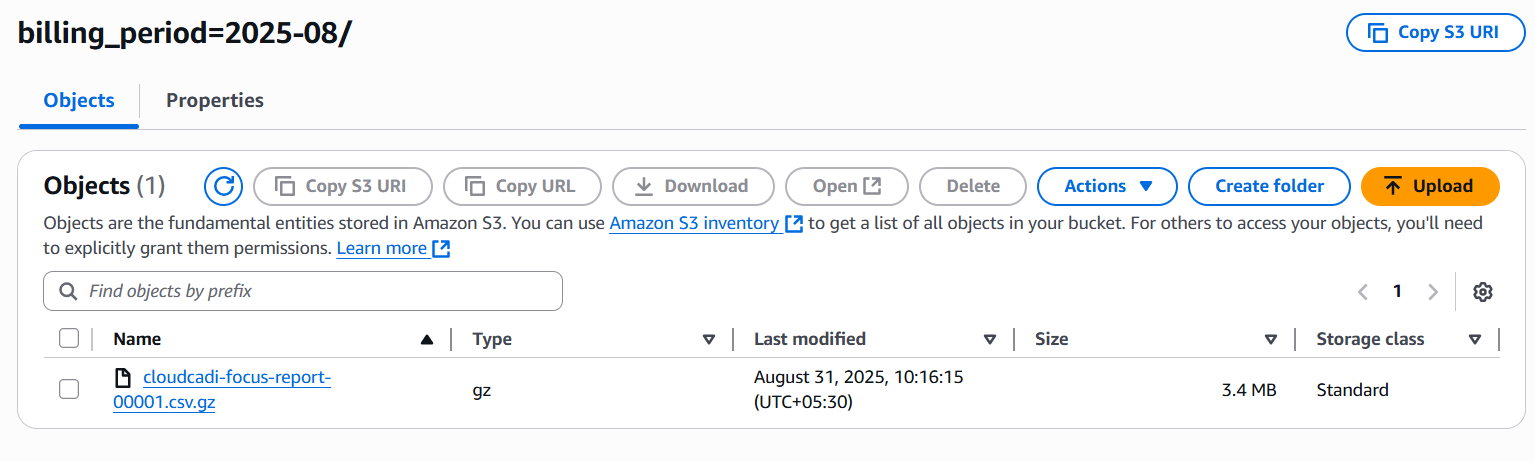
Cost Report in S3 Bucket
- Go to S3 console -> Buckets.
- New bucket will be created.
- Cost reports are maintained in folder on monthly basis.
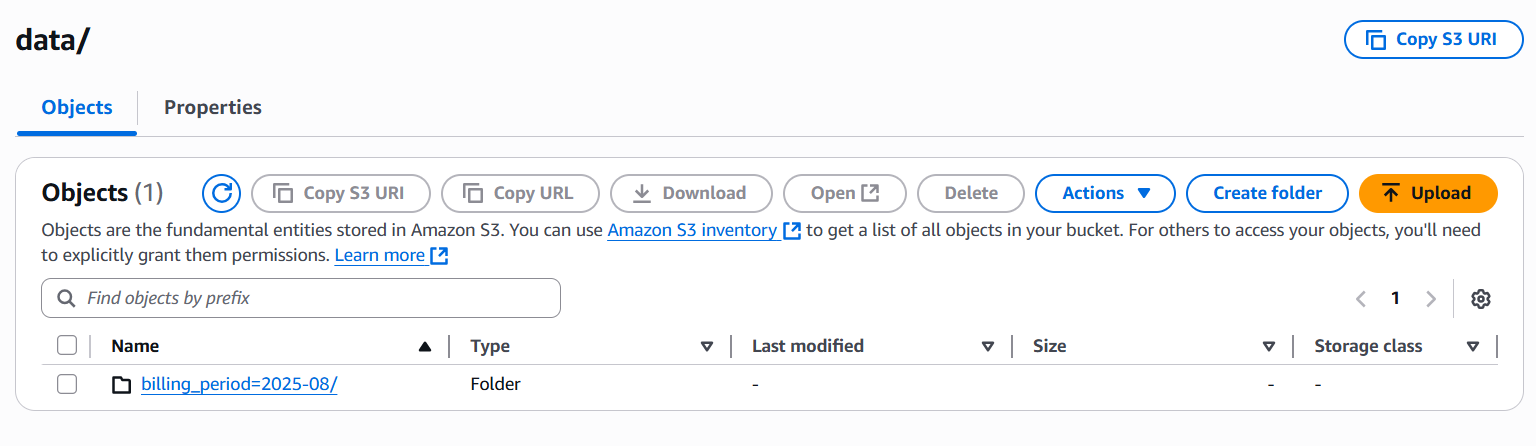
- New .zip file will be available with the report. (cost report will be available after 24 hours of report creation).
-
Return to the CloudCADI Integration page and enter the following details:
-
Role ARN – The ARN of the IAM role used for the EKS integration.
- Report Name – The name of the FOCUS report you created (e.g., cloudcadi-focus-report).
- S3 Bucket Name – The name of the S3 bucket where the cost reports are stored (e.g., cloudcadi-focus-cost-bucket).
- Report Path Prefix – The folder path within the S3 bucket where reports are saved (e.g., cloudcadi-focus-prefix).
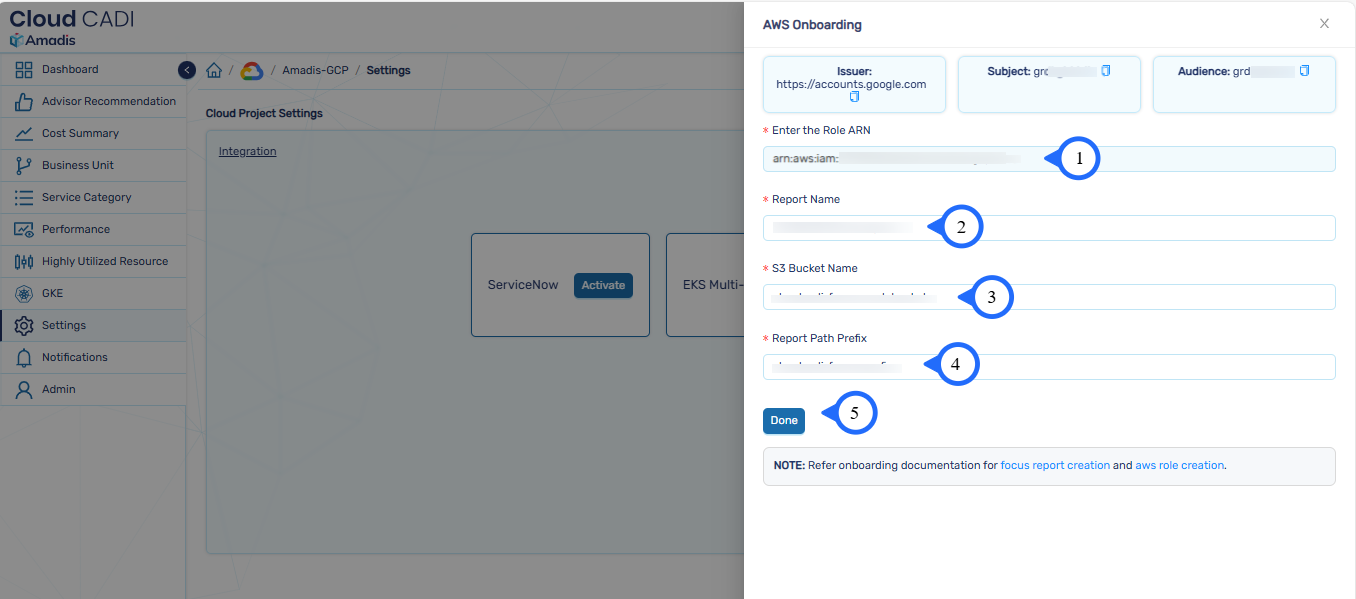
- After entering all the details, click Done to complete the EKS integration setup.
4.3 Automation
CloudCADI End-to-End Automation enables you to Cleanup orphan resources & take snapshots across multiple cloud projects simultaneously with a single configuration.
Note
- Only admin can enable automation.
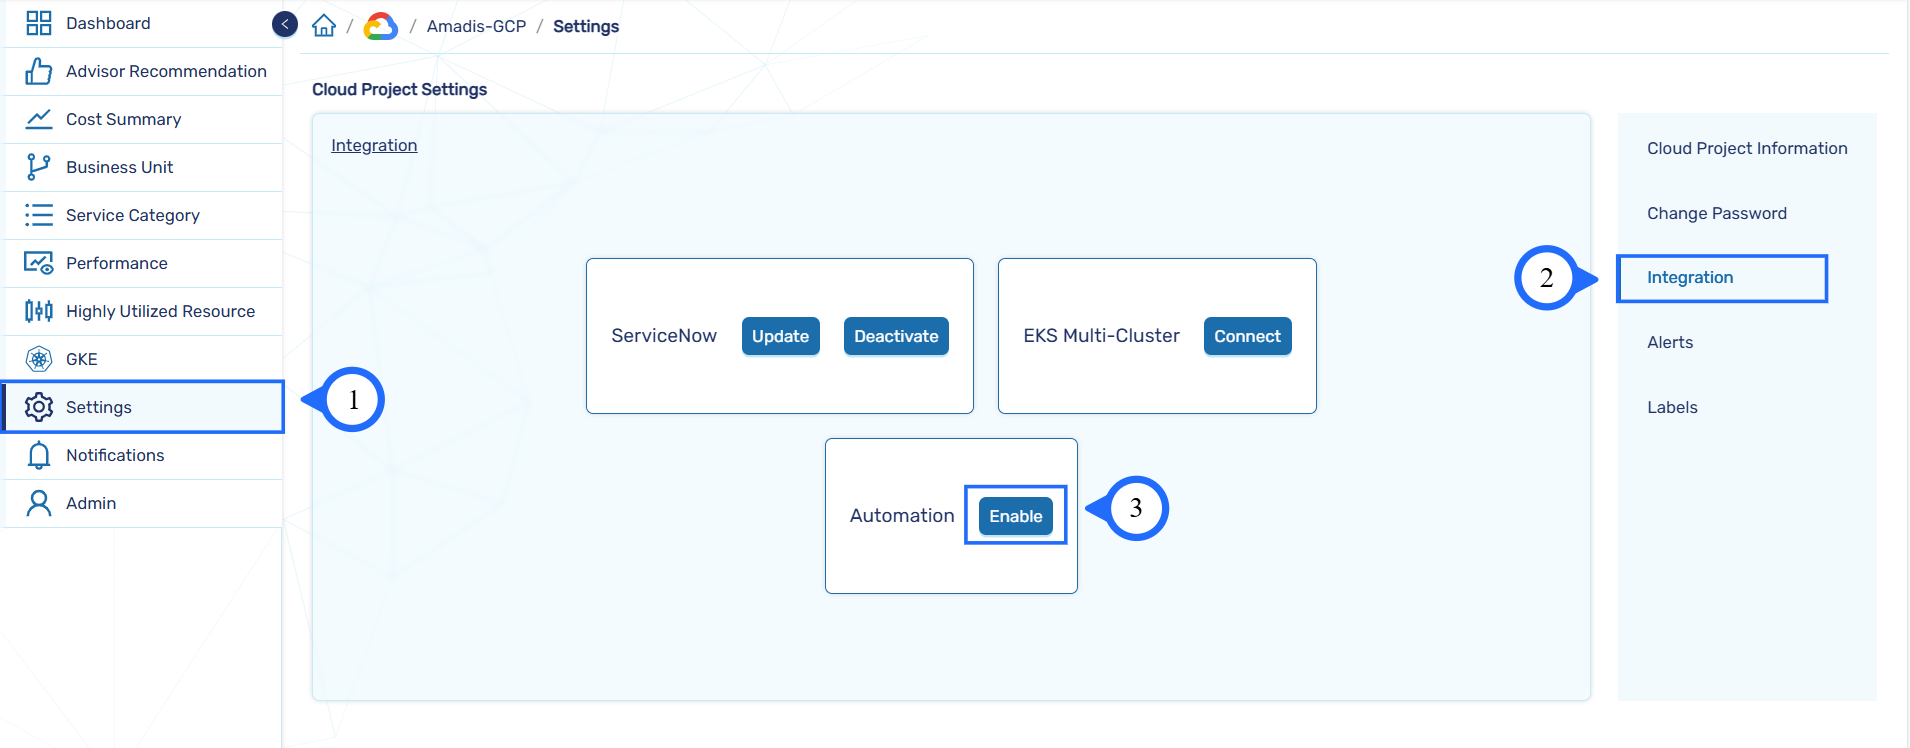
- To use automation, navigate to the Admin dashboard and click Integrations from the left sidebar, then click Enable next to Automation to configure and manage automation settings.
4.3.1 Automation Enabler
-
Select one or more Cloud Projects to apply automation .You can search for projects using the search bar, or select it.
-
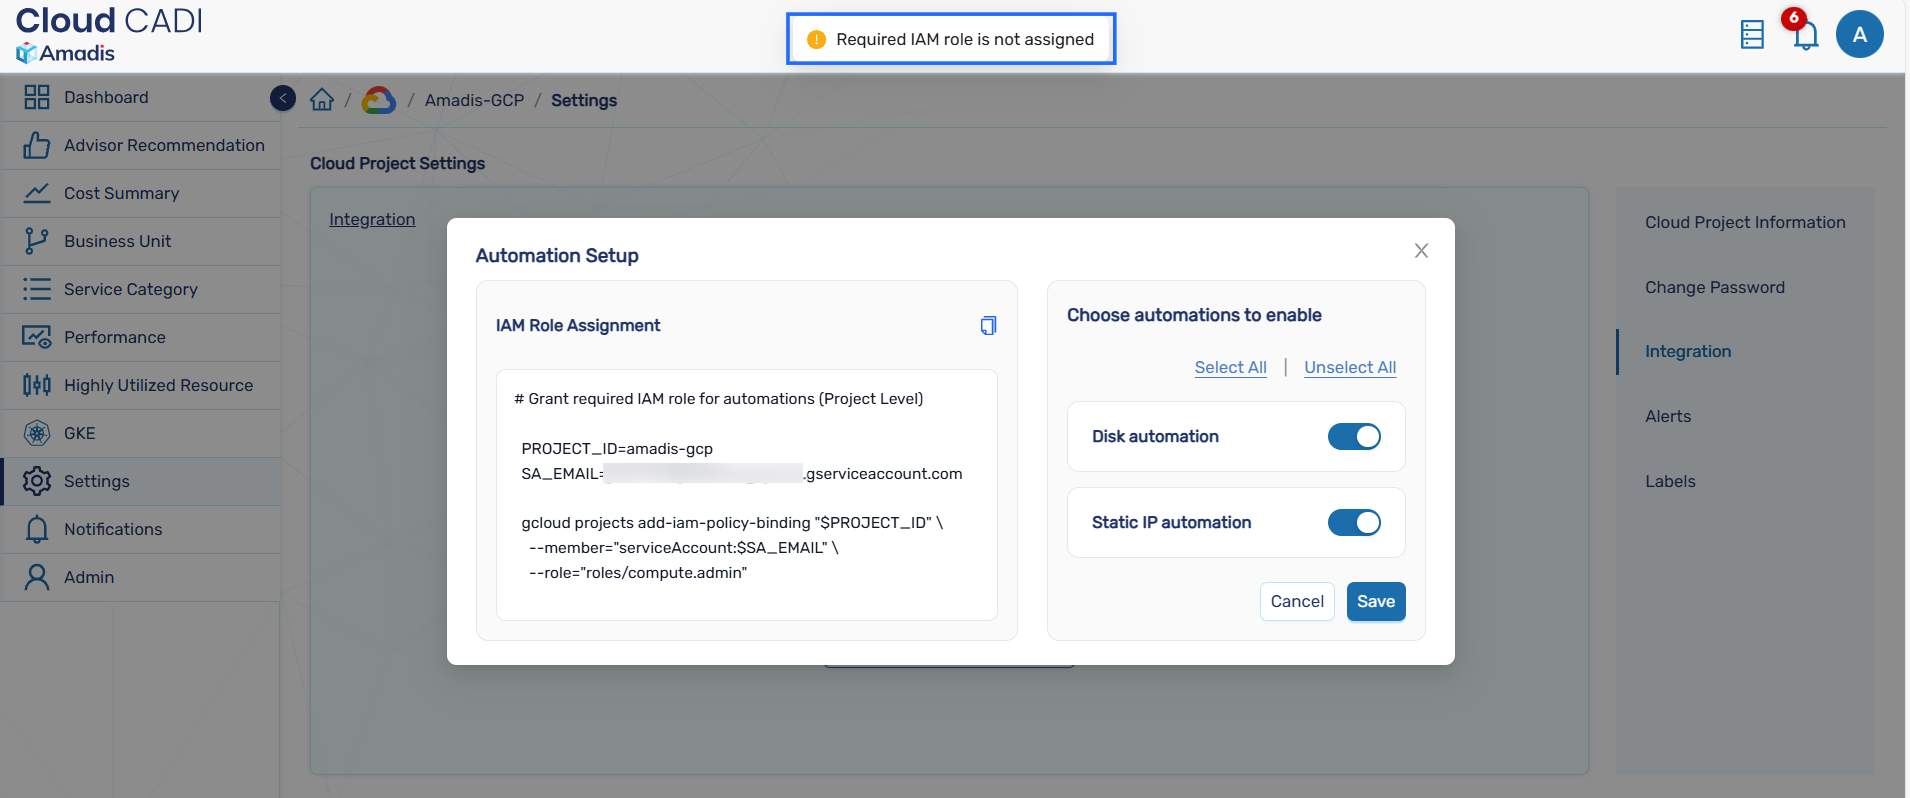
Select the required automations to enable.
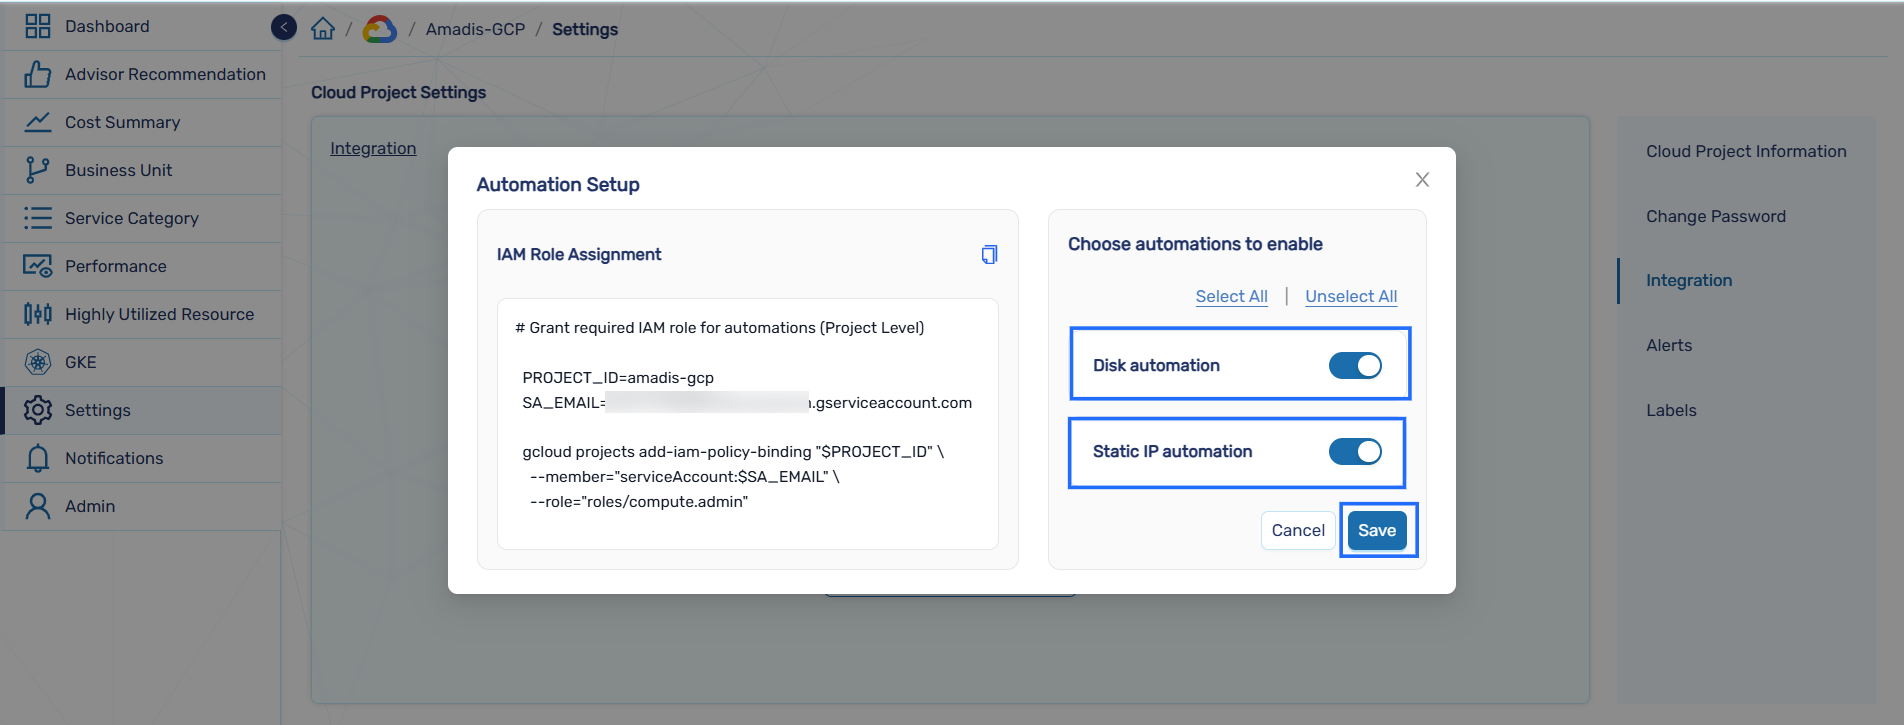
-
Click Save to apply the configuration and validate required IAM roles.
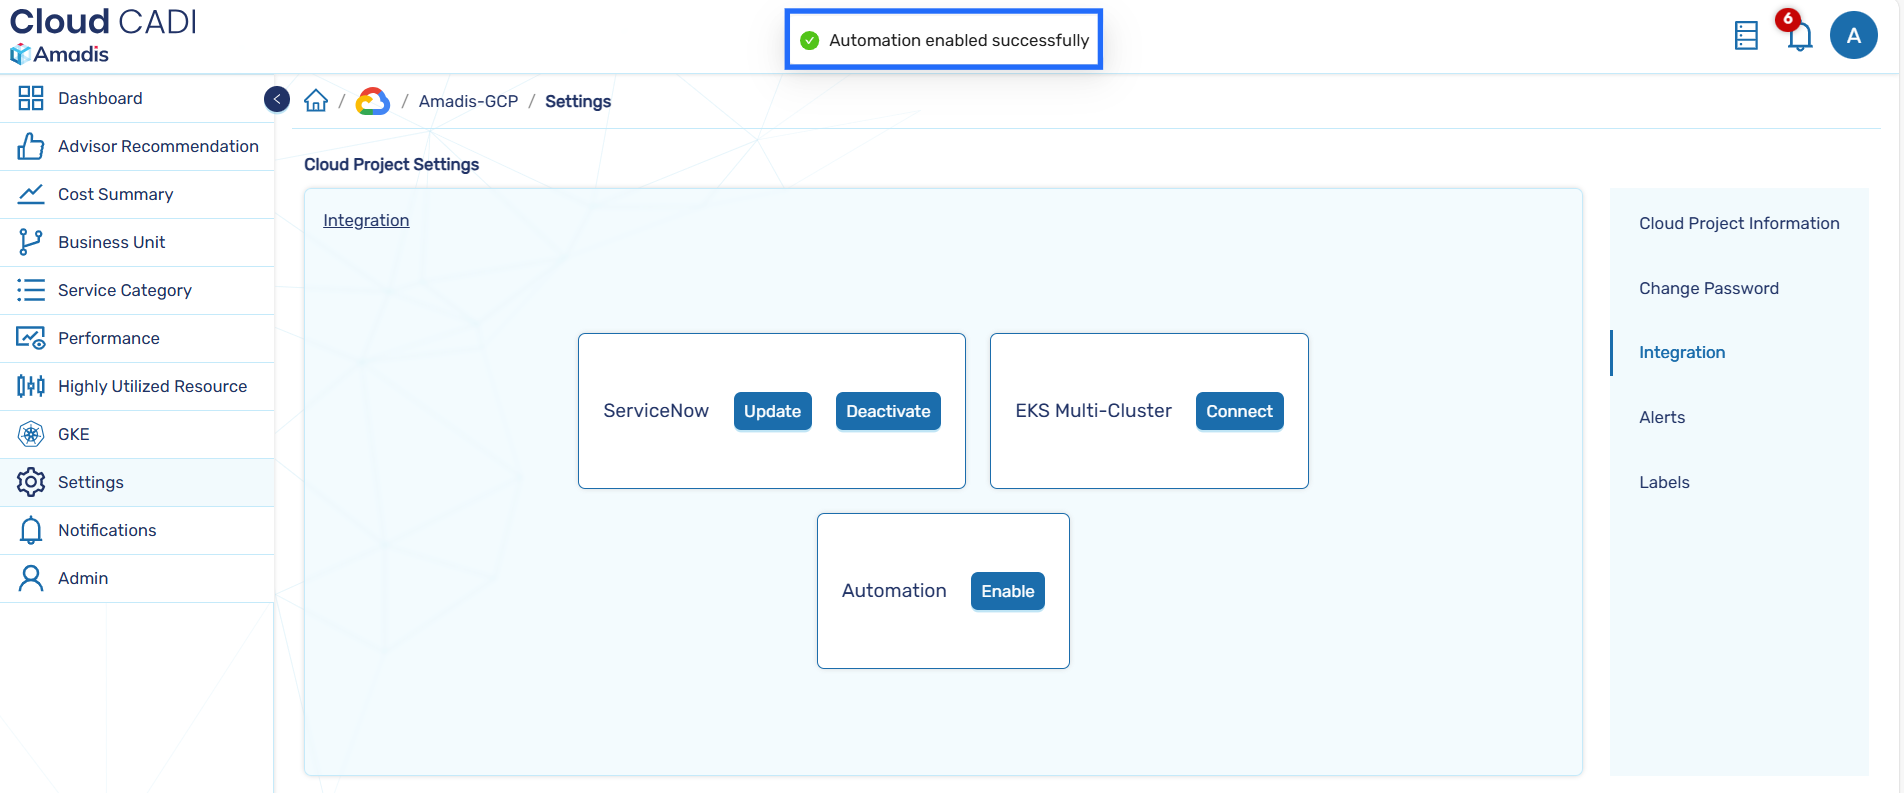
-
On successful validation, a success message is displayed.
- If any required role is missing, the configuration is not saved and an error message is displayed.
Note
- Required role for Disk Automation:
roles/compute.admin - Required role for IP Automation:
roles/compute.admin
- If required roles are not assigned, execute the provided CLI command to grant the necessary permissions, or assign them manually through the GCP Cloud Console.
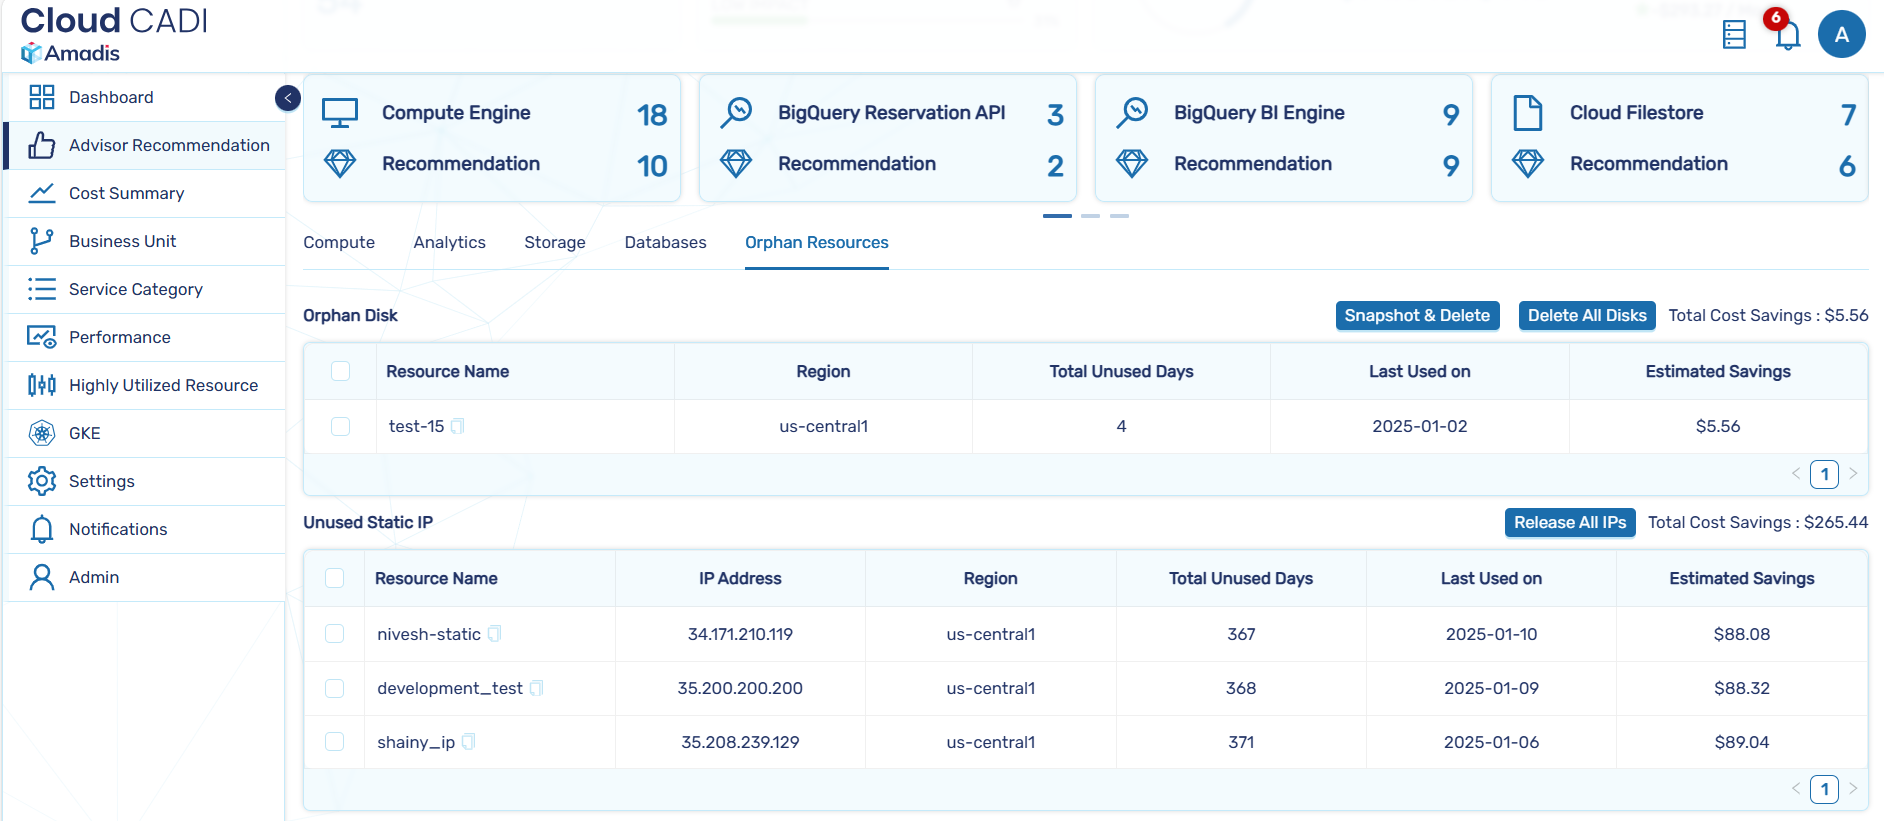
- CloudCADI now enables you to delete orphan resources in the GCP console , with the relevant automation checkboxes enabled in the UI.
Note
- If an admin performs a delete action, the resource is deleted immediately.
- When a user initiates a delete action, a request is sent to the admin for approval or rejection.
- Requests that remain pending for more than 6 hours are automatically removed from the request page.
4.4 Slack
CloudCADI integrates with Slack to deliver cost variance & user created alerts and daily reports on the top three cost utilizations, helping teams stay informed and optimize expenses.
4.4.1 Integrate Slack with CloudCADI
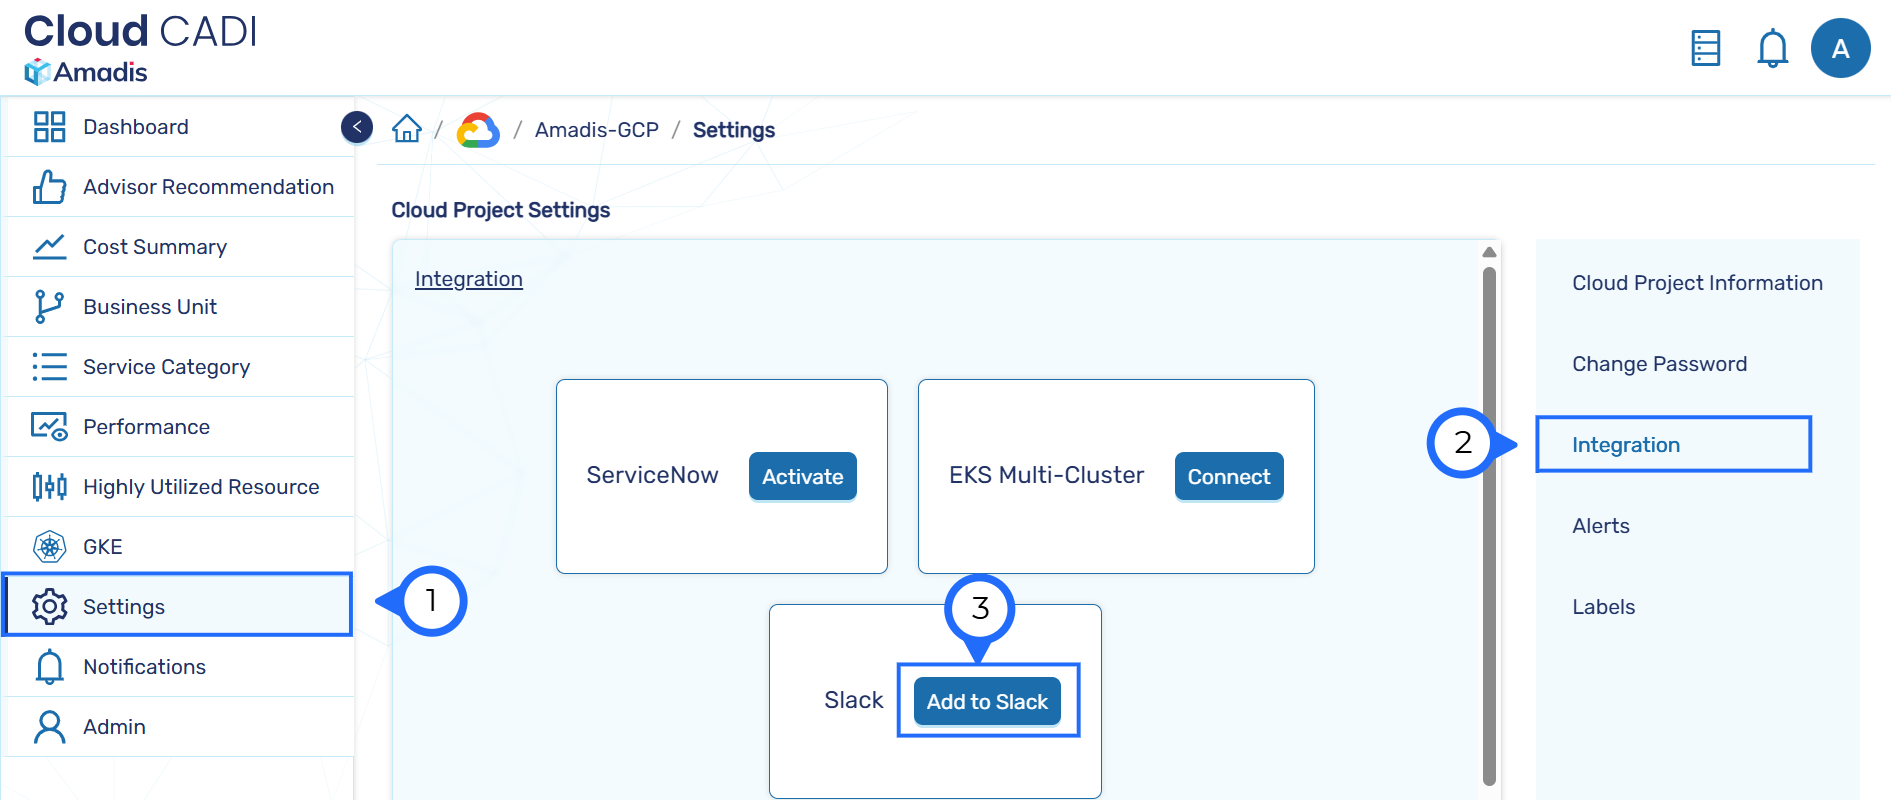
- To integrate Slack, navigate to the Admin dashboard, click Integrations from the left sidebar, and click Add to Slack.
-
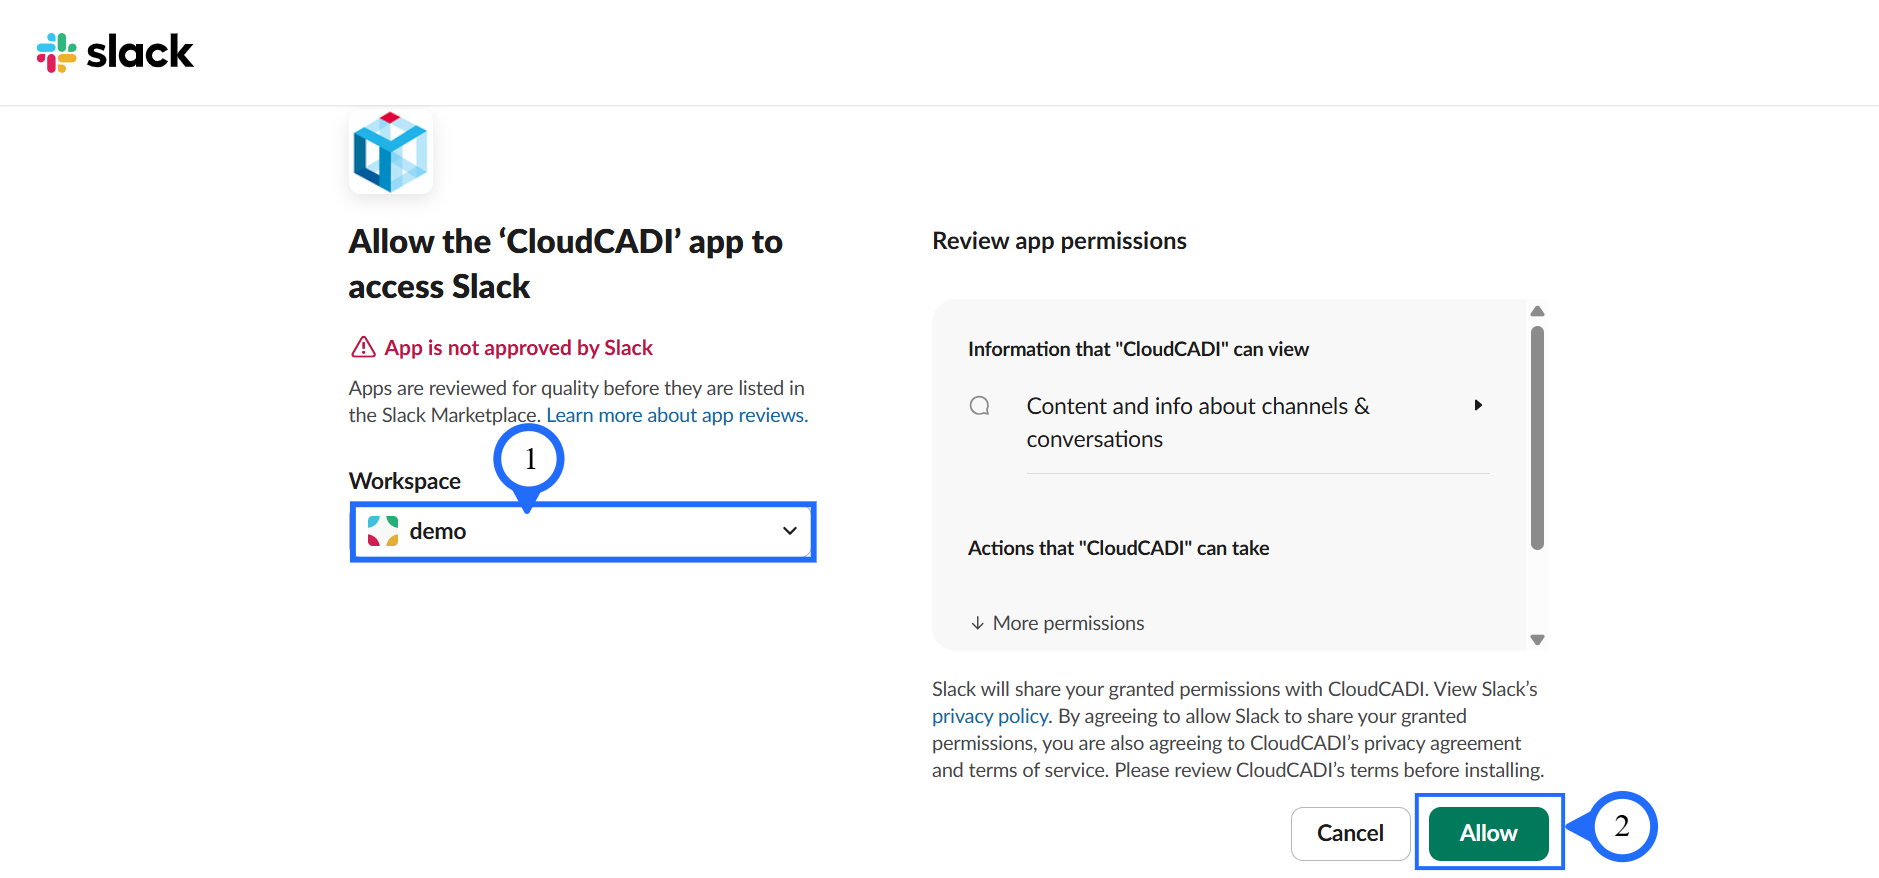
You will be redirected to the Slack authorization page.
-
In the slack authorization page, select your Workspace and click Allow.
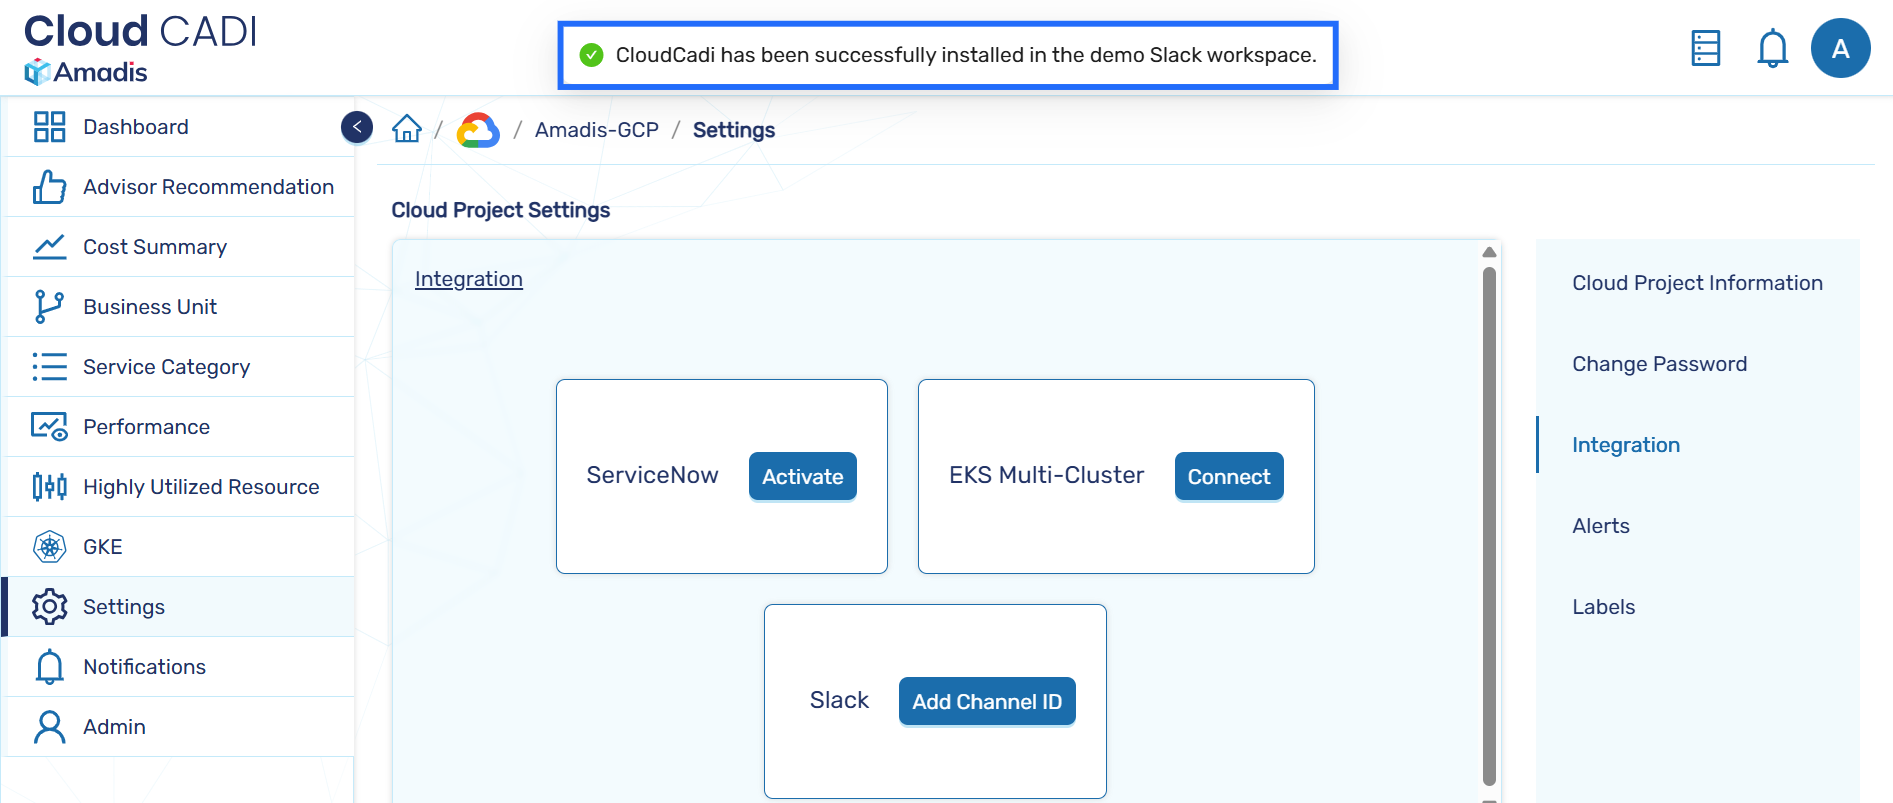
- After successful authorization, you are redirected back to CloudCADI, where a confirmation message pops up at the top of the Integrations page.
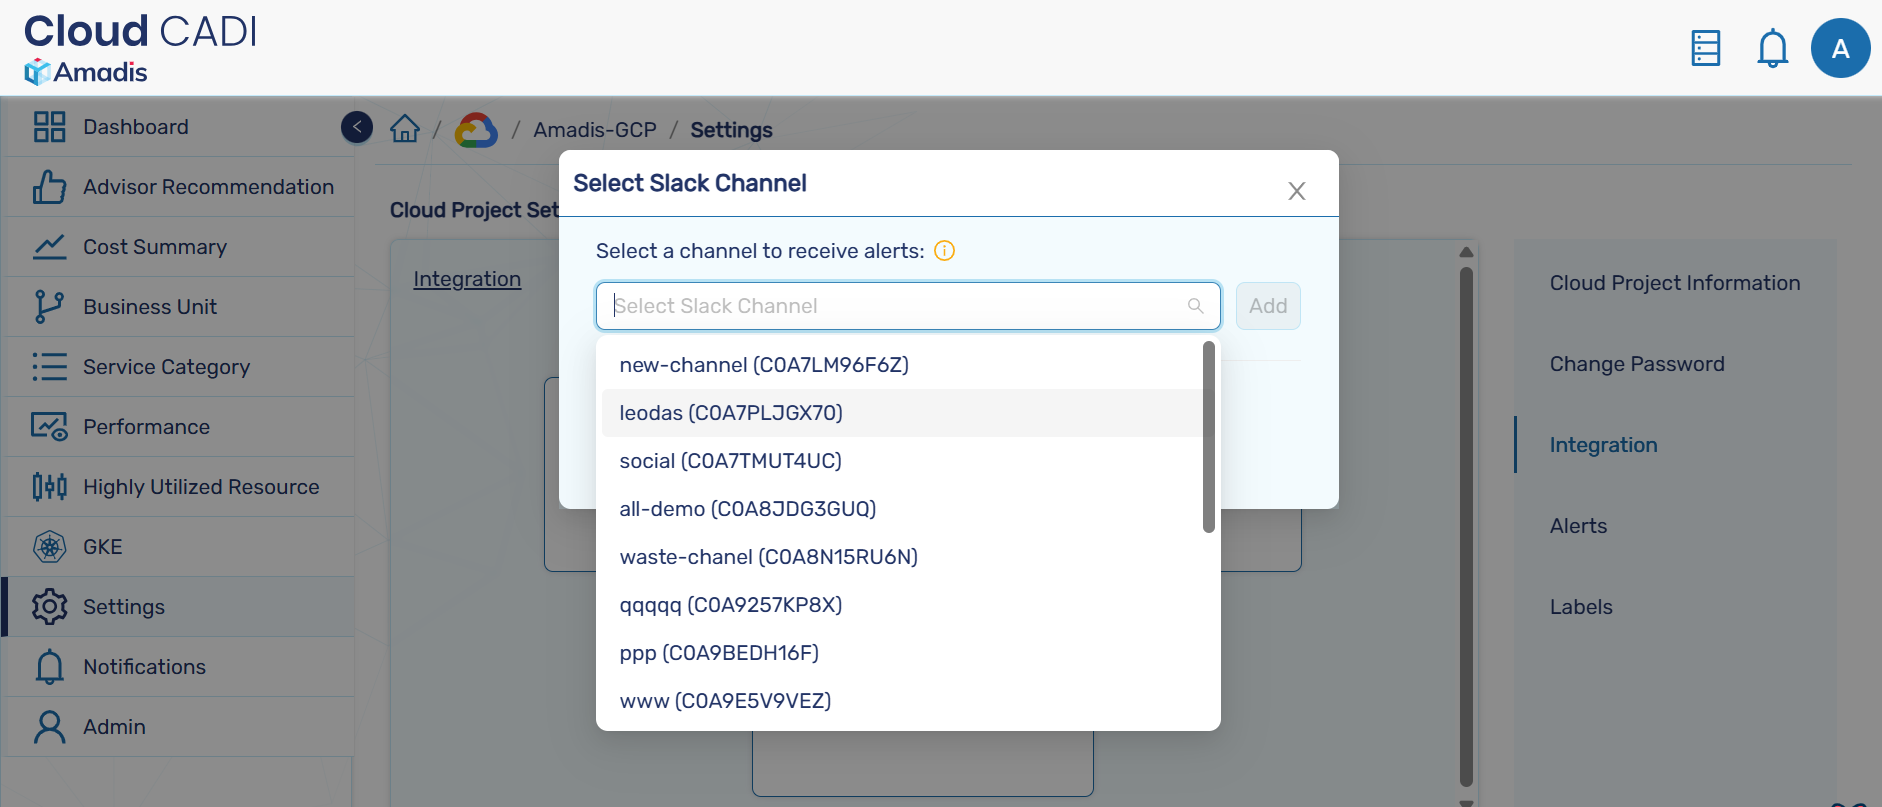
- Select the Slack channels that will receive CloudCADI alert messages.The CloudCADI app must be invited to each selected channel.
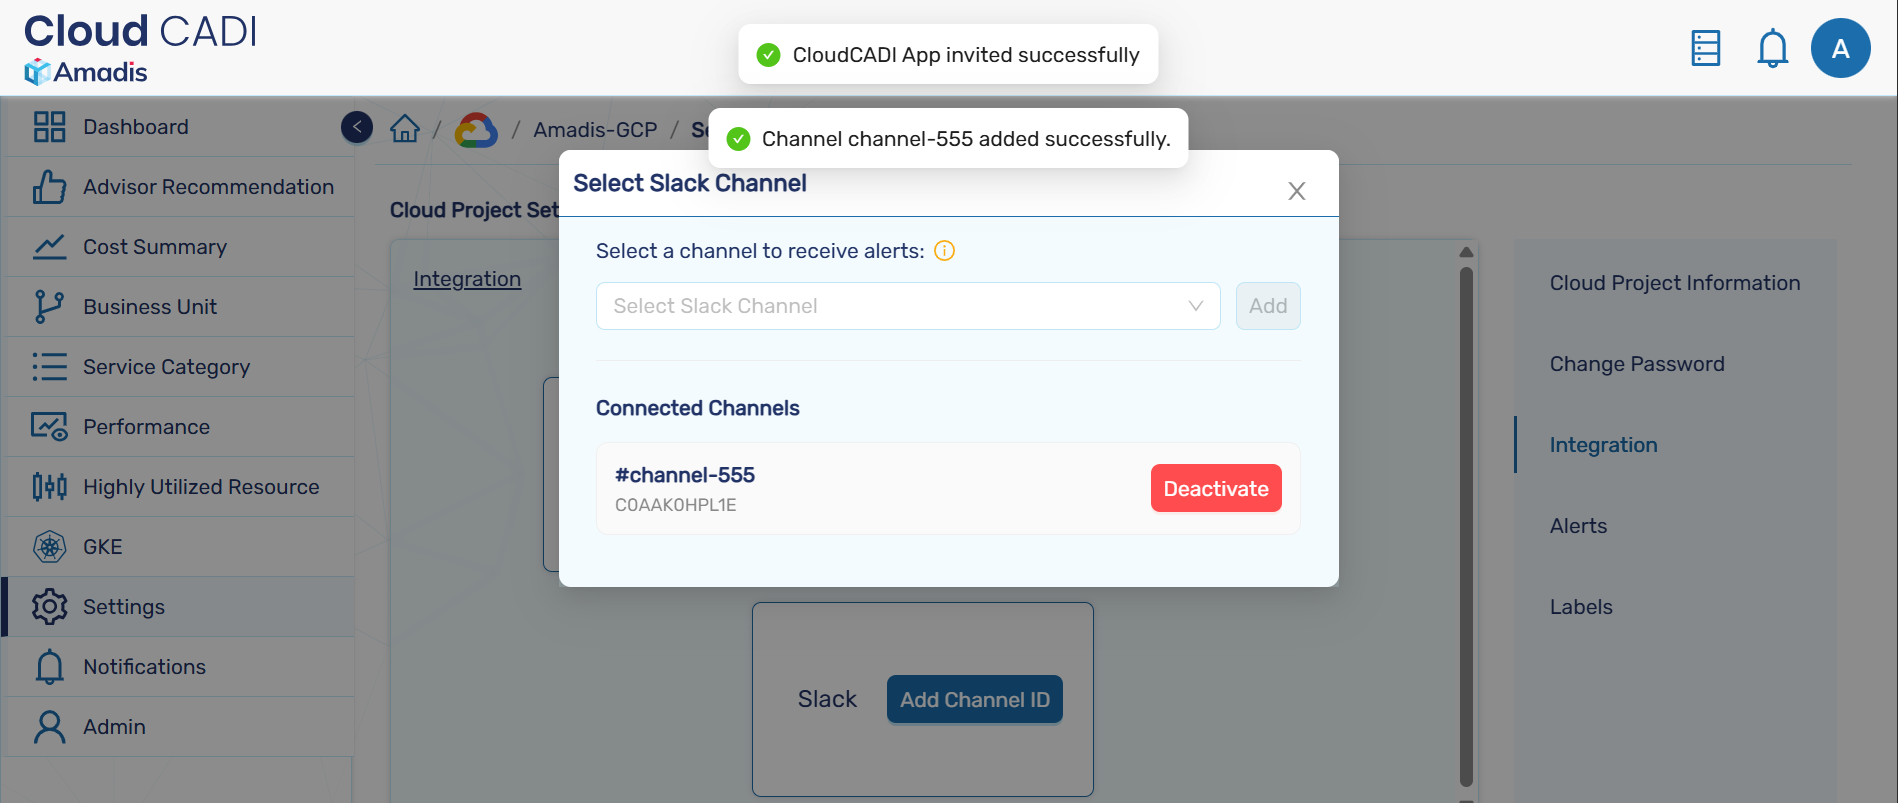
- The added channels will appear under Connected Channels.
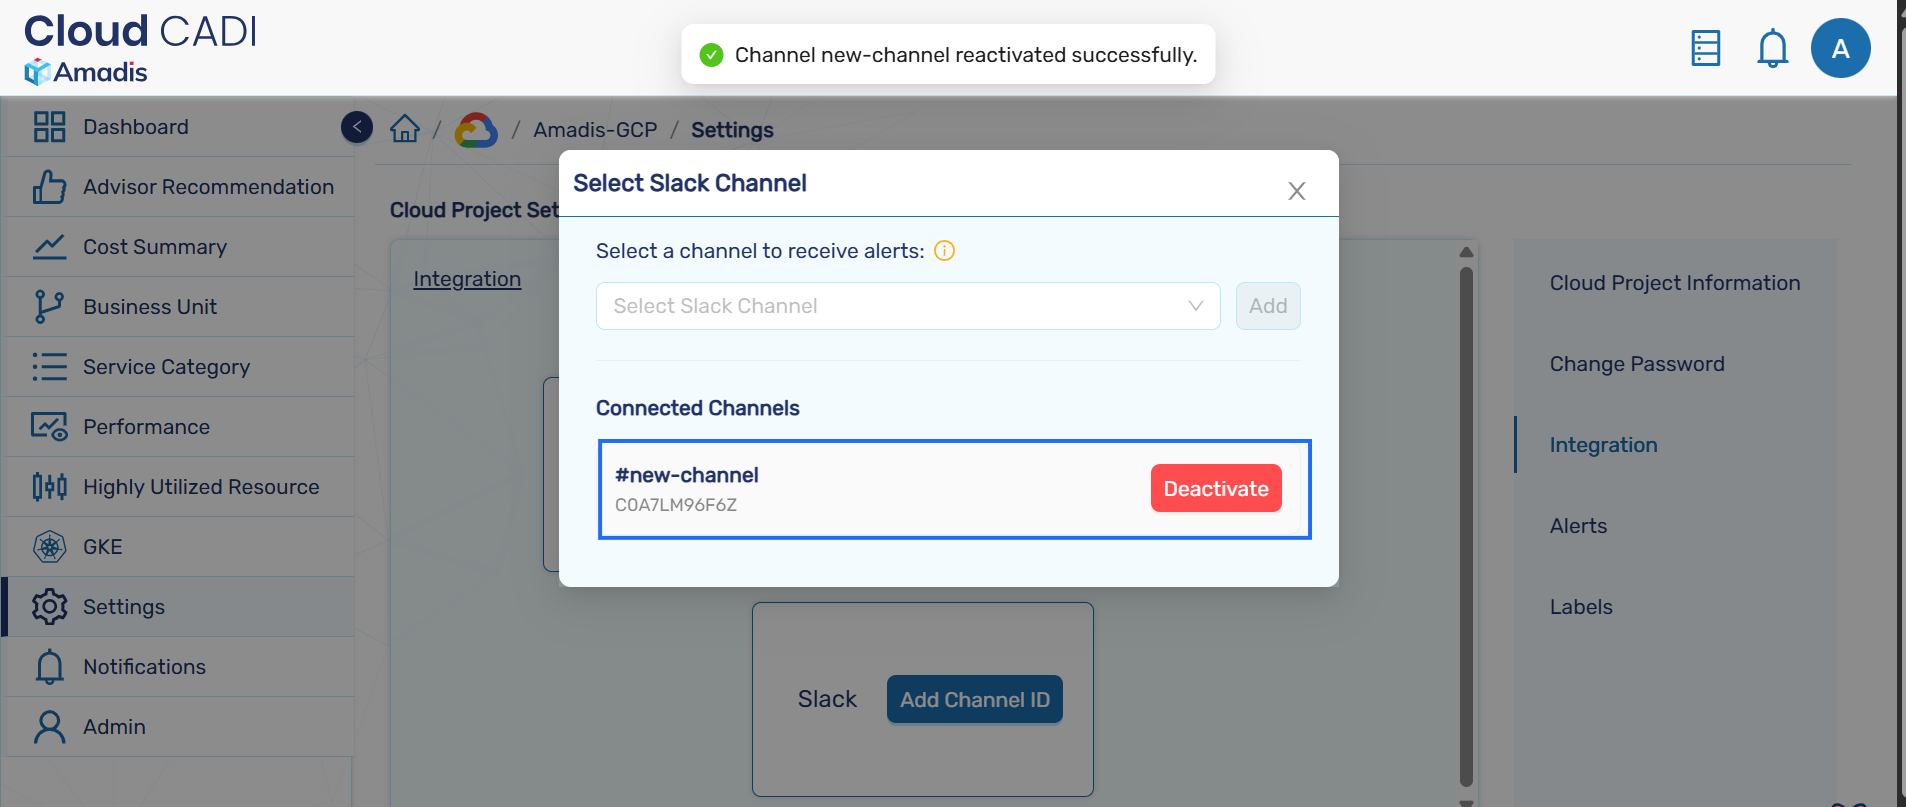
- Ensure the CloudCADI app is invited via Slack or during channel setup in the CloudCADI app; otherwise, the channel won’t be added.
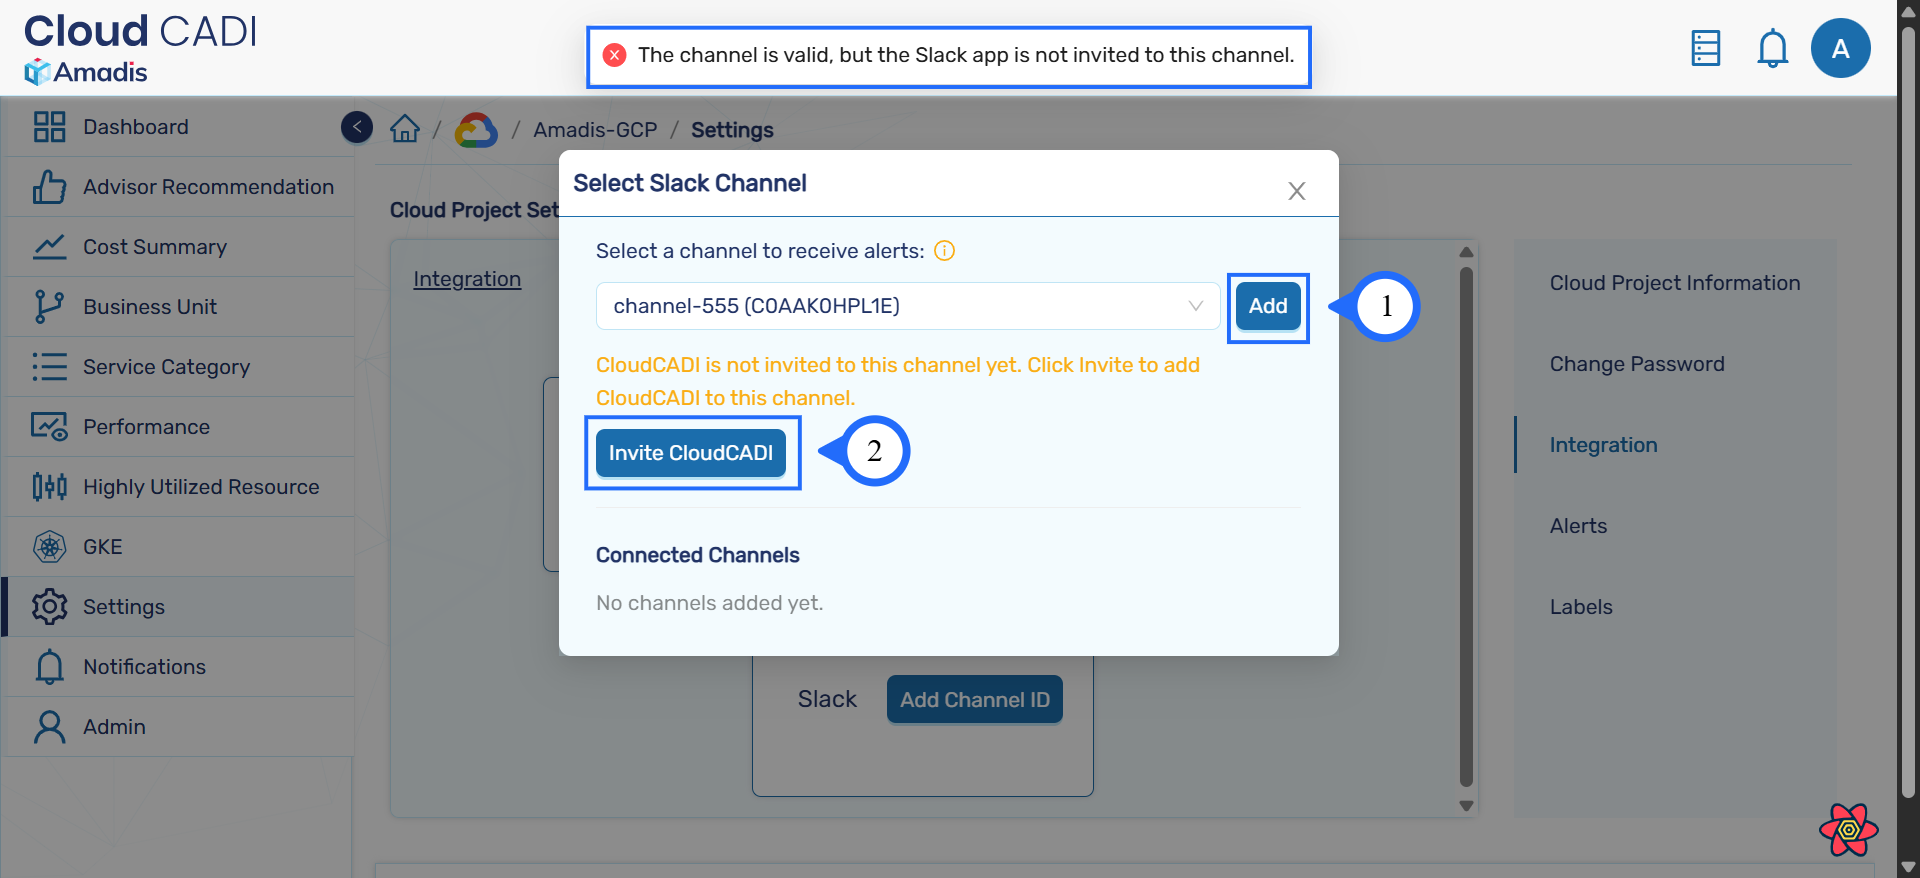
- Once the CloudCADI app is successfully invited, the channel can be included.
Note
- Private Slack channels cannot be invited.
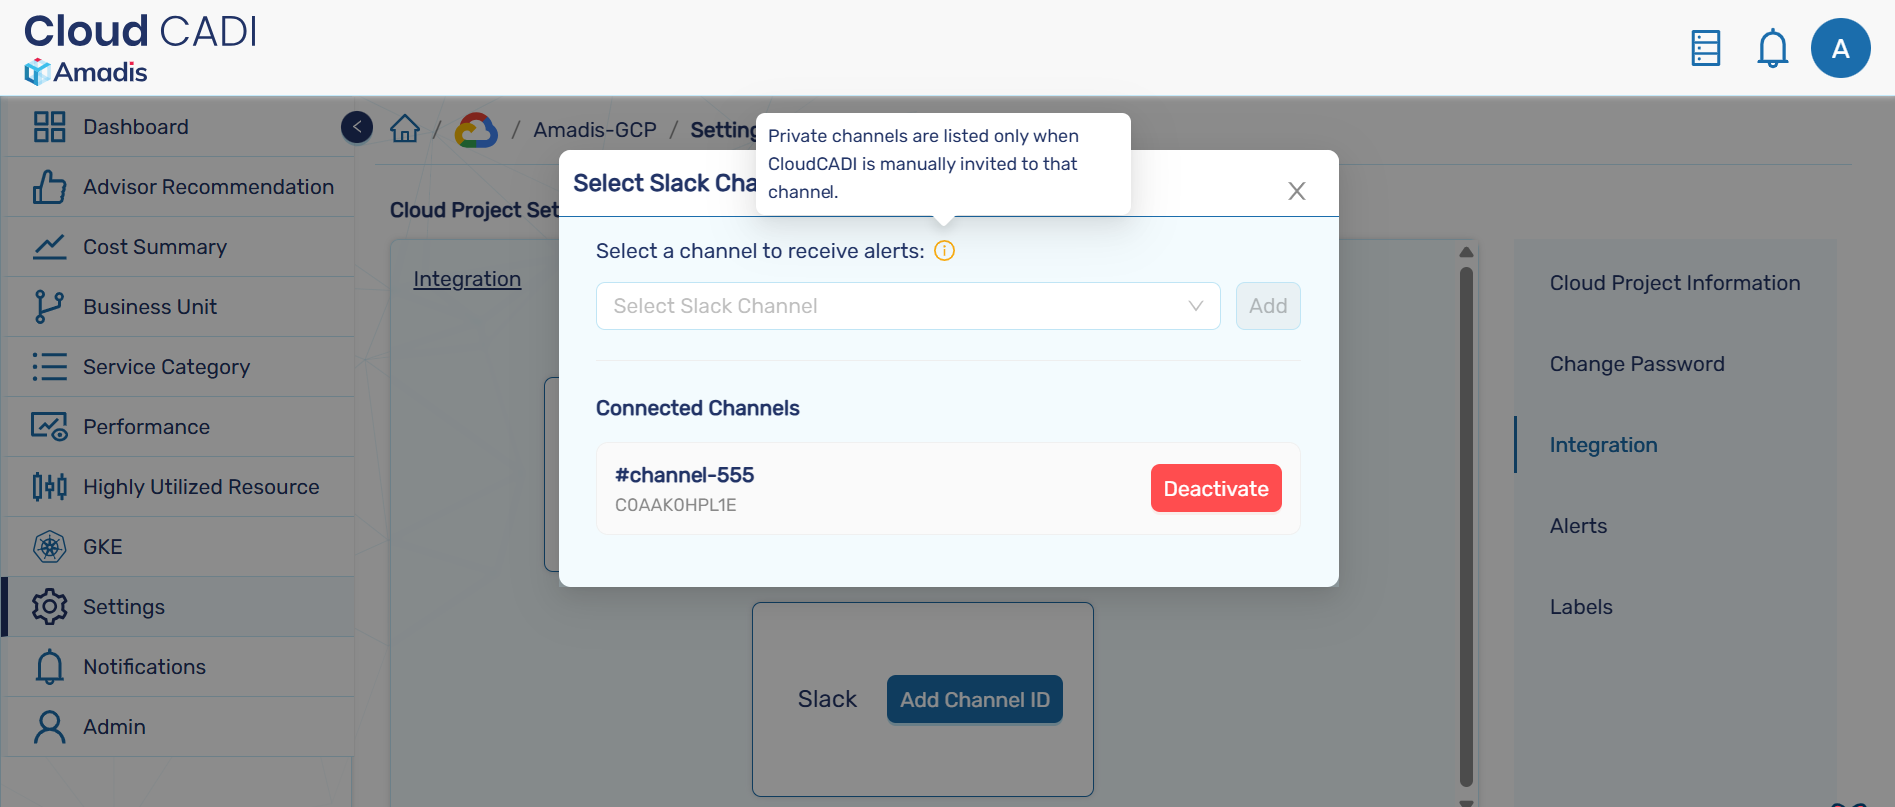
- Your channel is now configured to receive cost variance & user created alerts and daily top three utilization reports.