CloudCADI Application Onboarding Process
Onboarding Process helps to connect your gcp account with the CloudCADI. The steps are as follows,
2.1 Setting Up an Admin Account
- Visit PublicIP and Signup to CloudCADI.
Note
- The initial user who completes the sign-up process is automatically designated as the administrator, granting them full access to create cloud project, as well as approve, activate, and deactivate cloud projects.
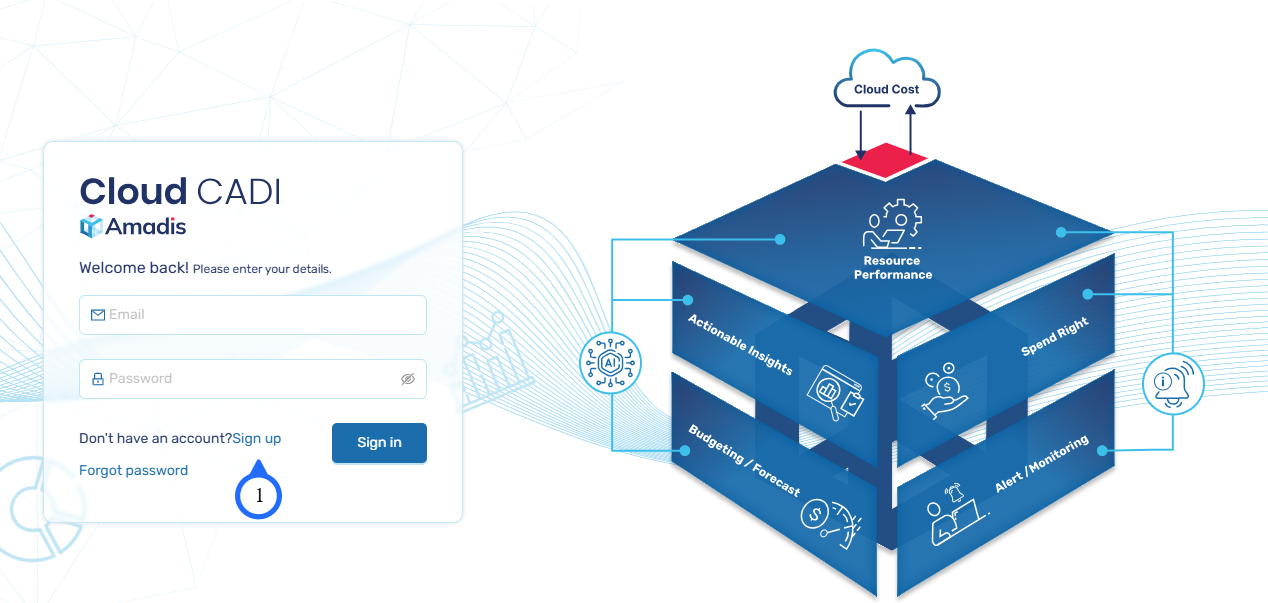
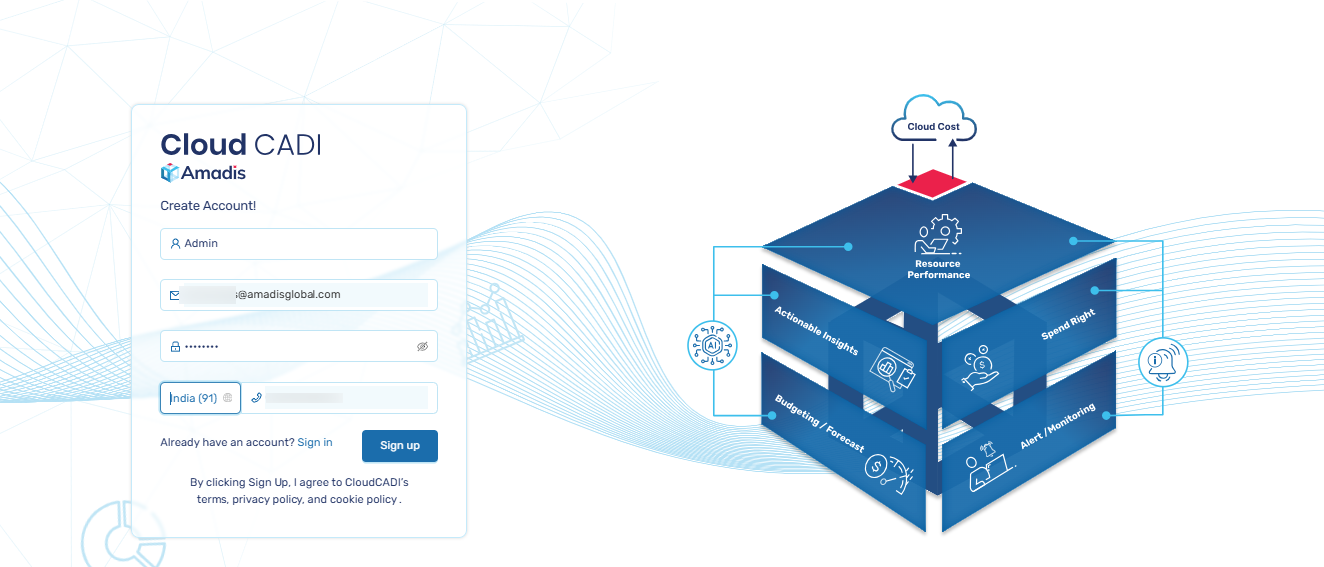
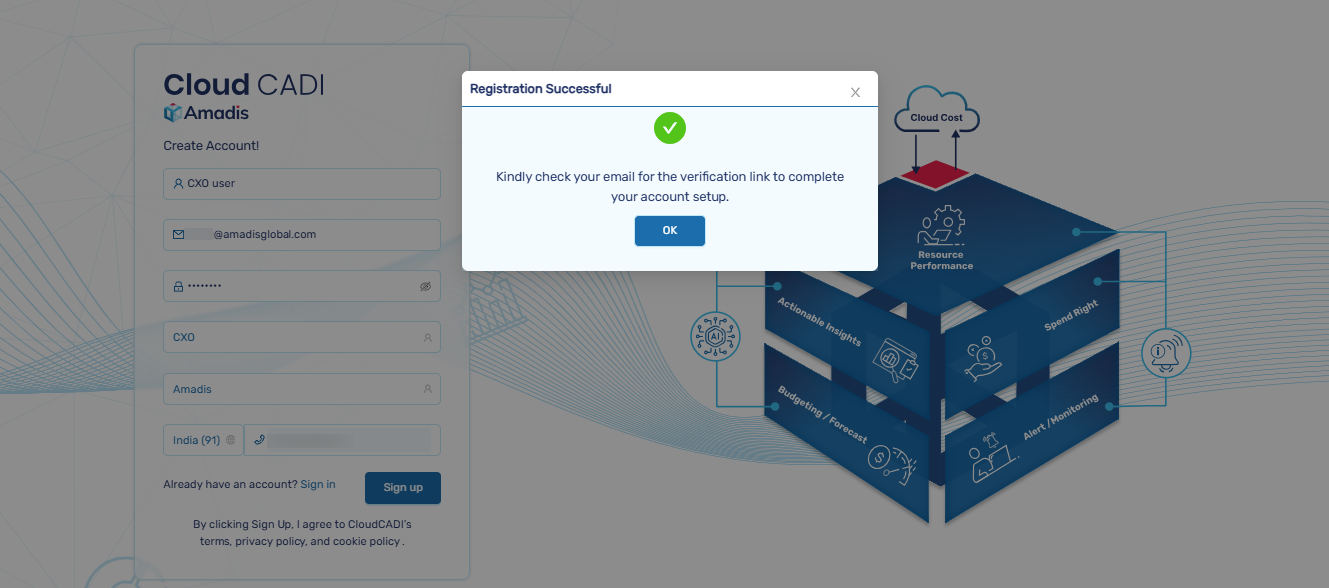
- Create your account by entering your name, email, and phone number. After entering your details, click Sign up to proceed.
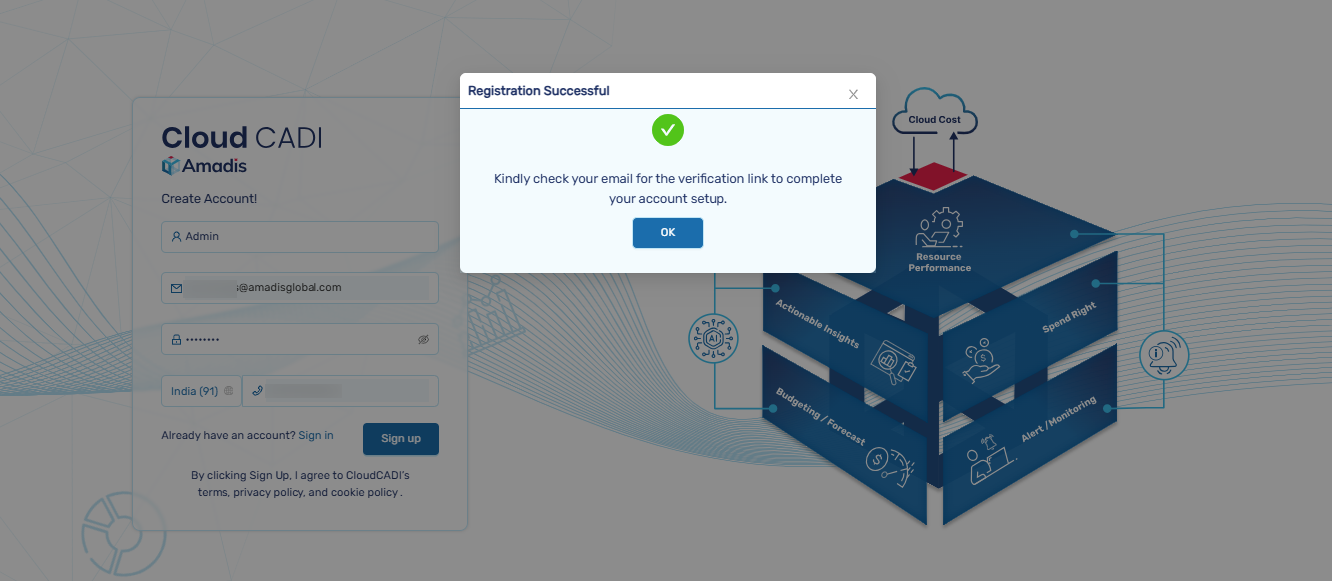
- A verification email will be sent to your registered email address.
-
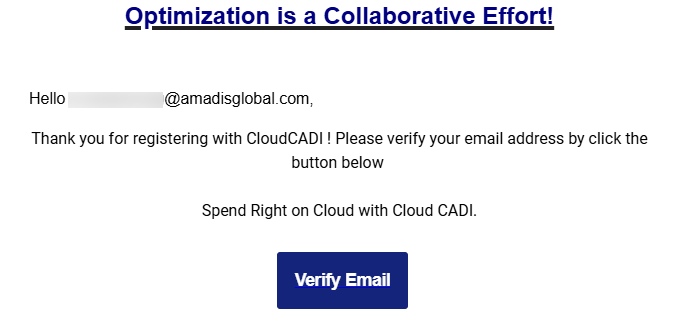
After receiving the verification email, open it.
-
Click on the Verify Email button to complete the email verification process.
- Sign in with your account.
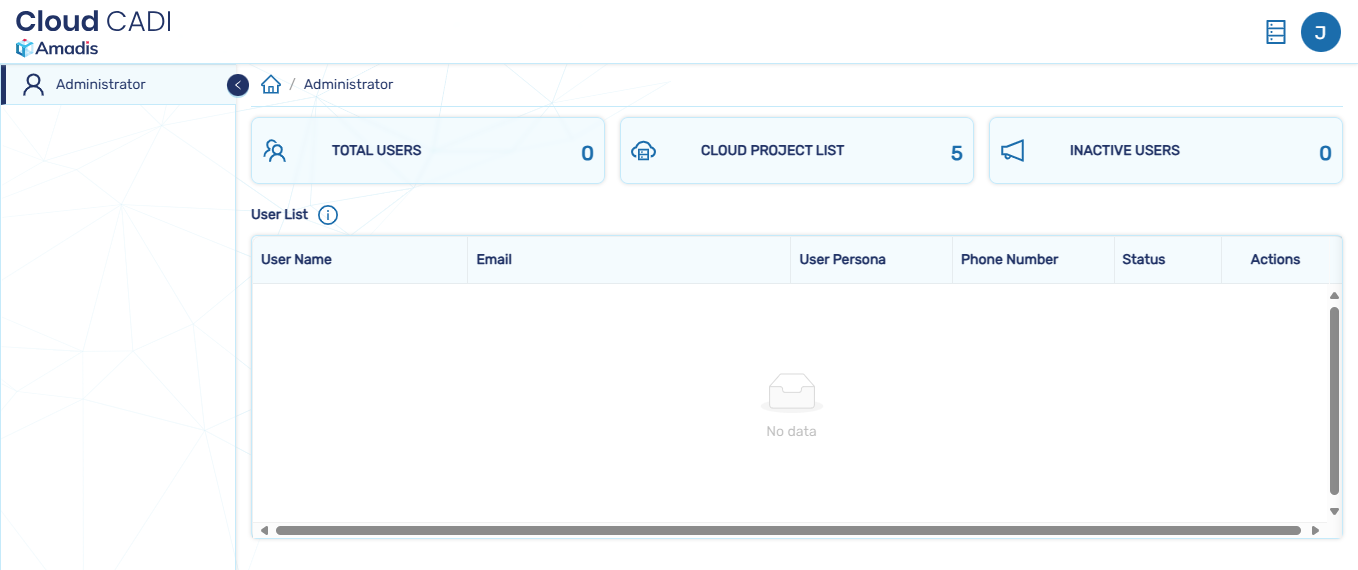
- After log in, you will be redirected to the admin page.
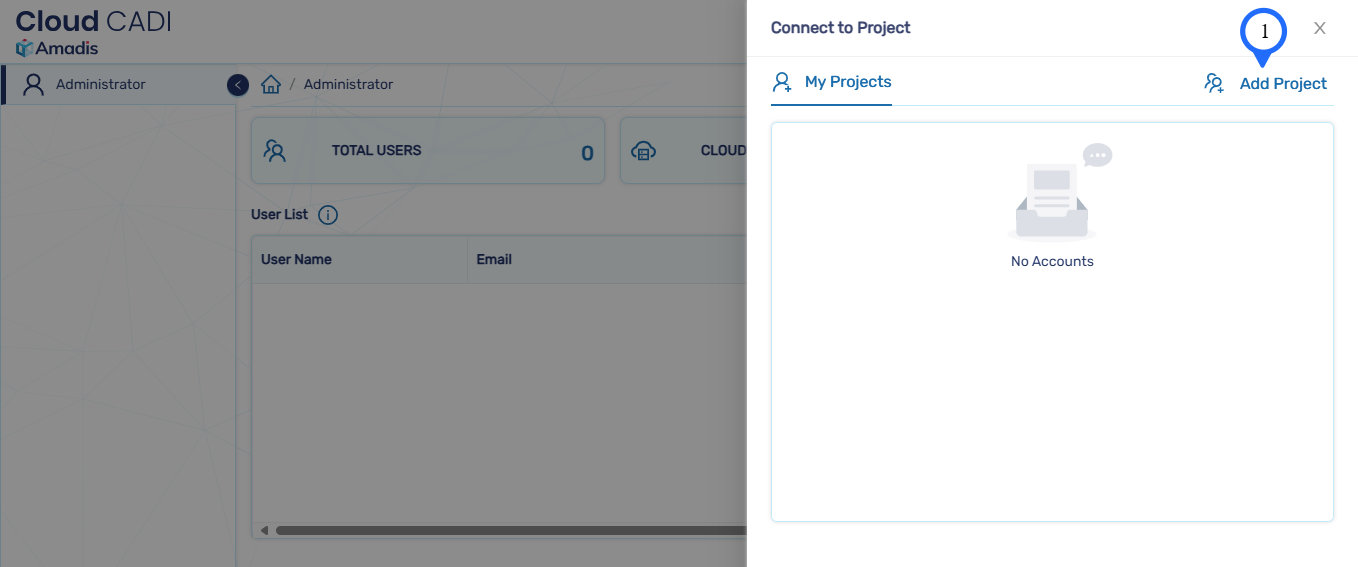
2.2 Onboarding a Cloud Project
![]()
- Click on the Add project button. Only the admin has the authority to onboard a cloud project.
- Choose the preferred project setup mode.

-
Manual setup - allows you to add projects individually by manually entering the details for each project.
-
Automatic setup - enables you to automatically discover and fetch all available projects within your organization.
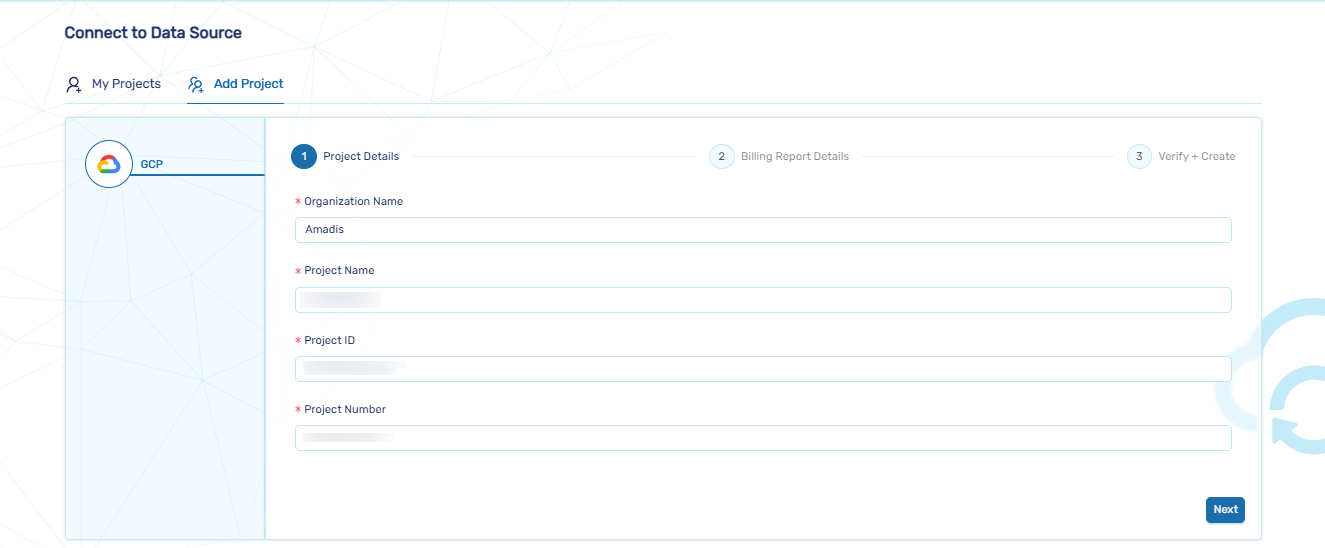
2.2.1 Manual Setup
- Enter Organization Name , Project Name , Project ID and Project Number.
Note
-
The following details are available under Cloud overview dashboard page in gcp console.
-
Project Name : It is a human-readable name given by the user, which can be edited anytime and does not need to be unique.
-
Project ID : It must be 6–30 characters, start with a lowercase letter, contain only lowercase letters, digits, or hyphens, and end with a letter or digit.
-
Project Number : It is an unique identifier for your project.
- After entering the details, click the Next button.
Note
- Assign the following roles to the service account:
- IAMPolicyViewer, BigQueryJobUser, BigQueryDataViewer, BigQueryResourceViewer, CloudBuildEditor, RunInvoker, RunViewer, CloudSQLClient, CloudSQLInstanceUser,CloudSQLViewer, ComputeOSLogin, ComputeViewer, FilestoreViewer,ServiceAccountUser, LogsViewer, MonitoringViewer, StorageObjectViewer
- On this page, you need to enter the billing and pricing report details.
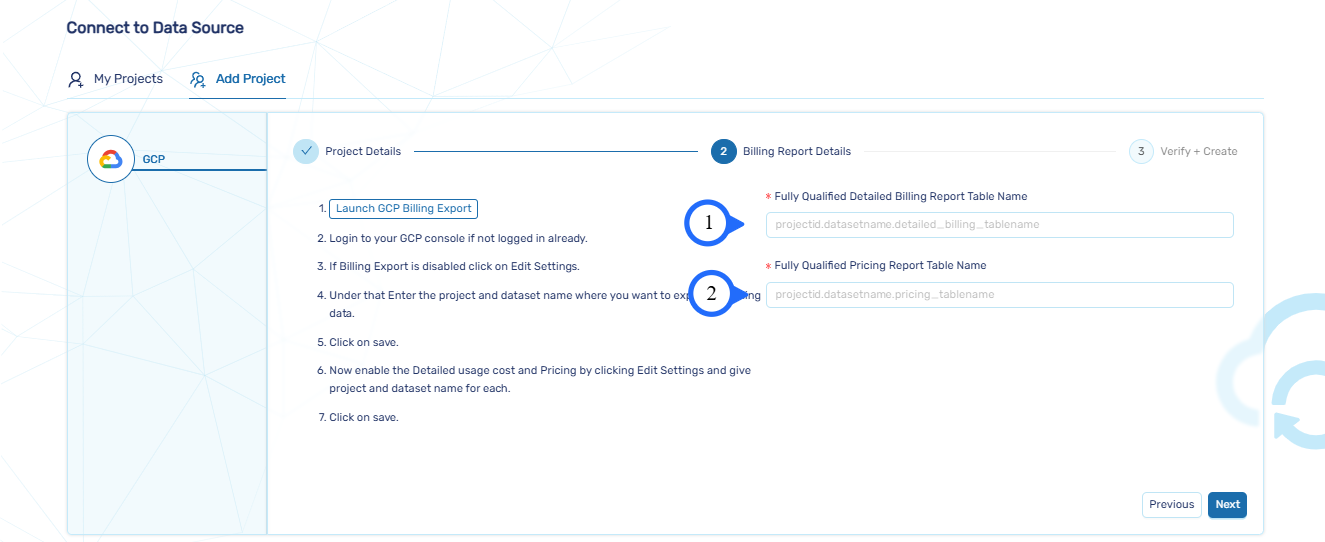
- Follow the steps below to retrieve the billing and pricing report details.
Steps to Retrieve Table Names
- Open the Google Cloud Console
- Select the project where you exported the billing and pricing data.
- Navigate to BigQuery.
- Expand your project and dataset under the Explorer panel.
- You can find the table (detailed billing or pricing) in your dataset.
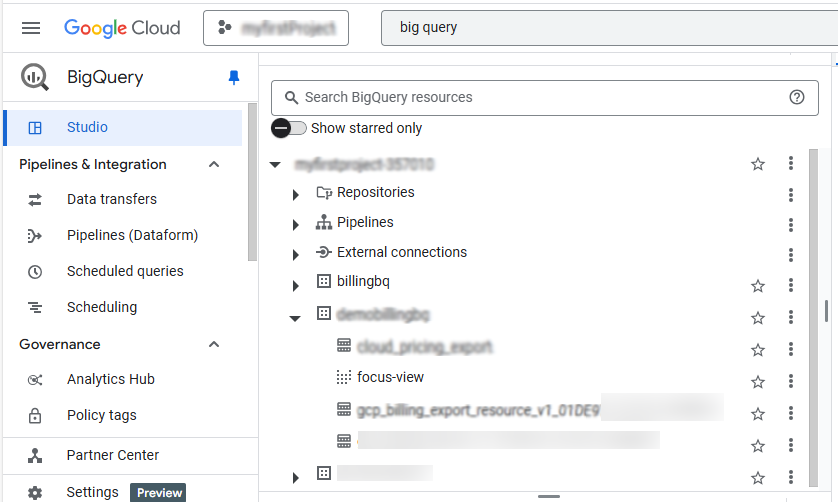
Fully Qualified Detailed Billing Report
For example:
project-123456.billingdataset.gcp_billing_export_resource_v1_A1B2C3_D4E5F6_G7H8I9
- Project ID:
project-123456 - Dataset:
billingdataset - Table name:
gcp_billing_export_resource_v1_A1B2C3_D4E5F6_G7H8I9
!!! info "Note" - Detailed billing report table name will have "resource_v1" as a substring within the table name
Fully Qualified Pricing Report
For example:
project-123456.billingdataset.pricing_details_export
- Project ID:
project-123456 - Dataset:
billingdataset -
Table name:
pricing_details_export -
Enter the retrieved Fully Qualified Detailed Billing Report Table Name and Fully Qualified Pricing Report Table Name.
Note
- To allow a user to access billing and pricing report details from another project, assign the following roles to the service account:
- BigQueryJobUser, BigQueryDataViewer
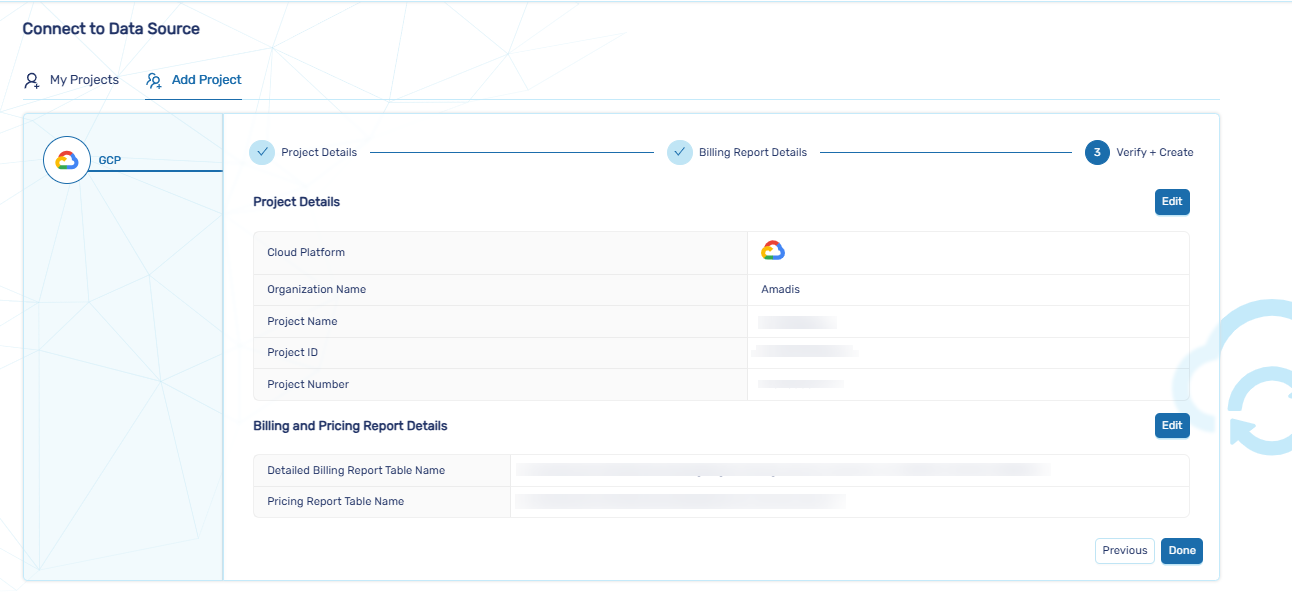
- Review and click Done.
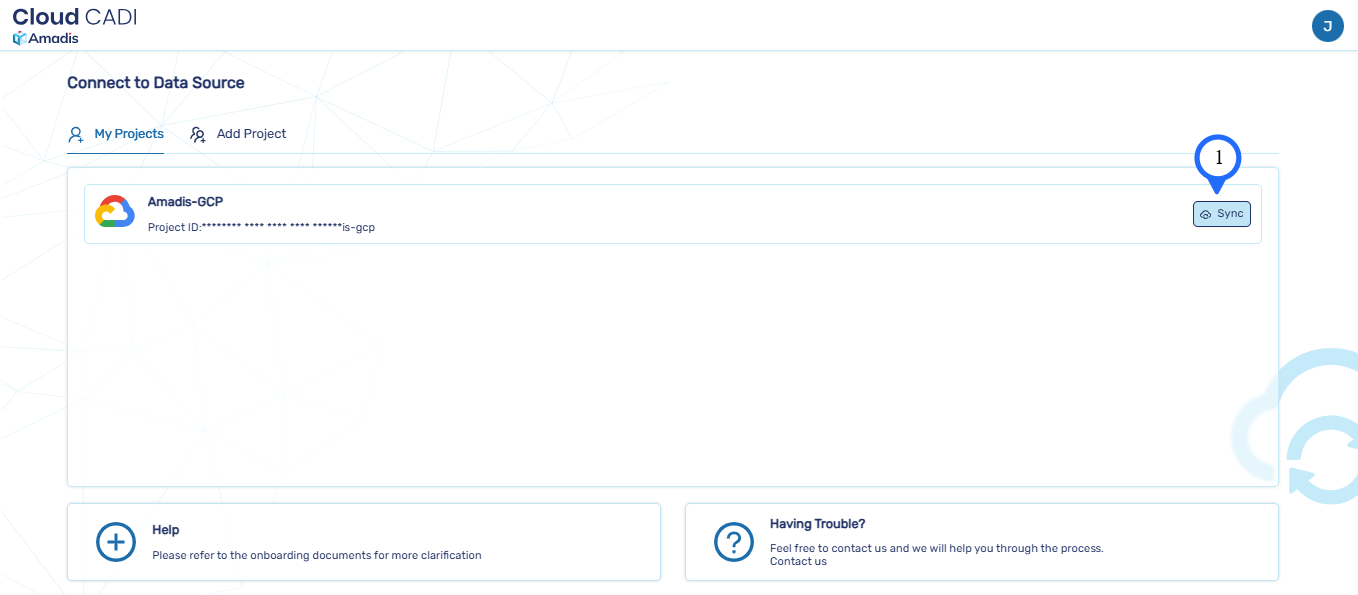
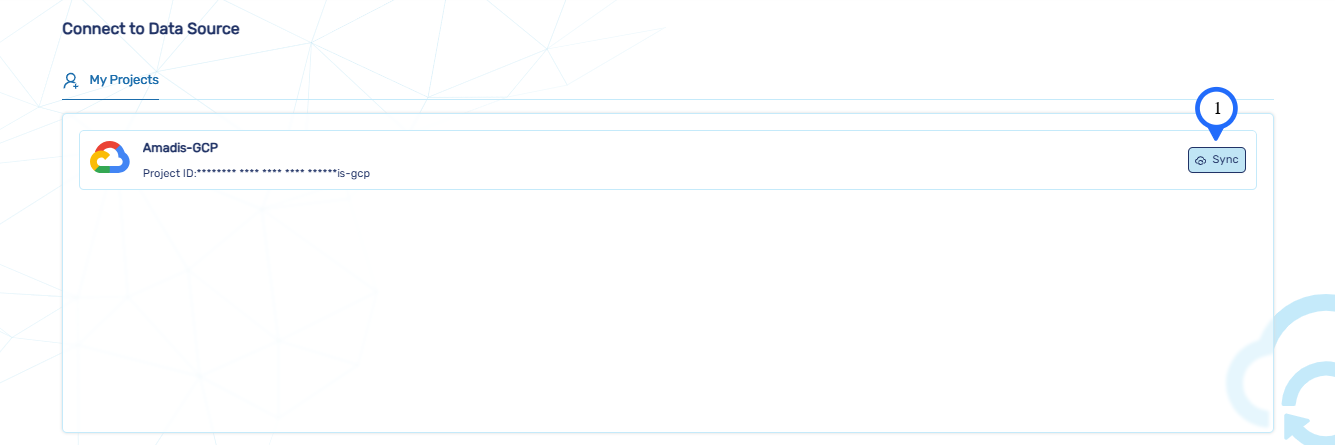
- After creating a cloud project, sync the account by clicking Sync button.
Note
If you're onboarding a project different from the one where CloudCadi has been deployed, you must grant the following IAM roles to the service account below in the onboarding project:
Required IAM Roles:
- roles/iam.roleViewer
- roles/bigquery.jobUser
- roles/bigquery.resourceViewer
- roles/cloudbuild.builds.editor
- roles/run.invoker
- roles/run.viewer
- roles/cloudsql.client
- roles/cloudsql.instanceUser
- roles/cloudsql.viewer
- roles/compute.osLogin
- roles/compute.viewer
- roles/file.viewer
- roles/iam.serviceAccountUser
- roles/logging.viewer
- roles/monitoring.viewer
- roles/storage.objectViewer
💡 Replace
<deployment-project-id>with the actual ID of the project that is being onboarded
2.2.2 Automatic Setup
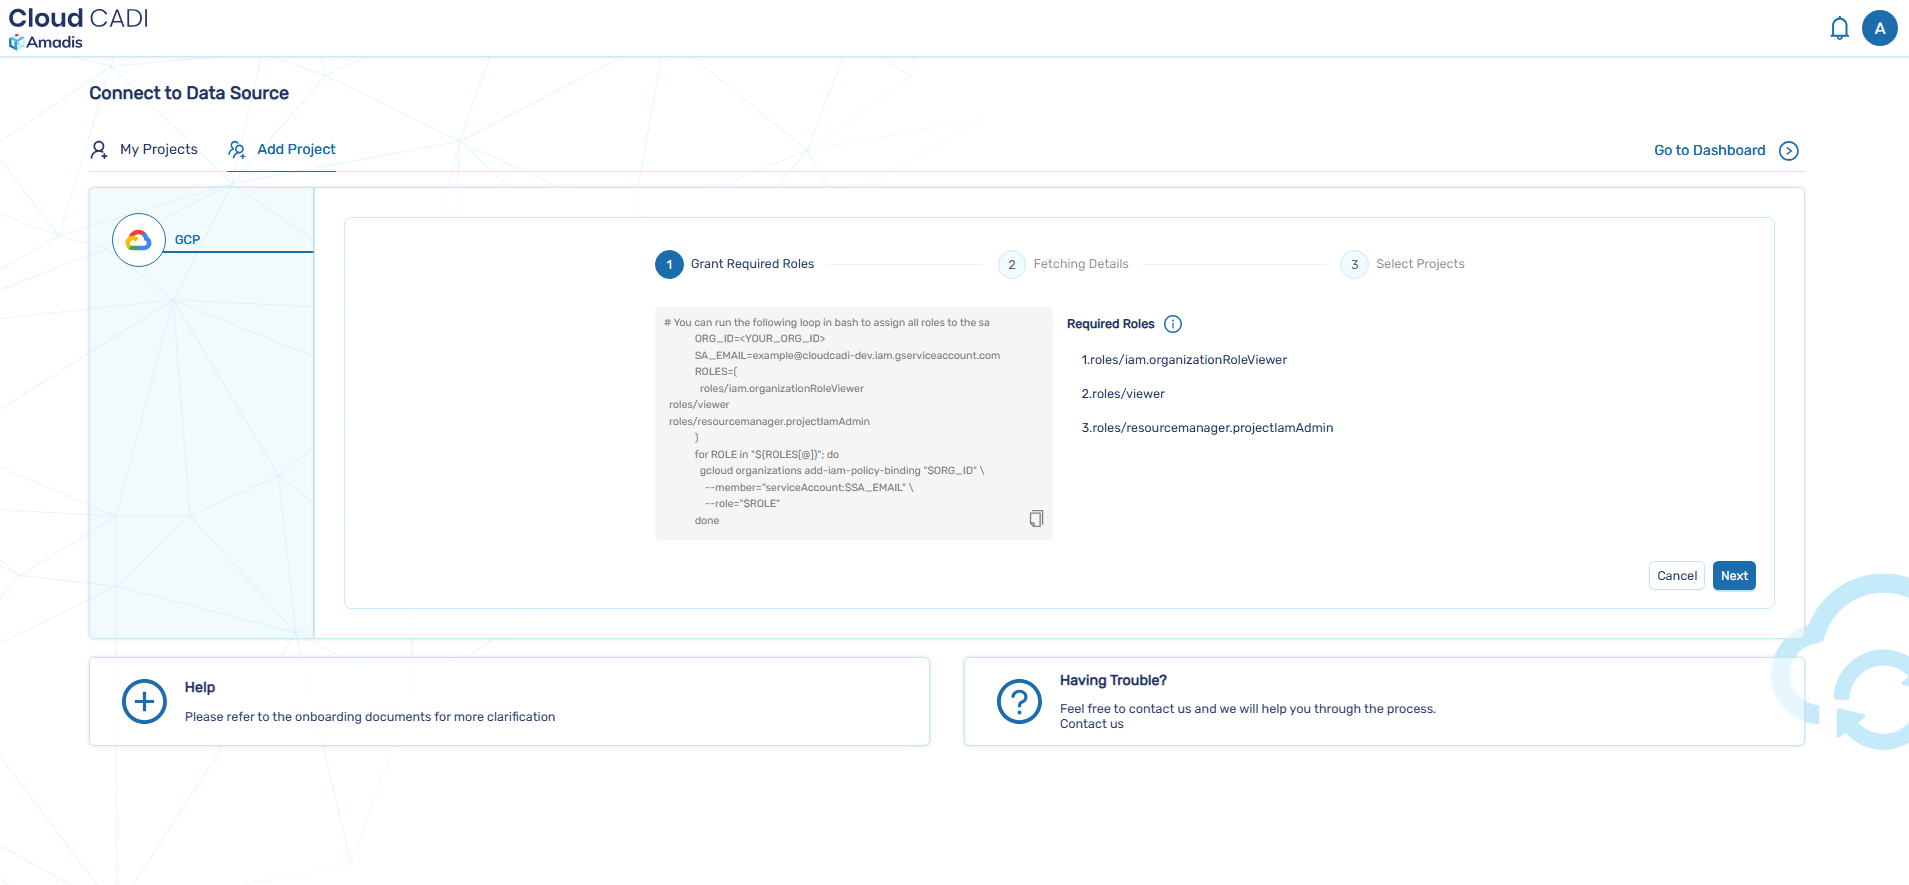
- To automatically discover projects, temporarily grant the following roles to the service account at the organization level:
roles/iam.organizationRoleViewerroles/viewerroles/resourcemanager.projectIamAdmin- After assigning the roles, click Next to proceed.
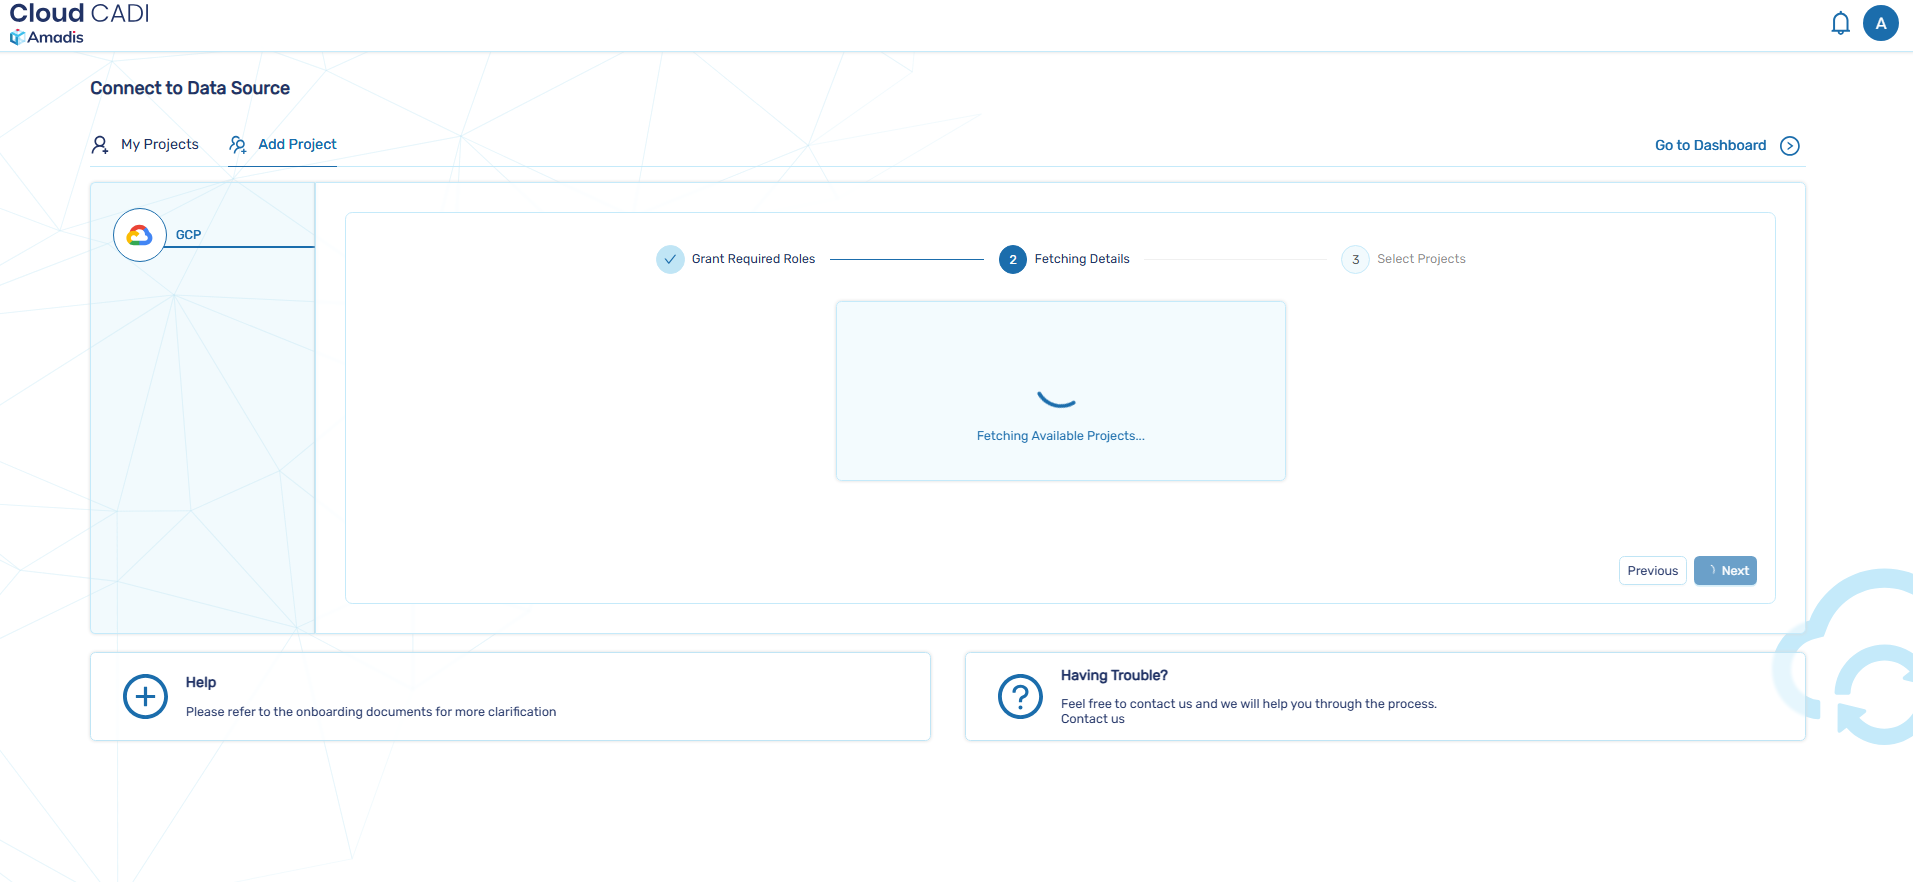
- The projects will be fetched and displayed in the table.
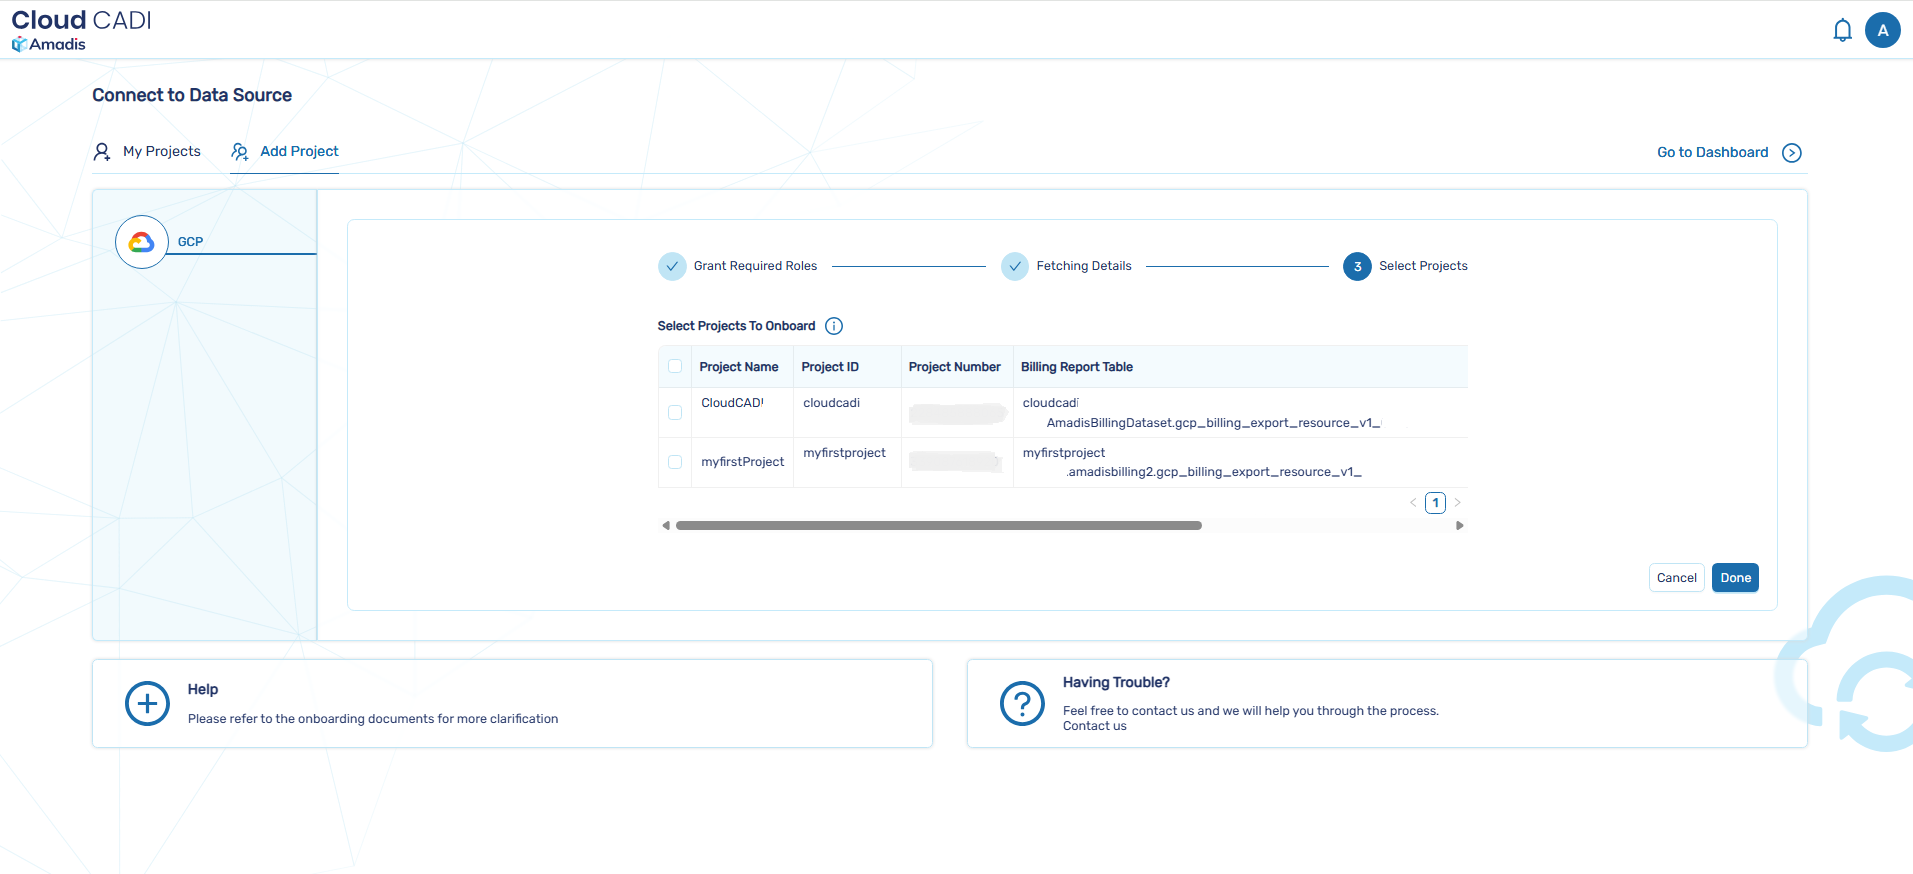
- Select the projects you wish to onboard, then click Done to complete the process.
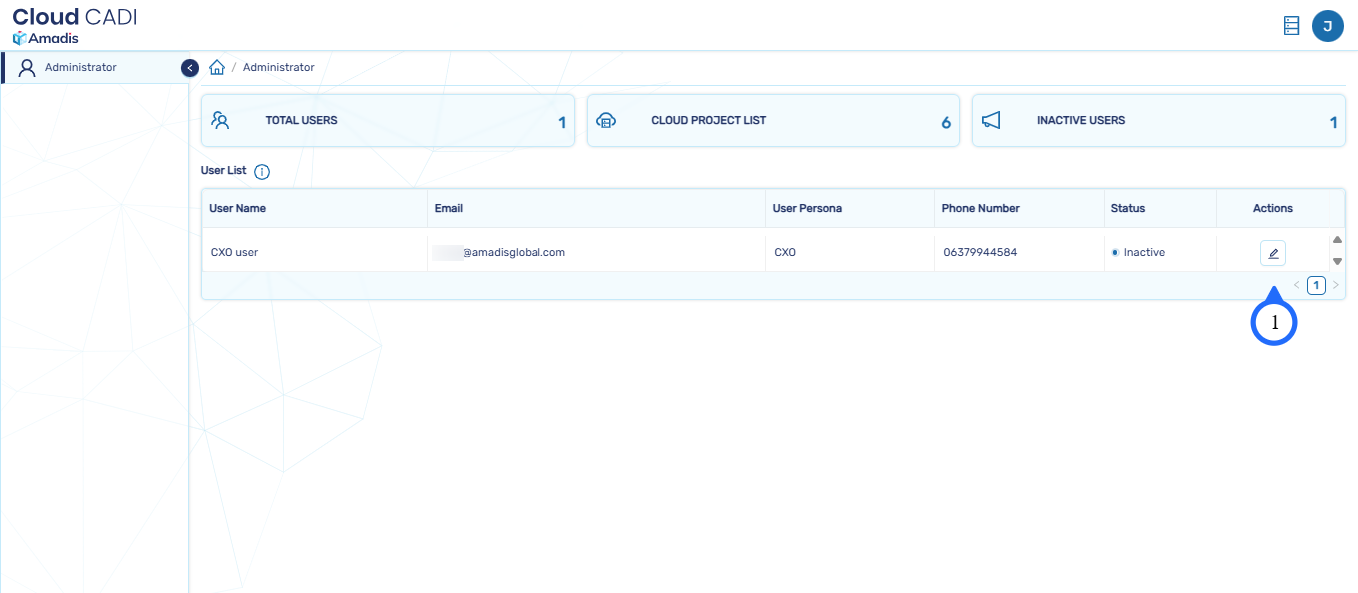
2.1.2 Cloud Account Allocation for User by Admin
- In the admin page, the list of users will be displayed.
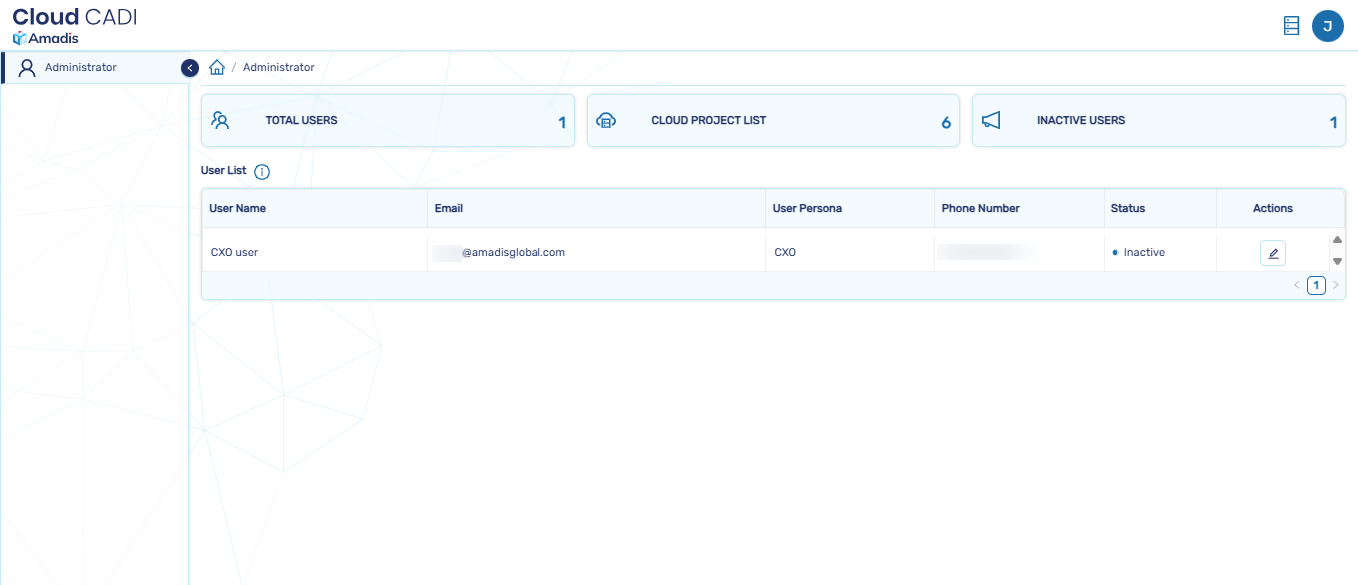
- Click on Actions button to update the user details.
Note
- Only admin has the authority to activate and deactivate cloud projects.
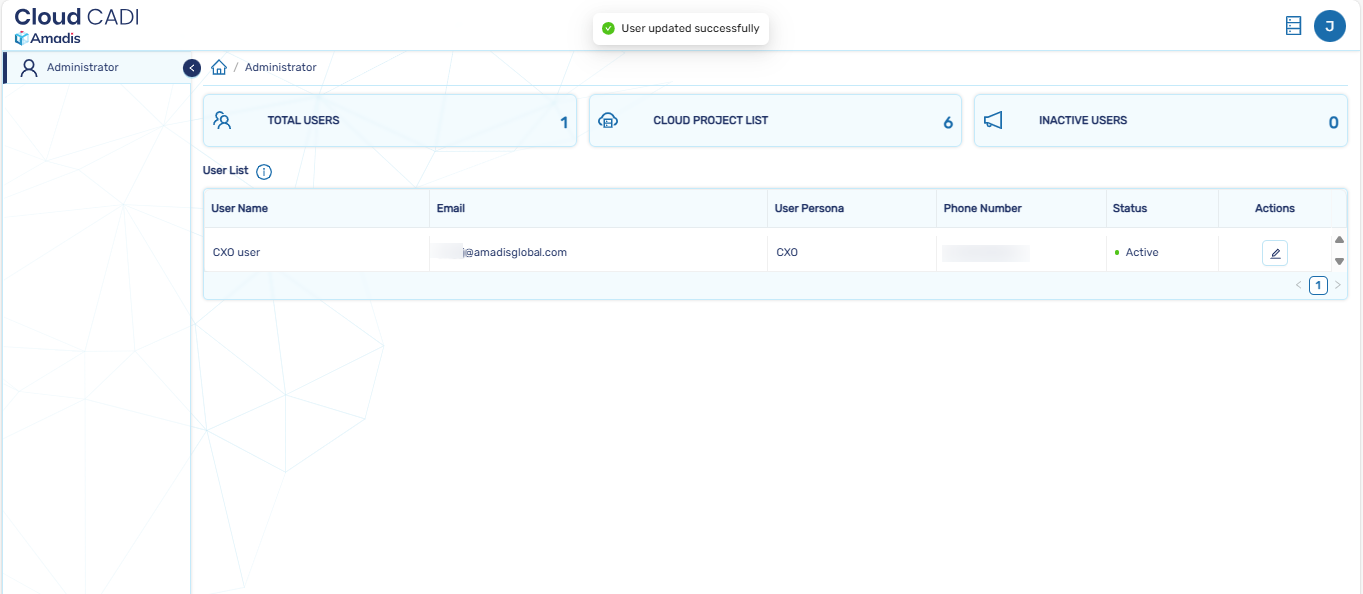
- Select the cloud project from the Cloud Project List, set status to active, and click on OK button.
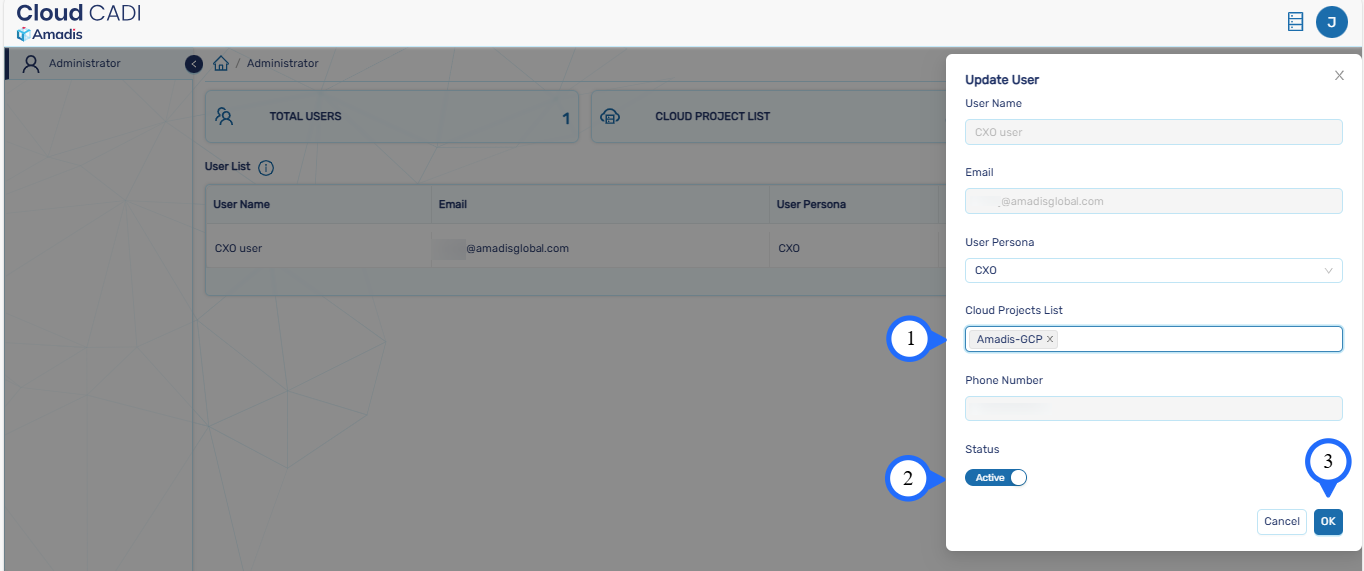
- The cloud project is allocated to the user by the admin.
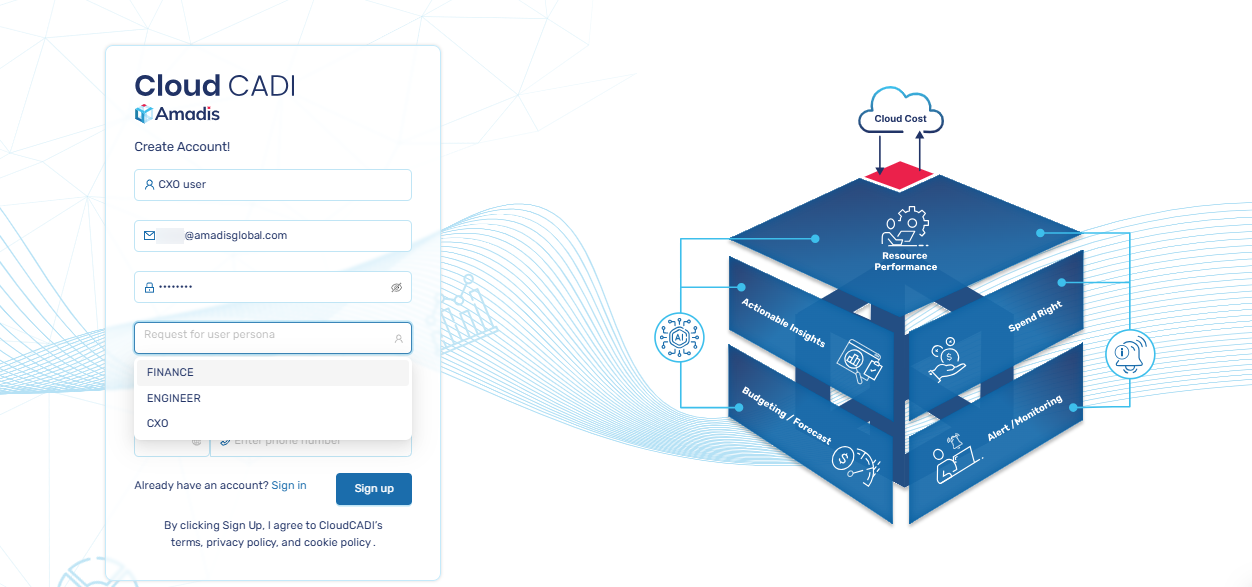
2.1.3 Setting Up an User Account
- Visit PublicIP and Signup to CloudCADI.
- While signing in to CloudCADI, the user must select their respective persona choice: Finance, CXO, or Engineer.After that click on Sign up.
- A verification email will be sent to your registered email address and after the verification Sign in with your account.
-
After receiving the verification email, open it.
-
Click on the Verify Email button to complete the email verification process.
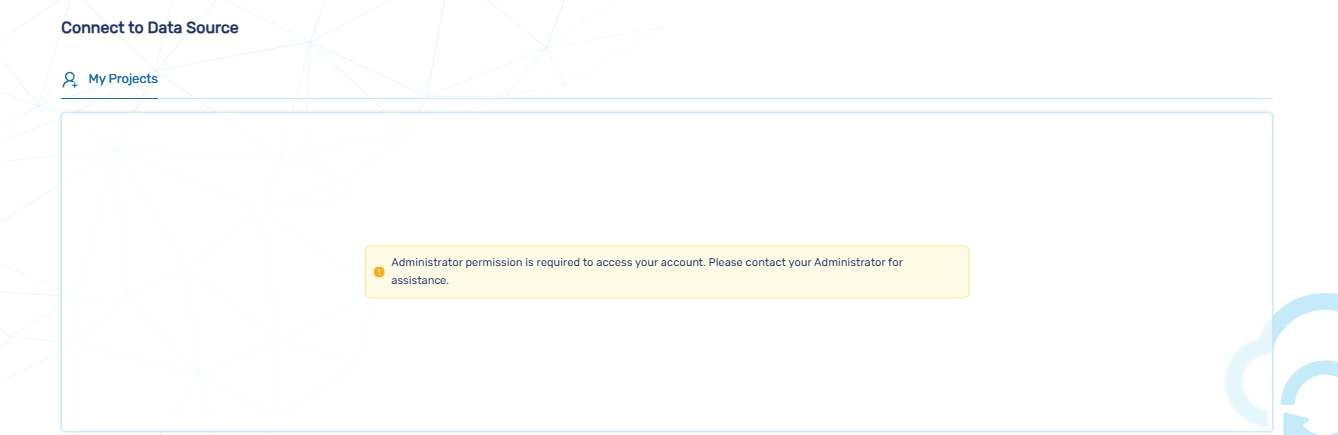
- Ensure the Admin has set up your Cloud Project.If not contact your administrator for assistance.
Note
- The user cannot able to create cloud project and has read-only access.
- After allocation , log in and sync the project that was created for you by the admin.
Note
CloudCADI reads performance and cost data at regular intervals. If the Compute Engine instance is stopped, the Observability dashboard may display incomplete or outdated information.
To maintain correct and up-to-date insights, ensure that the Compute Engine instance remains running.